14 / 15
Pedal Assembly
*Make sure that the pedals are mounted on their respective
sides, as labeled. Failure to do so will prevent their being
removed or reattached.*
• The left and right pedals are fastened by screws rotating
in the opposite directions.
• The pedal with “R” marked on one side is the Right Pedal.
The pedal with the “L” marked on one side is the Left Pedal.
• Use a 15mm spanner and make sure that the pedal axle
and the gear crank arm are perpendicular to each other
when attaching the pedals.
Brakes
• Please note that all brake services need to be conducted
by the technical service department at your retailer or at
a GenZe Service Center.
• Riding with improperly adjusted brakes or worn brake
pads can result in serious injury or death.
• Adjust the brake lever if the distance between the lever
and the handlebar is too great.
• Make sure that the disc is fully coupled to the frame and
securely held.
• Insert the disc into the brake body (attach the front wheel)
and then fix the brake wire.
• Squeeze the brake lever two to three times to see whether
the brake pad touches the disc.
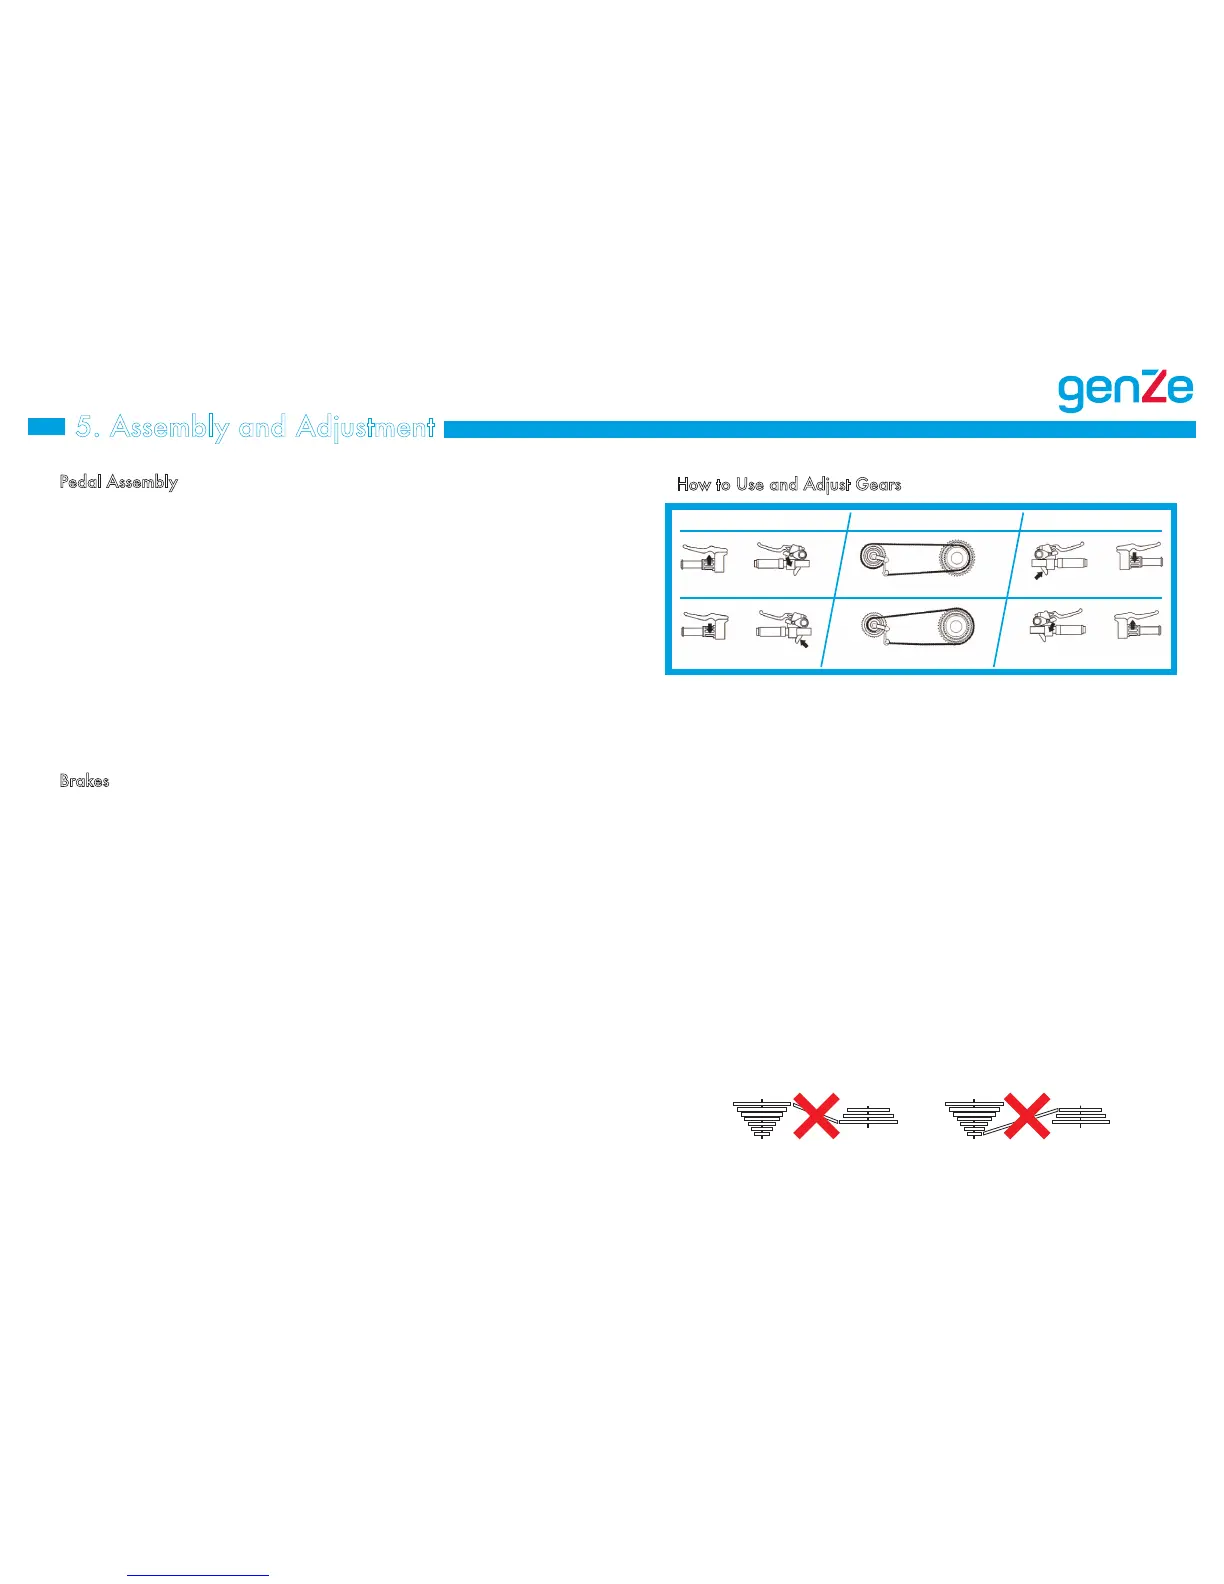
How to Use and Adjust Gears
• If your GenZe e-Bike is not shifting correctly:
o Check the wire tension.
o If the wire is loose, rotate the bolt on the shifting lever
counter-clockwise.
o If the wire is not loose, choose the bolt marked ʻHʼ
between the two adjusting bolts for the front derailleur
and rotate it counter-clockwise one to two turns.
o Rotate the bolt marked ʻHʼ one turn to the left to adjust
gear 3 of the front derailleur, and the bolt marked ʻLʼ to
adjust the large gears of the rear derailleur.
If the problem still exists, consult your local retailer or a GenZe
technical service center by calling 1-855-GO-GENZE.
Avoid using extreme combinations of gears such as those
shown in Figure 4. They can cause excessive traction between
the sprocket and the chain, reducing the service life of your
e-bike.
5. Assembly and Adjustment
Front derailleur
Pull the shifting lever Push the shifting lever
Pull the
shifting lever
Release the
shifting lever
Wind the
shifting lever
Low speed riding
High speed riding
Release the shifting grip
Wind the
shifting grip
Push the shifting
lever
Adjusting bolt
Figure 4