Note: For these changes to be applied through the GV-NVR System Lite, it is
required that the GV-IPCAM H.264 uses the default username and password
that are admin. To modify the username and password, you can select Change
Setting.
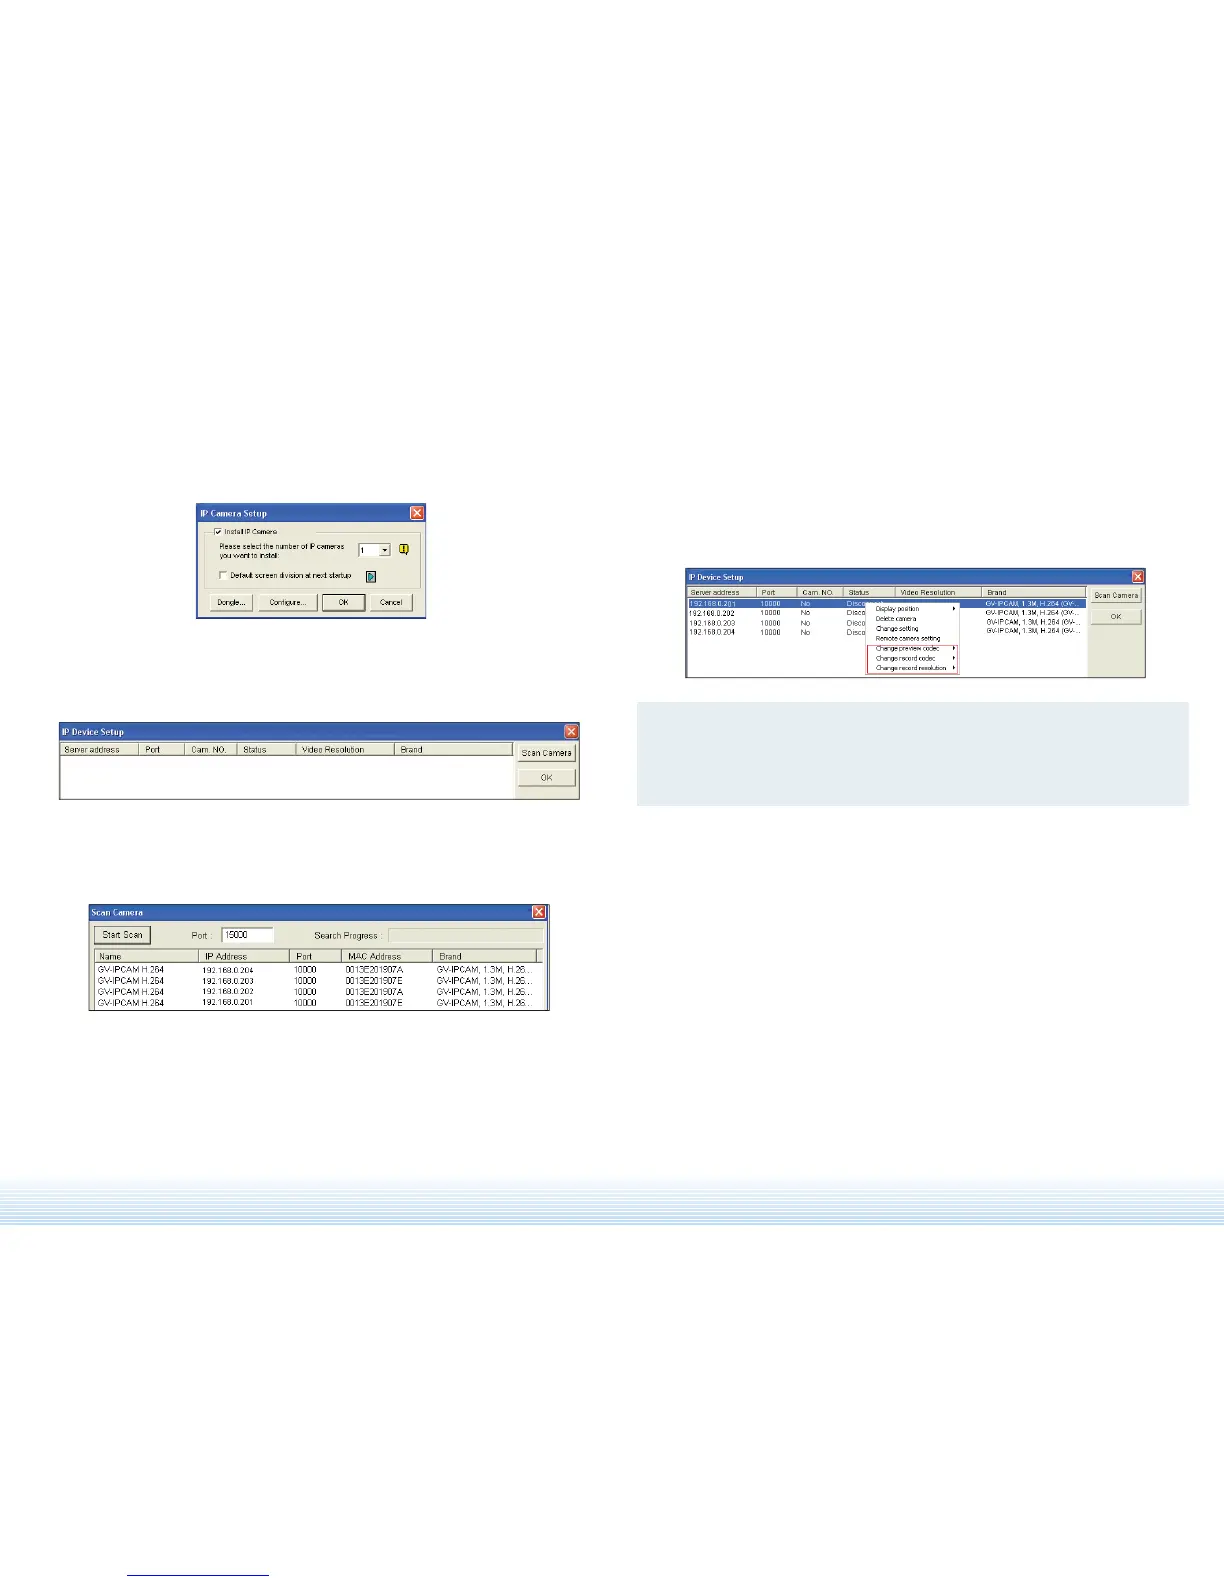
1. On the main screen, click the Configure button, select General Setting, select
Camera / Audio Install, and click IP Camera Install. This dialog box appears.
2. Check Install IP Camera, select the number of IP cameras you want to link to,
and click Configure. This dialog box appears.
3. Click Scan Camera to detect all the IP cameras on the same LAN. After the
scanning process is finished, this dialog box appears.
4. Double-click the IP cameras to add them to the list.
5. Click the listed camera, and select Change preview codec, Change record
codec or Change record resolution to change the Live View codec or
Recording codec and recording resolution.
6. Click the listed camera, and select Display position to map the IP camera to a
channel on the GV-NVR System Lite.
7. The Status column now should display “Connected”. Click OK to exit.
 Loading...