EasyManua.ls Logo

GEPRC CineLog25 HD PRO - User Manual

GEPRC CineLog25 HD PRO
26 pages
Print Icon
To Next Page IconTo Next Page
Loading...
Born For FPV
Question and Answer IconNeed help?

Do you have a question about the GEPRC CineLog25 HD PRO and is the answer not in the manual?

Summary

Summary

Key Features of CineLog25

Advanced Camera Damping System

Eliminates video jelly and FPV camera vibration, adjustable for flight states.

Durable Pusher Frame Design

Features new material and carbon plate for increased strength and efficiency.

Low Noise Flight Optimization

Optimized air inlet volume and EVA foam reduce flight noise and vibrations.

Extended Range Flight Capability

High-efficiency power matching and motor scheme improve flight time.

Low Center of Gravity Design

Inverted frame design with VISTA at bottom enhances stability and efficiency.

Broad Camera Compatibility

Compatible with SMO 4K, GoPro Lite, and future GoPro 8 Lite models.

DJI HD Goggles Integration

Specifically designed for use with DJI HD Goggles and Vista system.

Optimized Nebula Pro Camera

Features 120 FPS HD camera for low-delay flight and video.

Adjustable Camera Angle

Camera angle adjustable from 0-40 degrees to suit various shooting requirements.

Protective EVA Foam Cushioning

Integrated EVA design enhances durability and protects electronics during crashes.

Camera Power and Video Output

Provides power and video output for GoPro cameras via dedicated wire.

Technical Specifications

Warranty Policy Information

Betaflight Installation Guide

Install Flight Controller Drivers

Driver installation required for FC connection, especially for Windows.

Driver Download Resources

Links to download CP210x, STM USB VCP, and Zadig drivers.

Betaflight Configurator Setup

Betaflight Configurator Download

Download the latest Betaflight Configurator from the official GitHub repository.

System-Specific Installation Packages

Select the correct installation package for Windows, macOS, Linux, or Android systems.

Mobile Betaflight Configuration

Binding with DJI Air Unit

Binding Procedure with DJI Goggle

Binding with Remote Controller

DJI Remote Controller Definitions

SA Switch: ARM Function

Defines the SA switch for arming the drone.

SB Switch: Modes Switching

Defines the SB switch for changing flight modes.

SC Switch: Beeper Control

Defines the SC switch for activating the buzzer.

SD Switch: GoPro Recording

Defines the SD switch for controlling GoPro recording.

Arming the Drone

Flight Mode Selection

ARM Mode Explained

FPV attitude not auto-stabilized, requires pilot skill for freestyle movements.

ANGLE Mode Explained

Auto-stabilizes to horizontal, limits tilt angle, beginner-friendly.

HORIZON Mode Explained

Based on Angle mode but without tilt angle limits for faster flight.

Buzzer Functionality

GoPro Recording Setup

GoPro Connection and Wiring

Connect MODE and GND of GoPro, then plug into the drone connector.

Betaflight Configuration for Recording

Enter CLI commands: resource LED_STRIP 1 NONE, resource PΙΝΙΟ 1 A08, set pinio_box.

On-Screen Display (OSD) Configuration

Propeller Installation Guide

Battery Installation and Securing

GoPro Mounting Instructions

Essential Pre-Flight Checklist

Remote Control and Model Check

Confirm correct model selection, locked state, and lowest throttle position.

Visual Inspection for Damage

Check the FPV for any physical damage before flying.

Propeller Installation and Security

Verify correct propeller installation, steering, and motor screw tightness.

Battery Voltage Check

Ensure battery voltage is within acceptable range for 3S, 4S, or 6S.

Battery Securement and Wiring

Confirm battery is firmly strapped and wires are secured from propeller damage.

Flight Area and Weather Assessment

Observe flight area for risks and check weather conditions for suitability.

Frequency Conflict Detection

Check goggles/FPV screen for frequency conflicts before powering up.

Gyroscope Calibration Confirmation

Wait for three beeps after connecting battery for successful gyro calibration.

Pre-Takeoff Propeller Clearance

Rotate propellers to check for clearance with antenna or power lines.

Final Arming Procedure

Unlock and arm the drone as the final step before takeoff.

Water Flying Safety Advisory

Exercise caution when flying near water; falling into water is not covered by warranty.

FPV Community Flying Rules

Battery Connection Etiquette

Avoid connecting battery when others are flying to prevent interference.

Maintaining Flight Separation

Keep a safe distance from other pilots to avoid signal disturbance.

VTX Frequency Coordination

Coordinate VTX frequencies (40-60MHz difference) for minimal interference.

Optimizing VTX Transmission Power

Use appropriate VTX power settings (e.g., 25MW) for optimal performance.

Additional Resources and Links

Overview

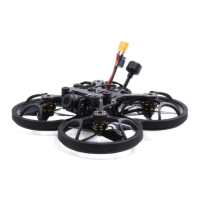
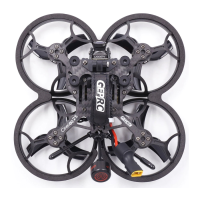
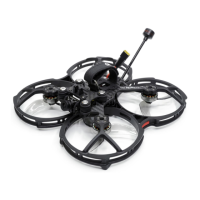
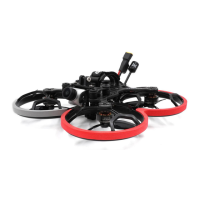
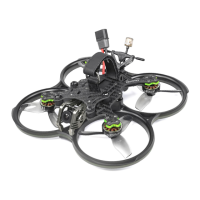
The CineLog25 is a lightweight FPV quadcopter designed for shooting video, particularly with GoPro Lite cameras. It comes in three versions: CineLog25 HD PRO, CineLog25 HD Micro, and CineLog25 Analog. The drone incorporates a popular backward push design, which optimizes the thrust-to-weight ratio for higher flight efficiency. Its overall layout places the VISTA HD system at the center, ensuring a balanced center of gravity. The propeller inlet is designed for smoother airflow and reduced noise.

Function Description

The CineLog25 is primarily a cinematic FPV drone, optimized for stable video capture. It utilizes an F411-20A-F4 AIO flight system and GEPRC NEW 1204 3750KV motors, compatible with 450mAh to 750mAh LiPo batteries, offering a flight time of approximately 5.5 minutes, depending on flying habits. The drone's robust electronic equipment and advanced frame materials contribute to its stability, making it suitable for various FPV freestyle tricks.

Usage Features

  • Camera Damping System: A new camera damping system effectively eliminates video jelly and FPV camera vibrations. It features adjustable damping construction, allowing users to choose between three, four, or five damping rings to suit different flight states and achieve optimal stability in vibration and noise.
  • Pusher Frame Design: The CineLog Whoop Quadcopter boasts a brand-new pusher frame design, incorporating ultra-light carbon plate and new materials. This design enhances strength by 20% and efficiency by 15%.
  • Low Noise Optimization: The quadcopter's design increases the air inlet volume, and with EVA foam cushioning, it reduces airflow resistance, resulting in extremely low flight noise and a significant reduction in external vibrations.
  • Long-Range Flight: High-efficiency power matching, combined with the latest GEP 1204 motor power output scheme and optimized tuning, improves flight time.
  • Low Center of Gravity: The CADDX VISTA is strategically placed at the bottom, optimizing the air inlet structure. This low center of gravity "pusher-style" inverted frame design increases efficiency by at least 15%.
  • Camera Compatibility: The CineLog25 is compatible with most mainstream cameras, including SMO 4K, GoPro6 Lite, and GoPro8 Lite (with upcoming support).
  • DJI HD Goggles Integration: It supports DJI HD Goggles with Vista, and features an optimized Caddx Nebula Pro (120 FPS HD camera, 28ms low delay flight) for high-quality FPV viewing.
  • Adjustable Lens Angle: The flight angle can be adjusted from 0 to 40 degrees to meet various flight and shooting requirements.
  • EVA Foam Cushioning: An integrated EVA design provides a coordinated look, enhanced strength, and increased protection. The bottom part reinforces landing strength and safeguards all electronic equipment.
  • Camera Power Output: The drone includes its own power cable output for cameras like GoPro6 and GoPro8, along with a video recording wire. The camera can be turned on or off directly via the remote controller.

Binding and Control:

  • Binding with Air Unit: For PNP (DJI receiver) versions, the drone requires pairing with DJI remote control and DJI Goggles. The binding sequence is crucial: DJI Goggles first, then DJI remote control. Incorrect sequencing will cause the Air Unit to disconnect from the remote control, requiring re-binding. Propellers must be removed before frequency matching for safety.
  • Binding with DJI Goggle: Turn on FPV Goggles and FPV Air Unit Module. Press the FPV Goggles binding button until the buzzer emits a continuous sound, indicating binding mode. Then, press the FPV Air Unit Module binding button; its indicator light will change from green to red. Successful binding is indicated when the FPV Air Unit Module indicator light changes from red to green.
  • Binding with Remote Controller: Turn on the FPV Remote Controller. Simultaneously long-press REC, custom key C, and the right wheel button. The remote controller buzzer will make a continuous sound, and its indicator will turn blue and flash slowly, signifying binding mode. Press the FPV Air Unit Module binding button; its indicator light will change from green to red. Successful binding is indicated when the Remote Controller indicator changes from blue to green, and the FPV Air Unit Module indicator light changes from red to green.
  • ARM Switch: Two conditions must be met before arming: low throttle and the Arm Switch in unlocking mode. If the throttle is not at its lowest position when the unlocking switch is turned, the motors will not activate, and a warning sound will be emitted if a buzzer is installed. For landing, the drone can be locked when its height drops to about 30cm from the ground.
  • Modes Switch: The CineLog25 HD offers three flight modes: ARM, ANGLE, and HORIZON.
    • ARM mode: Provides full manual control, requiring pilot skill to maintain balance. It allows for complex freestyle movements but is challenging for novices.
    • ANGLE mode: Automatically returns the FPV to a horizontal state and hovers when the stick returns to the middle position. It limits the tilt angle, making it easier for novices to control.
    • HORIZON mode: Similar to Angle mode but without an angle limit, allowing for faster and more flexible flight.
  • BEEPER: A buzzer is set to the SC switch. Activating it will cause the FPV to emit a beep, useful for locating a lost drone.
  • GOPRO REC: The drone supports GoPro recording. Connect MODE and FND of the GoPro, then plug the GoPro into the connector. In Betaflight, configure the resource LED_STRIP 1 NONE, resource PINIO 1 A08, and set pinio_box = 40,255,255,255. Save these settings. The SD switch on the remote controller (mapped to Aux4) controls recording: toggling from 1→2→3 starts recording, and 3→2→1 stops it. The indicator light flashes slowly when recording is active and flashes three times when recording stops.
  • OSD (On-Screen Display): The OSD tab in Betaflight allows users to select and arrange data elements to be displayed on the Goggle screen during flight. Individual elements can be enabled/disabled and repositioned by dragging them on the screen.

Maintenance Features

  • Propeller Installation: The FPV propeller has clockwise (CW) and counter-clockwise (CCW) directions, with a distinct front and back side (front side up). The CineLog25 uses a reverse installation method, where motors 2 and 3 rotate clockwise, and motors 1 and 4 rotate counter-clockwise.
  • Battery Installation: The battery is carried on top and secured with a strap. It is recommended to fix the power plug within the strap to prevent it from being cut by propellers during flight. The battery should be positioned near the center of gravity to avoid affecting flight balance.

Pre-Flight Inspection:

Before each flight, a thorough inspection is recommended to prevent crashes:

  1. Turn on the remote control, select the correct model, confirm the unlock switch is in the locked state, and the throttle is at its lowest position.
  2. Check for any damage to the FPV's appearance; repair if necessary before flying.
  3. Confirm propellers are correctly installed, their steering is correct, and motor screws are tightened to prevent propeller detachment.
  4. Check battery voltage: 3S should be 12.6V, 4S should be 16.8V, and 6S should be 25.2V when fully charged.
  5. Ensure the battery is firmly fixed with the strap and its wire is secured to avoid propeller cuts.
  6. Observe the flight area for safety risks (e.g., people) and check weather conditions.
  7. Check Goggle or FPV screen for frequency conflicts with other pilots. If a conflict exists, do not power on your FPV.
  8. After connecting the battery, place the FPV on the ground and do not move it until three beeps are heard, indicating successful gyroscope calibration.
  9. Before takeoff, unlock and rotate propellers to ensure they do not scratch the antenna or power line.
  10. Finally, unlock and arm the drone.

FPV Community Rules:

  • 5.8GHz Analog Image Transmission: When multiple people fly together, interference can occur. CineLog25 HD uses DJI Digital signal with high anti-interference, but it still uses 5.8GHz, which can interfere with analog transmissions.
  • Plug in Battery: Avoid connecting the battery while others are flying, as it can cause interference and potentially lead to crashes.
  • Flight & Landing: Maintain a certain distance from others to avoid signal disturbance.
  • VTX Power: When flying with others, coordinate frequencies to prevent disturbance. A 40-60MHz difference between frequencies is ideal. Choosing R-band channels (eight available) allows eight people to fly together.
  • VTX Transmitting: Higher transmission power increases mutual interference. In open areas, 25mW is sufficient. For solo flights, any power can be set.

Important Note: Flying near water sources carries a high risk of loss, and water damage is not covered under warranty.

GEPRC CineLog25 HD PRO Specifications

General IconGeneral
BrandGEPRC
FrameGEP-CL25
MCUSTM32F411
IMUMPU6000(SPI)
ESCBLheliS 20A
SystemGEP-20A-F4
OSDBetaFlight OSD w/AT7456E chip
VTXCaddx Vista/5.8G 500mW VTX
CameraCaddx Nebula Pro/Caddx Nebula Micro/Caddx Nano EOS2
PropellersGEMFAN D63-5
MotorGR1204 3750KV
BatteryRecommend LIPO 4s 650mah-750mah Battery
Weight and Dimensions IconWeight and Dimensions
Motor to motor109mm
CineLog25HD Weight125.6g(weight without batteries)
CineLog25Analog Weight111.1g(weight without batteries)

Related product manuals