This document is an instruction manual for a Gevi coffee maker, model GECME003D-U. It provides detailed guidance on its operation, maintenance, and important safety precautions.
Function Description
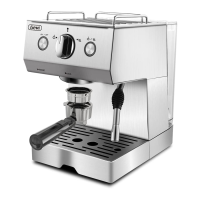
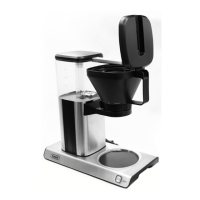
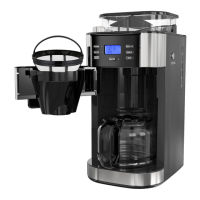
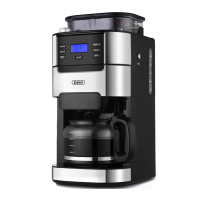
The Gevi GECME003D-U is a coffee maker designed for household use, capable of brewing espresso and frothing milk for beverages like Latte and Cappuccino. It features a system that allows for precise temperature control for both espresso extraction and milk frothing, aiming to deliver optimal taste and quality. The machine is equipped with various switches and an operation knob to control its different functions, including power, coffee brewing, and steam generation.
Important Technical Specifications
- Electrical Parameters: 120V~, 60Hz, 1050W
- Espresso Extraction Temperature: Controlled at 197°F (91.7°C) by NTC precision thermostats.
- Milk Frothing Temperature: Controlled at 212°F (100°C) by NTC precision thermostats.
- Plug Type: Polarized plug for safety.
- Grounding: Incorporated with a grounded plug, requiring a well-earthed wall outlet.
- Water Tank Capacity: Designed with a MAX line to prevent overfilling.
- Portafilter: Designed to hold a 2-cup mesh for coffee powder, with a recommendation of 7g for one cup of espresso.
Usage Features
First Time Use / Long Time Not Used:
Before initial use or after a long period of inactivity, it's recommended to rinse the machine. This involves filling the water tank, powering on the machine, and allowing water to flow through the coffee outlet for about a minute by turning the operation knob to the coffee icon. This process helps release any air inside the appliance, which may cause noise initially.
Frothing Milk Alone (USE GUIDE 1):
- Ensure the sealing tape is removed from the water tank bottom.
- Verify the operation knob is in the middle "•" standby position.
- Fill the water tank (not exceeding MAX line) and properly align it.
- Plug in and power on the machine (power switch to "I"). The coffee switch light will flash blue, indicating default espresso brewing setting.
- Press the steam switch; it will flash white. Wait until it stops flashing.
- (Optional, for better taste) Release water from the boiler: When the steam indicator turns green, place a cup under the froth nozzle and turn the knob to the steam icon. After a few seconds, water will come out.
- Prepare about 100ml of milk in a pitcher. Insert the frothing nozzle 1-2cm into the milk.
- Turn the knob to the steam icon; steam will come out.
- Froth milk by moving the vessel up and down until the milk volume doubles or desired froth is achieved.
- Turn the knob back to the "•" position to stop.
- Note on Milk Frothing Noise: If noise occurs and steam weakens, check water tank level and add water if needed.
- Continuing Frothing: If frothing 1-2 times, wait for the steam switch light to stop flashing. If frothing 3-4 times, pump water into the boiler by turning the knob to the steam icon, waiting for water, then turning it back to "•" before resuming frothing from step 3.
Making Espresso After Milk Frothing (For Latte) (USE GUIDE 2):
- After frothing milk (following USE GUIDE 1), press the coffee switch. Both coffee and steam switch lights will flash simultaneously. This indicates the temperature is too high for espresso (212°F vs. 197°F).
- Wait until the steam switch light extinguishes, leaving only the coffee switch light flashing.
- Alternatively, to speed up cooling, turn the knob to the steam icon to release hot steam, then turn it back to "•" once the steam switch light extinguishes.
- Proceed with espresso making as described in "USE GUIDE 3" steps 3-7.
- Pour frothed milk into the espresso to enjoy a Latte.
Make Espresso Alone (USE GUIDE 3):
- Ensure the sealing tape is removed from the water tank bottom.
- Verify the operation knob is in the middle "•" standby position.
- Fill the water tank (not exceeding MAX line) and properly align it.
- Plug in and power on the machine (power switch to "I"). The coffee switch light will flash blue, indicating default espresso brewing setting.
- Place a 2-cup mesh inside the portafilter, ensuring alignment with the groove.
- Add 7g of coffee powder for one cup of espresso. Tamp the powder below the MAX line of the portafilter to prevent leaking and ensure smooth flow. Avoid tamping too firmly, which can obstruct coffee flow.
- Install the portafilter into the machine from "Insert" to "Lock" position. Incorrect installation can cause splashing and leakage.
- Wait until the coffee switch light stops flashing (indicating heating is finished and the knob is on the "•" position). Do not proceed to step 6 before the light is solid, as unsuitable temperature affects coffee taste.
- Place a cup on the drip tray. If the cup is tall, remove the drip tray cover.
- Turn the knob to the coffee icon. Espresso will start flowing out.
- Once the desired amount of espresso (not more than 30ml per cup for full flavor) is reached, turn the knob back to the "•" position to stop brewing.
- Notes on Espresso Operation:
- Noise during operation is normal due to high-pressure water pumping.
- Loud noise may indicate insufficient water in the tank.
- A louder noise when the boiler water is low is normal; it will operate as usual after adding water.
- If espresso drips slowly or not smoothly, check water level and coffee powder tamping.
- Remove the portafilter after a while to relieve pressure and prevent steam splashing.
- Slow water flow through coffee powder is normal due to high pressure; excess coffee dripping off is also normal.
Froth Milk After Making Espresso (For Cappuccino) (USE GUIDE 4):
- After making espresso (following USE GUIDE 3), press the steam switch. It will flash white. Wait until it stops flashing.
- (Optional, for better taste) Release water from the boiler: When the steam indicator turns green, place a cup under the froth nozzle and turn the knob to the steam icon. After a few seconds, water will come out.
- Prepare about 100ml of milk in a pitcher. Insert the frothing nozzle 1-2cm into the milk.
- Turn the knob to the steam icon; steam will come out.
- Froth milk by moving the vessel up and down until the milk volume doubles or desired froth is achieved.
- Turn the knob back to the "•" position to stop.
- Pour frothed milk into the espresso to enjoy a Cappuccino.
Special Functions - Both Lights Flash for Alarming:
- If the coffee switch is pressed or the operation knob is turned to the coffee icon immediately after steam production (when the boiler temperature is very high), both coffee and steam switch lights will flash, indicating the appliance needs cooling.
- If the power switch is pressed to "I" and the steam switch is mistakenly pressed, the coffee switch can be pressed immediately for coffee function. However, if there's a delay, both lights will flash. In this case, wait until both lights stop flashing and the coffee switch light remains blue.
Maintenance Features
Cleaning The Steam Nozzle:
- Clean the froth nozzle immediately after frothing milk to prevent blockages and bad smells.
- If there's no or little steam, check for blockages.
- Turn the knob to the steam icon to release steam, clean the nozzle with a cloth, then return the knob to the middle "•" position. (Operate carefully due to hot water/steam).
Cleaning The Seal Ring:
- The seal ring prevents leaks. Excessive coffee powder can block it, causing espresso leakage or splashing.
- Clean the seal ring immediately with hot water from the brewing function after use for hygiene and to prevent bad smells.
- To clean: Uninstall the portafilter, discard coffee powder, press the coffee switch until the light stops flashing. Turn the knob to the coffee icon to flush out coffee powder, then turn it back to "•" to stop. Rinse the seal ring with a cloth. (Operate carefully due to hot water/steam).
Cleaning Mineral Deposits (Descaling):
- To ensure efficient operation, clean internal piping, and maintain coffee flavor, descale every 2-3 months.
- Descaling Solution: Fill the tank with water and descaler to the MAX level. The ratio of water to descaler is 4:1. Household descaler or a solution of 100 parts water to 3 parts citric acid can be used.
- Process:
- Power on the unit (power switch to "I"). The coffee switch light will flash blue, indicating heating.
- Wait until the coffee switch light becomes solid (pre-heating finished).
- Turn the operation knob to the coffee icon and make two cups of coffee (approx. 2oz). Then turn it to "O".
- Press the steam switch; the steam switch light will flash white. Wait until it becomes solid.
- Turn the operation knob to the steam icon and make steam for 2 minutes, then turn it to "O" to stop.
- Press the power switch to "O" to stop the unit immediately. Let the descaler sit for at least 15 minutes.
- Restart the unit and repeat steps 3-6 at least 3 times.
- Finally, brew coffee (without coffee powder) with tap water at the MAX level, repeating steps 3-6 for 3 times (no 15-minute wait in step 6) until no water is left in the tank.
Troubleshooting:
The manual includes a troubleshooting table that lists common symptoms, their causes, and recommended corrections.
- Water leaks from bottom: Could be too much water in the drip tray (clean it), appliance malfunction (contact service), or normal water residue from the movable water tank outlet (not a leak).
- Acid/vinegar taste in espresso: Due to not cleaning mineral deposits correctly (clean per instructions) or using old/improperly stored coffee powder (use fresh, store in cool/dry place, reseal).
- Coffee maker not working: Power outlet not plugged in well (plug correctly, contact service if issue persists).
- Steam cannot froth: Ready indicator not illuminated (wait for it to illuminate), container too big/wrong shape (use high/narrow cup), skimmed milk used (use whole or half-skimmed milk), or dirt in steam nozzle (clean immediately after use).
General Safety and Disposal:
- Do not immerse cord, plug, or appliance in water or other liquids.
- Unplug before cleaning and when not in use. Allow to cool.
- Do not operate with damaged cord/plug or after malfunction/damage.
- Do not use unrecommended attachments.
- Place on a flat surface, away from hot surfaces.
- Do not let the power cord touch hot surfaces.
- Do not place the coffee maker on hot surfaces or near fire.
- Always hold the plug to disconnect, never pull the cord.
- Not for outdoor use.
- Not for use by children or persons with reduced capabilities unless supervised.
- Children should be supervised to ensure they do not play with the appliance.
- Be careful of hot steam and surfaces.
- Do not operate without water.
- Do not remove the water tank during brewing cycles.
- Do not remove the portafilter when brewing or when steam/hot water is escaping. Release pressure first.
- Relief pressure through the steam wand before removing the tank cover or portafilter.
- Do not open the brew chamber during the brew process.
- Do not attempt to modify the polarized plug.
- Use short power-supply cords to reduce risks; longer extension cords can be used if properly rated and arranged.
- Do not disassemble the appliance yourself if the cause of failure is unknown; contact a certified service center.
- Correct Disposal: The product should not be disposed of with household waste in the EU. Recycle responsibly through return and collection systems or by contacting the retailer.