27
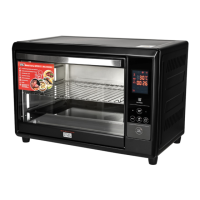
Before the first use of the mini-oven, it is recommended to warm it up to eliminate production
dust and other contaminants. Before turning on, make sure that the oven is empty inside
(dishes or accessories are not installed, the product does not lie).
gfgril
PREPARATION FOR USING
Enables the Delayed Start feature to set the lead time from 0:01 (1 minute) to 24:00 (24 hour).
The postponement time is set until any program is selected. By default (pressing the button
),
the preparation delay is 0:10 (10 min). You can change this value using the + and - buttons.
Used to turn on convection for "UPPER HEATING," "LOWER HEATING," "HEATING" and
"SKEWERr" programs.
Is used to activate the selected automatic program/cooking mode or to cancel them.
1. Remove all labels and packaging material (if any existed);
2. Remove all accessories supplied with the kit and wash them using a dishwasher and soft
cloth or sponge. Do not use metal cleaning products and abrasives as this can damage the
coating;
3. Dry all accessories;
4. Carefully wipe the internal and external surfaces of the electrical appliance with dry cloth;
5. Install the device on a flat, dry and stable surface and connect the power cord plug to the
mains. A beep will sound. Illumination of "START/CANCEL," "MODE," " " and "PROGRAM"
buttons is illuminated;
6. Select "HEATING" mode using "MODE" button. Display, "HEATING" mode indicator and
"UPPER HEATING" and "LOWER HEATING" heating elements operation indicators are lit. The
cooking time on the display will blink. For HEAT mode, the default time is 0:20 (20 minutes)
and the temperature is 220 ° C.
7. Change the time to 10 minutes and the temperature to 230 ° C. For a manual change in
temperature and time in the selected mode, see Description of Display and Control Panel.
8. Click the START/CANCEL button. The mini-oven will start operating and shut down after
10 minutes, notifying the end of operation with an audio signal;
9. Allow the instrument to cool;
10. Carefully wipe the internal and external surfaces of the electrical appliance with dry
cloth;
11. The device is ready for use.