Appendix - 94 -
Figure 2
Step 2:
Save changes and exit BIOS Setup.
Figure 3
C. Conguring a RAID array in RAID BIOS
Enter the RAID BIOS setup utility to congure a RAID array. Skip this step and proceed to the installation of
Windows operating system for a non-RAID conguration.
After the POST memory test begins and before the operating system boot begins, look for a message which
says "Press <Ctrl>+<M> to enter BIOS Setup or <Space> to continue" (Figure 3). Press <Ctrl> + <M> to enter
the RAID setup utility.
Marvell 88SE91xx Adapter - BIOS Version 1.0.1.0025
PCIe x2 5.0Gbps
Mode: RAID
[Virtual Disks]
No Virtual Disk!
[Physical Disks]
Adapter 0
Port Disk Name Size Max Speed
S0 SATA: WDC WD800JD-22LSA0 76.3GB SATA 3Gb/s
S1 SATA: WDC WD800JD-22LSA0 76.3GB SATA 3Gb/s
Press <Ctrl>+<M> to enter BIOS Setup or <Space> to continue_
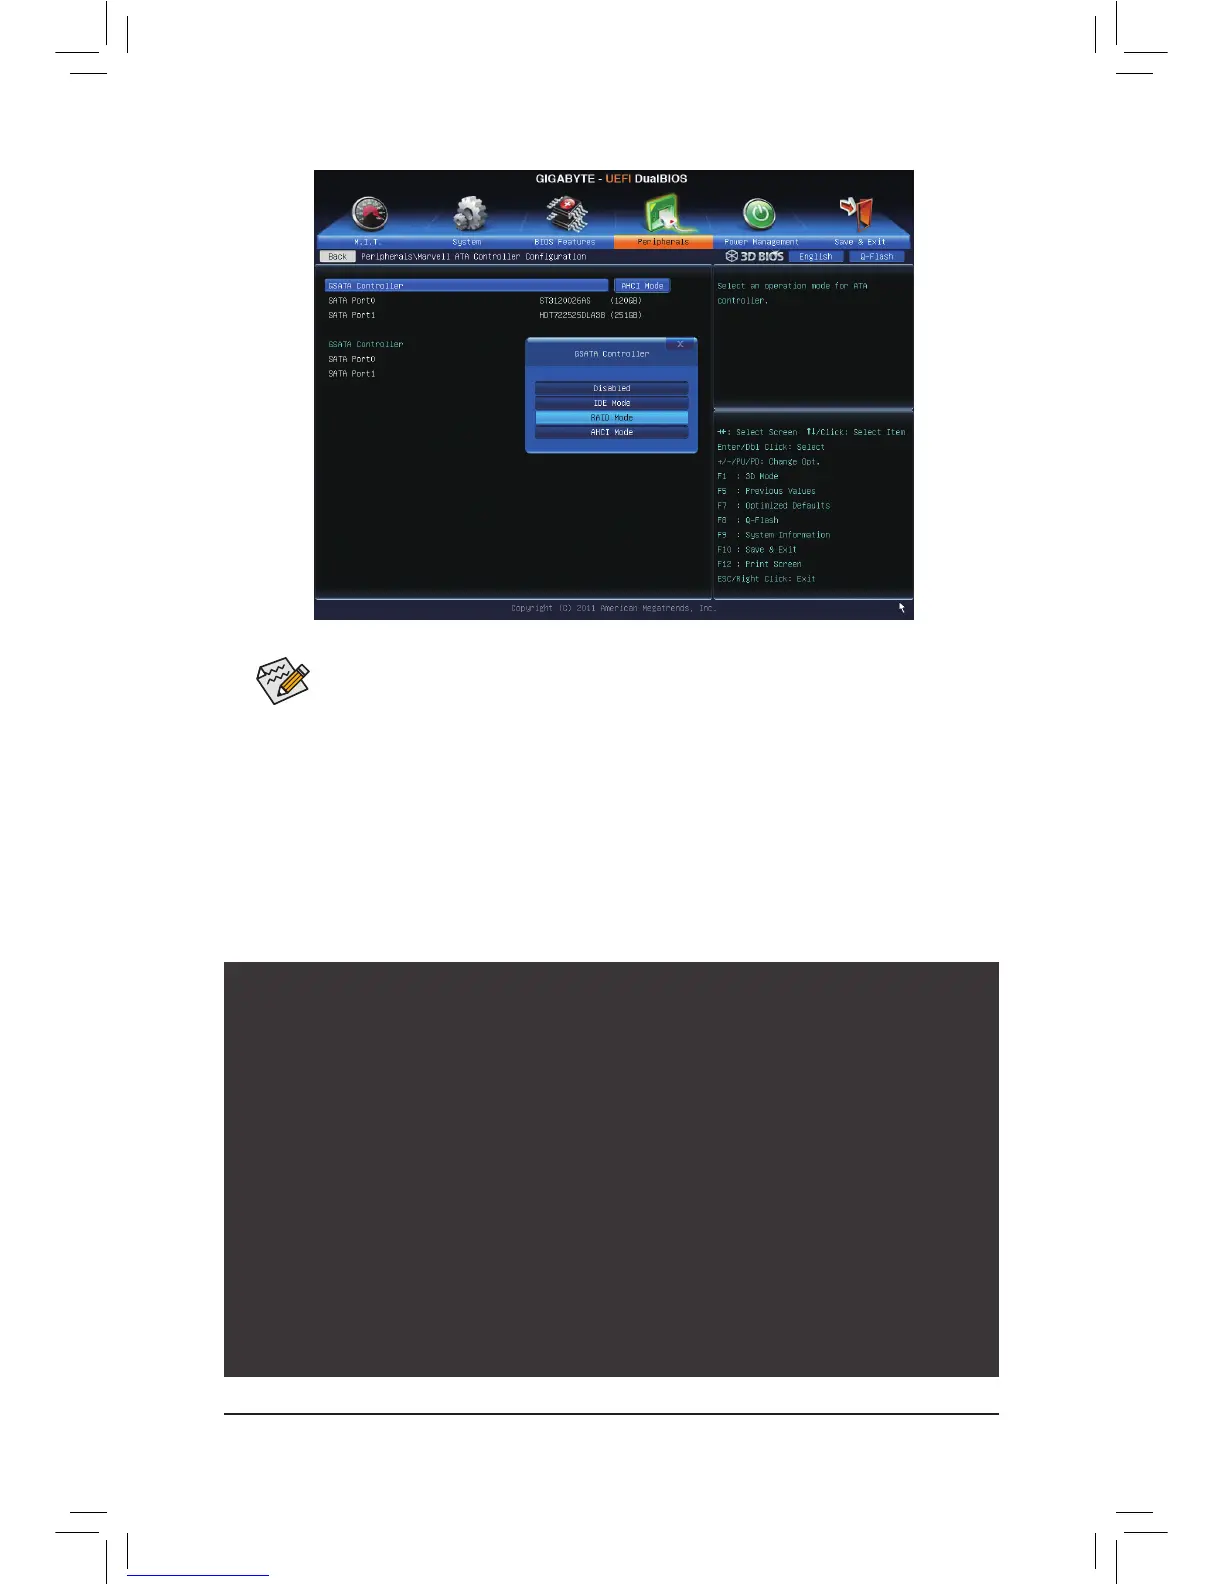
The rst GSATA Controller item controls the "GSATA3 6" and "GSATA3 7" connectors. The second
GSATA Controller item controls the "GSATA3 8" and "GSATA3 9" connectors.

 Loading...