- 31 - BIOS Setup
2-2 The Main Menu
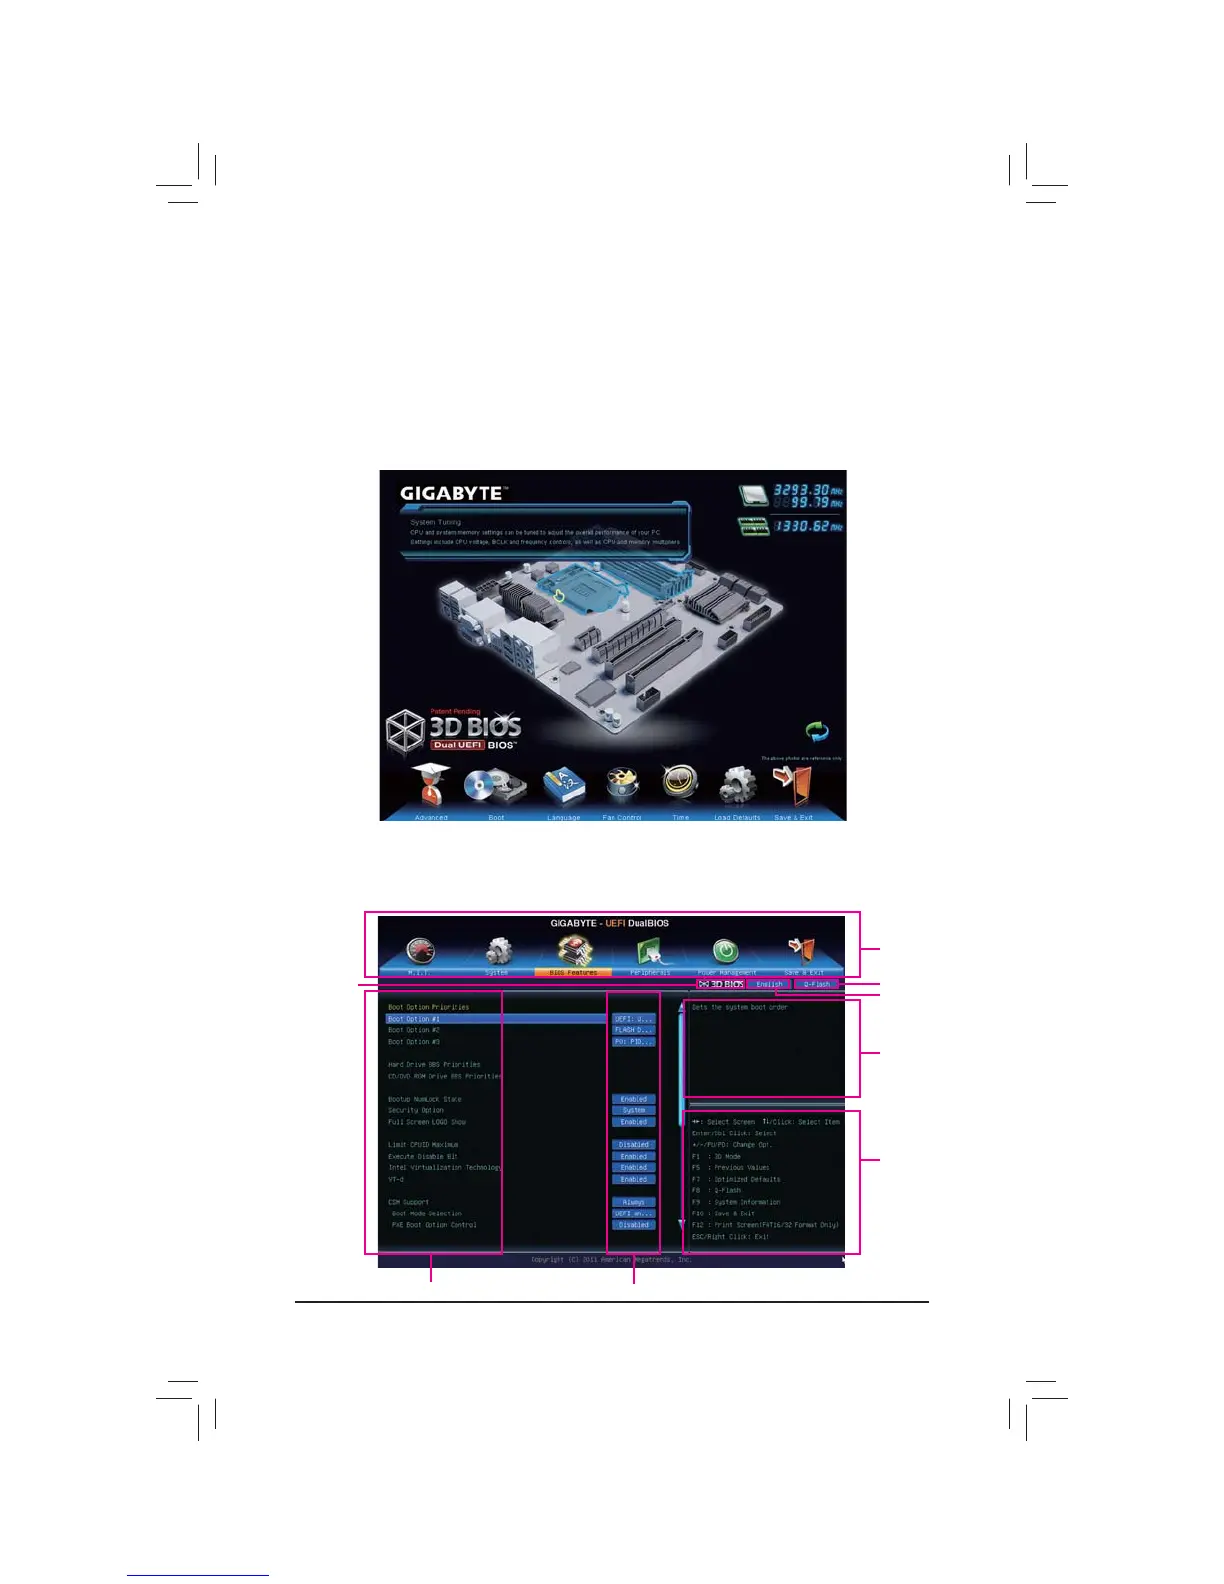
A. The 3D BIOS Screen (Default)
On GIGABYTE's uniquely designed 3D BIOS screen, you can use your mouse to move through the motherboard
LPDJHDQGFOLFNWRHQWHUWKHIXQFWLRQPHQXLQHDFKDUHDIRUTXLFNFRQ¿JXUDWLRQ)RUH[DPSOHSDVV\RXUPRXVH
arrow over the CPU and memory sockets and enter the System Tuning PHQXWR FRQ¿JXUH &38PHPRU\
IUHTXHQF\PHPRU\WLPLQJV DQG YROWDJH VHWWLQJV)RU PRUH GHWDLOHG FRQ¿JXUDWLRQ LWHPV\RX FDQ FOLFN WKH
function menu icons at the bottom of the screen or press <F1> to switch to the main menu of the BIOS Setup
program. (If a mouse is not connected, the 3D BIOS screen will automatically switch to the main menu of the
BIOS Setup Program.)
B. The Main Menu of the BIOS Setup Program
On the main menu of the BIOS Setup program, press arrow keys to move among the items and press <Enter>
to accept or enter a sub-menu. Or you can use your mouse to select the item you want.
(Sample BIOS Version: GA-Z77N-WIFI F1c)
Setup Menus
Function Keys
Help
Enter Q-Flash
Select Default
Language
&RQ¿JXUDWLRQ,WHPV
Current Settings
Switch to
3D BIOS
screen
 Loading...