EasyManua.ls Logo

Glacier bay OSWELL HD873X-1910H User Manual

Glacier bay OSWELL HD873X-1910H
34 pages
To Next Page IconTo Next Page
Page #1 background imageLoading...
Page #1 background image
THANK YOU
INSTALLATION AND CARE GUIDE
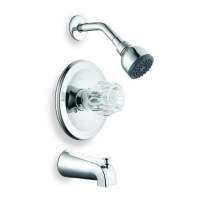
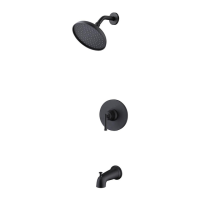
OSWELL 1-SPRAY SINGLE-HANDLE TUB AND SHOWER
shower faucet. We strive to continually create quality products designed to enhance your home. Visit us online
to see our full line of products available for your home improvement needs. Thank you for choosing Glacier Bay!
Questions, problems, missing parts?
Before returning to the store, call Glacier Bay Customer Service
8 a.m. - 7 p.m., EST, Monday - Friday
9 a.m. - 6 p.m., EST, Saturday
1-855-HD-GLACIER (1-855-434-5224)
HOMEDEPOT.COM/GLACIERBAY
THD
02/2020 REV.01
Model#
HD873X-1910H
SKU#
1005129783
HD873X-1901
HD873X-1904
HD873X-194405
312673417
312673422
312673413
Questions and Answers:

Glacier bay OSWELL HD873X-1910H Specifications

General IconGeneral
BrandGlacier bay
ModelOSWELL HD873X-1910H
CategoryPlumbing Product
LanguageEnglish

Summary

Important Information

Warranty Information

Limited Lifetime Warranty Details

Details the terms and conditions of the product's limited lifetime warranty.

Pre-Installation Steps

Planning Your Installation

Guidance on checking parts, consulting professionals, and verifying installation supplies.

Tools and Hardware Needed

Lists tools and hardware needed for installation, including plumbing methods.

Package Contents Checklist

Lists all parts included in the package with descriptions and quantities.

Installation Guide

Preparing for Installation

Shutting off water, verifying hole sizes, and checking valve body depth and orientation.

Install Valve Body & Remove Plaster Guard

Explains how to position and secure the valve body and remove the plaster guard.

Install Supply Connections (Threaded)

Details connecting supply lines using thread sealant tape and tightening pipes.

Install Supply Connections (Soldering)

Guides on soldering supply lines, including component removal and reinstallation.

Back-to-Back Installation Setup

Instructions for reversing cartridge orientation for specific installation types.

Flush Outlets & Check for Leaks

Steps to flush the system, check for leaks, and ensure proper water flow.

Install Plaster Guard

How to correctly position and secure the plaster guard onto the valve body.

Install Shower Arm and Flange

Instructions for installing the shower arm and flange, including thread sealing and tightening.

Install Tub Spout

Guides on attaching the tub spout, ensuring it's flush with the wall, and tightening.

Remove Plastic Cap

How to remove a plastic cap from the valve body before installing the escutcheon.

Adjust Temperature Limit Stop (Part A)

Removing the red limit stop ring from the cartridge assembly for temperature adjustment.

Adjust Maximum Water Temperature (Part B)

Explains how to adjust the red limit stop ring for colder or hotter water settings.

Install Escutcheon & Handle Assembly

Guides on placing the escutcheon and attaching the handle assembly securely.

Final Leak Check

Steps to test water flow through tub spout and shower arm, checking for leaks.

Install Shower Head

How to attach the shower head to the shower arm hand-tight.

Care and Cleaning Instructions

Troubleshooting Common Issues

Service Parts Identification

Related product manuals