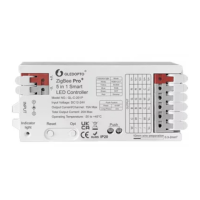
5 in 1 SMART LED CONTROLLER
User instruction
Ⅰ
. NETWORK PARING:
RGBCCT
Indicator
Color
RGBW RGB CCT Dimmer
1. Pairing with Zigbee Hub
FUNCTIONS OF DIFFERENT INDICATOR COLORS SHOWN AS FOLLOWING TABLE:
(RGBCCT >RGBW >RGB >CCT >DIMMER >RGBCCT)
Add the device to a zigbee network via coordinator or hub
① Please ensure the device wasn’t be paired.
Otherwise, please “RESET” the device according to the part Ⅱ “RESET”.
③ Open the zigbee App
(hue or Amazon Alexa),
add the device.
② After STEP 1, there will be a pairing process about 90s.
Once times out, you need to repeat the ①.
① LED indicator
Different color indicators correspond to different functions.
② Reset
Short press once to switch frequency; Short press twice to enter find and binding;
Short press three times to enter touchlink; Short press four times to clear the
zigbee network.
③ OPT
Short press once to switch the function; Press and hold for more than 5 seconds
to set the power-on status.
④ If the pairing done successfully
after the above steps, the device
will blink 3 times.
③ ④
2. TouchLink to a Zigbee Remote Control / Touch Panel
① Please make sure the distance between the device and
remote control/ touch panel less than 10cm;
Method 2: Re-power on the device, Touchlink Commissioning will
start after 15 seconds if it’s not added to a ZigBee network, 165
seconds timeout. Or start immediately if it’s already added to a
network, 180 seconds timeout. Once timeout, repeat the operation.
② Method 1: Please short press key “Reset” 3 times or power on/off the
device 3 times to enter into “Touchlink Commissioning” mode, the device
will blink 5 times.
(Short press for 3 times)
(Flash 3 times)
(Flash 2 times)
(Flash 5 times)
(Short press for 2 times)(Flash 2 times)
<10cm
Reset
③ Set the remote / touch panel to enter “Touchlink
Commissioning”.
Please refer to the manual of the corresponding remote / touch
panel.
④ There shall be indication on the remote or touch panel for successful pairing,
the device will blink 2 times. Now the device shall be controllable via the remote
/ touch panel.
*Note:
① If the device & remote control in different zigbee network,
each remote can link with one device.
② If the device & remote control in the same zigbee network, max 30
remotes can link with one device.
③ For the Philips Hue /Amazon Echo Plus, the device & remote control
should in the same network before TouchLink.
3. Find and Bind Mode
4. Pairing with 2.4GHz RF Remote Control / Touch Panel
*Note: Make sure that the device & remote are in the same network.
Please refer to the manual of the corresponding remote / touch panel.
The device will blink twice, and start “Find and Bind” mode to nd the “Target Node”.
① Short press “Reset” button (or re-power on the device)for 2 times.
① The pairing will be timeout after 4 seconds
when the device powered on.
③ The indications from the device will
blink 3 times.
② The pairing will be done successfully by pressing any
zone “On” key of the 2.4G RF Remote or touch panel.
② Set the remote control / touch panel (target node) to enter
the “Find and Bind” mode to search for “Bind Initiator”.
Now the device shall be remote control / touch panel controllable.
③ “Find and Bind” is completed, the remote / touch panel shall
have indication.
Any zone “On”
Short press once
(Power on the device, within 4s)
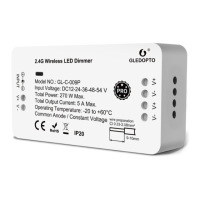
SPECIFICATION
Input Voltage DC12-24-36-48-54 V
Size 125x37x24mm
Model NO.
Product Name
GL-C-001P
5 in 1 Smart LED Controller Max
GL-CM-I-001
Protection Rate IP20
Total Power 270 W Max
Total Output Current 5 A Max
Operating Temperature
Common Anode
Constant Voltage
-20℃~45℃
3
2
1
Reset
White Yellow Blue Green Red