23
221469B
10 Boiler Fixing
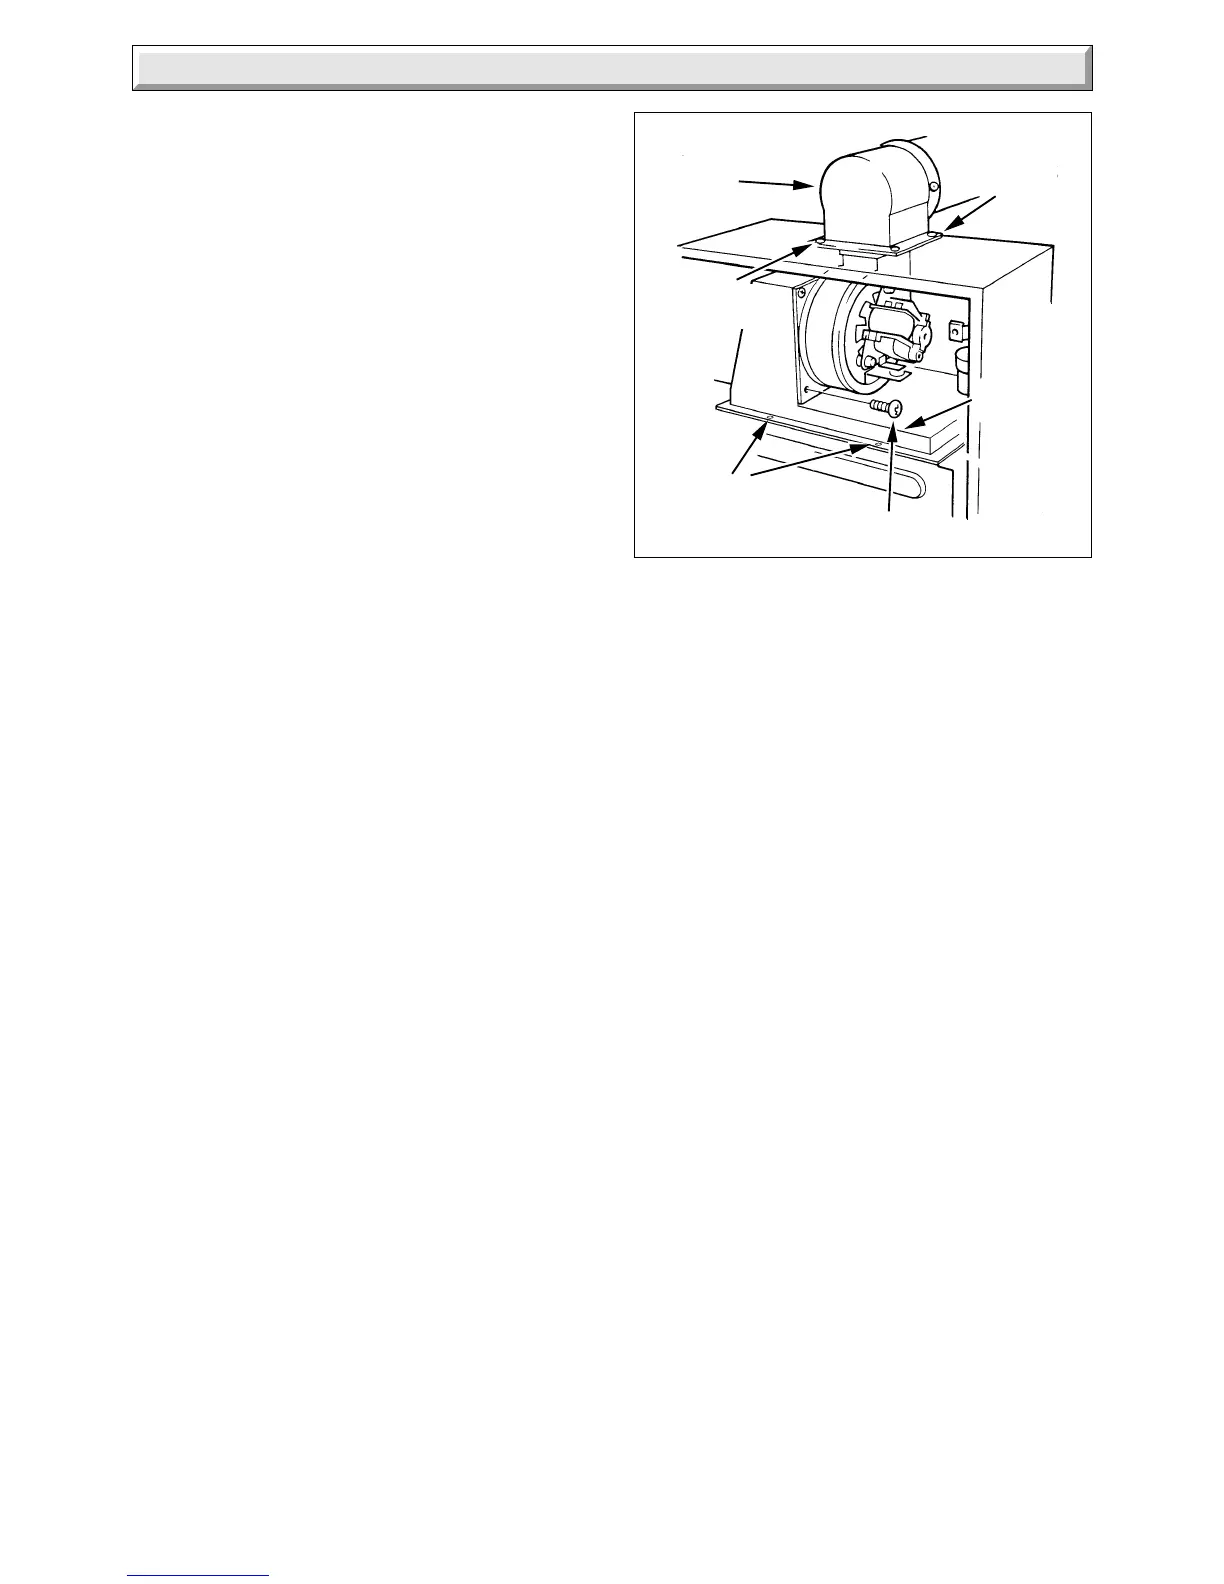
10.7 Flue Fixing
Fit the self-adhesive gasket, supplied in the loose items pack,
to the flue elbow, see diagram 10.3.
Pass the prepared ductings through the wall, the longest
protrusion of the flue terminal is positioned at the top.
If it is impractical to gain access to the outside wall face, the
optional wall liner kit may be used as described in Section 7.6
“Internal Access”.
Fit the flue elbow to the top of the boiler, see diagram 10.3, using
the four screws supplied loose. To assist with the location of the
flue elbow into the fan outlet, loosen the two screws on the flue
collector and the two fan securing screws.
Tighten the four screws of the flue elbow evenly to ensure a
good seal at the gasket. Tighten the screws, if slackened, to
secure the flue collector and fan.
Make the walls good internally and externally around the air
duct, also making it weatherproof on the outer wall, from
outside, if practicable or by using the optional wall liner kit as
described in Section 7.6 “Internal Access”. Make sure that the
ductings do not slope down towards the boiler.
Diagram 10.3
GASKET
6906
FLUE ELBOW
(REAR FLUE
SHOWN)
FAN
SECURING
SCREW (2)
FLUE
COLLECTOR
SECURING
SCREW (4)
SECURING
SCREWS (2)
 Loading...


