leak-tight by hand
. If you cannot hand-tighte
n
properly, the valve probably needs repair o
r
replacement
.
Because there may be some leakage of LP ga
s
when the tank is being filled, we recommend tha
t
you drive at least a mile away from the LP ga
s
dealer's before you relight any pilot lights or appli-
ances
. DO NOT relight pilots or appliances if th
e
scent of LP gas is present. Open the windows an
d
doors and wait 30 minutes
. If the odor is still present
,
follow the instructions in the LP GAS LINE CHEC
K
section
.
CAUTION
: Avoid overfilling by insisting tha
t
the LP gas bottle never be filled beyond th
e
20% liquid level
. if the bottle is overfilled
,
have the LP gas dealer bleed out the excess
.
Overfilling does not allow sufficient spac
e
for the liquid to expand
. This can produc
e
excessive pressure which can cause LP ga
s
leaks, creating a potential fire or explosio
n
hazard
. DO NOT smoke, strike a match o
r
ignite a lighter when the LP gas bottle is bein
g
filled
. A spark or flame could ignite fumes
.
Be certain all burner and pilot flames are ou
t
and the Service valve is closed when filling you
r
motor home's gasoline tanks
.
LP GAS
LINE
CHEC
K
Check the gas line connection at least after eac
h
third re-fill and inspect other connections regularly
,
at least every 30 days or 5,000 miles of travel
. T
o
check, turn off all burners and pilot lights
. Open al
l
doors and windows
. Open the LP gas bottle Servic
e
valve and use soapy water, a bubble solution o
r
approved leak detector to test all line connections
.
Do not use products that contain ammonia o
r
chlorine
. Bubbles indicate a leak
. Tighten the con-
nections with two open end wrenches until bubble
s
stop
. If leak persists, contact your GMC dealer
.
REGULATOR PRESSUR
E
Check the LP gas regulator at the beginning o
f
each season, or whenever a problem is indicated
.
Correct line pressure is 11 inches of water column
.
Your GMC dealer or LP gas supplier can perfor
m
this check
.
LP GAS TANK
CAR
E
After each trip, inspect the LP gas tank
. San
d
off traces of rust and apply a rust preventativ
e
paint
. Always use a light color paint, which reflect
s
heat
. When the LP gas system is not in use, th
e
Service valve should be closed
.
APPLIANCES
AND
ACCESSORIE
S
RANGE,
RANGE
HOOD, OVE
N
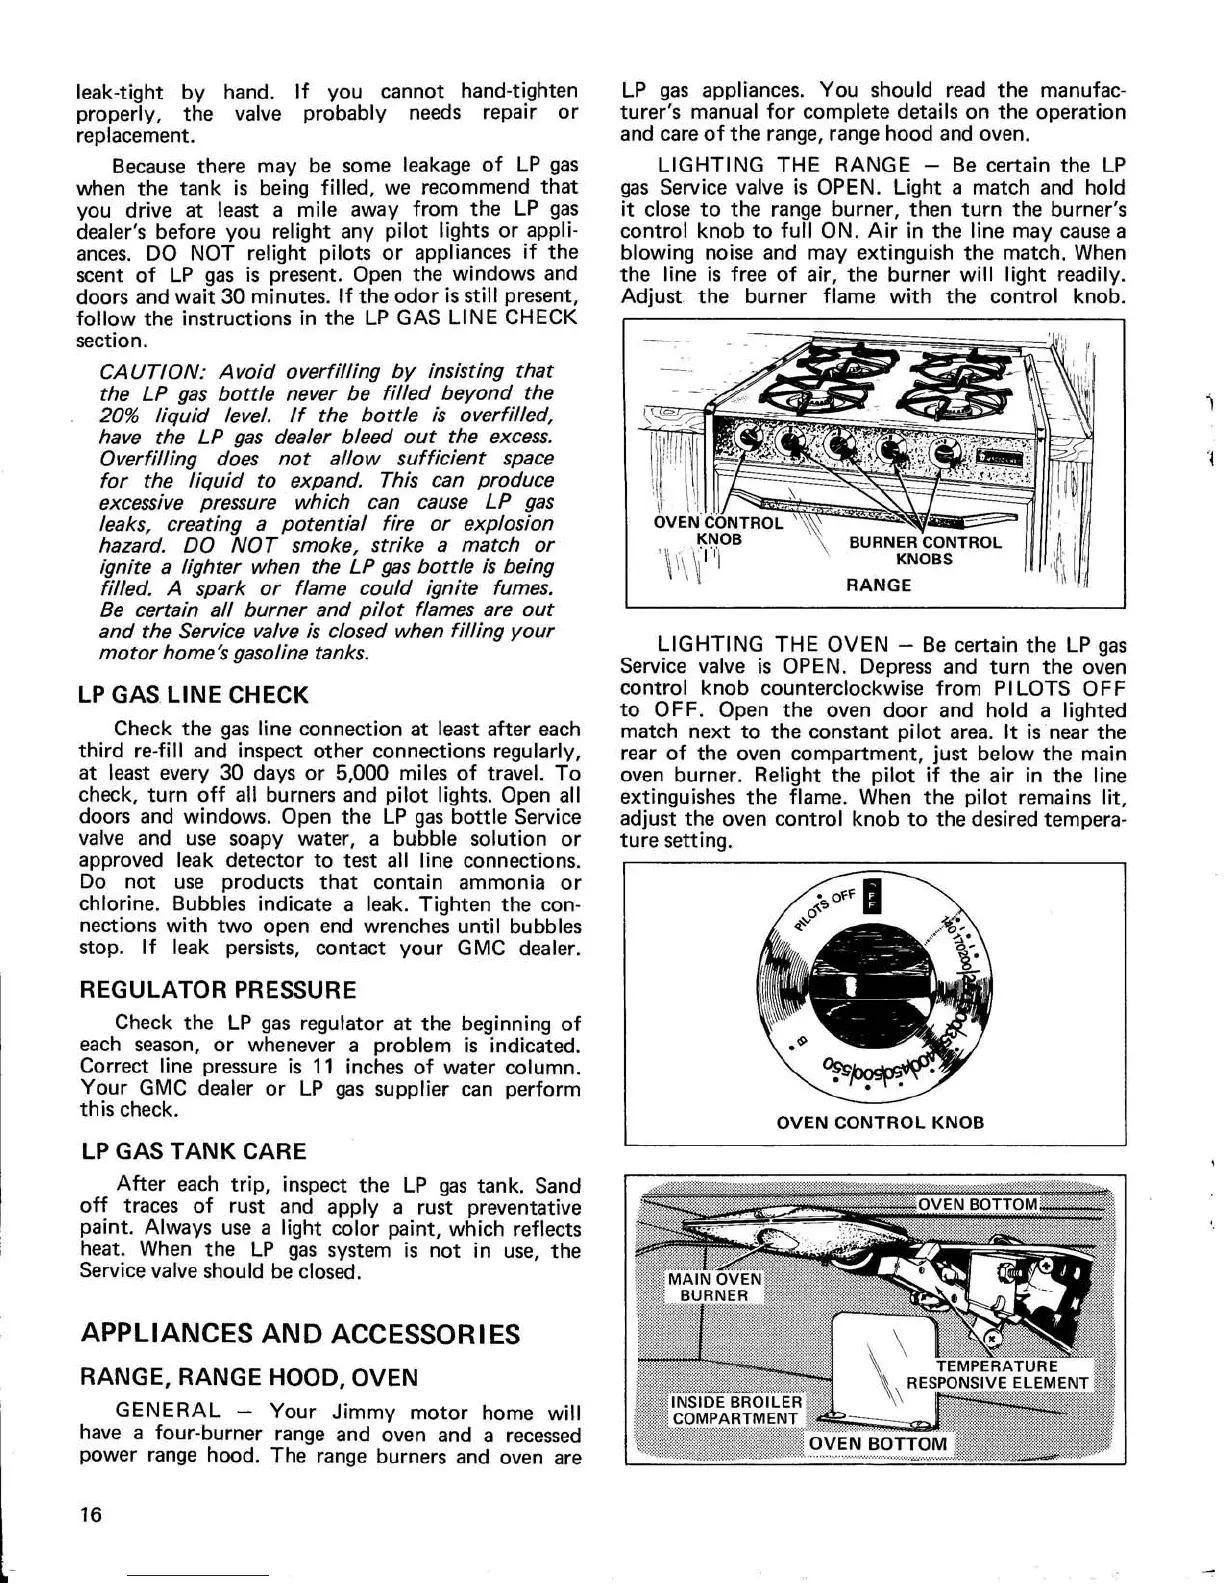
GENERAL — Your Jimmy motor home wil
l
have a four-burner range and oven and a recesse
d
power range hood
. The range burners and oven are
LP gas appliances
. You should read the manufac-
turer's manual for complete details on the operatio
n
and care of the range, range hood and oven
.
LIGHTING THE RANGE — Be certain the L
P
gas Service valve is OPEN
. Light a match and hol
d
it close to the range burner, then turn the burner'
s
control knob to full ON
. Air in the line may cause
a
blowing noise and may extinguish the match
. Whe
n
the line is free of air, the burner will light readily
.
Adjust the burner flame with the control knob
.
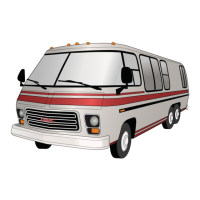
LIGHTING THE OVEN — Be certain the LP ga
s
Service valve is OPEN
. Depress and turn the ove
n
control knob counterclockwise from PILOTS OF
F
to OFF
. Open the oven door and hold a lighte
d
match next to the constant pilot area
. It is near th
e
rear of the oven compartment, just below the mai
n
oven burner
. Relight the pilot if the air in the lin
e
extinguishes the flame
. When the pilot remains
lit
,
adjust the oven control knob to the desired tempera-
ture setting
.
16