ROOF AIR CONDITIONE
R
GENERAL — If you did not order the optiona
l
roof air conditioner at the time of purchase, you
r
unit is wired so that one can be added
. Just orde
r
it from your GMC dealer
. The roof air conditione
r
will operate ONLY on 120-volt electricity
.
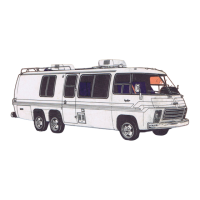
CONTROLS — The roof air conditioner is con
-
trolled by a panel on the portion of the applianc
e
which is attached to the ceiling inside your unit
.
The panel consists of controls for cooling air recir-
culation, air flow and distribution
.
To cool, set the blower switch to the desire
d
fan speed and turn the temperature control dial t
o
the desired temperature
.
To recirculate the air, set the blower switch t
o
the desired speed
.
The air flow may be adjusted by moving the ai
r
flow control to FRONT or REAR
. Adjust the louver
s
on each side of the air conditioner to obtain th
e
desired amount of air circulation
.
CARE OF AIR CONDITIONER — Remove an
d
clean the filter at least once every two weeks if i
t
is used extensively
. Wash filter in soap and war
m
water
. Let filter dry before installing
. DO NO
T
operate the air conditioner for extended period
s
without a filter
.
AM/FM/MPX STEREO
RADIO AND
8-TRAC
K
TAPE PLAYE
R
The tape player is equipped with an automati
c
head cleaner
. Occasionally you will have to clea
n
oxide off the tape playback gear, capstan shaft an
d
the automatic track selector
. To activate the capstan
,
depress the switch (located next to the capstan
)
with the eraser end of a pencil
. Use a cotton swab
,
moistened with isopropyl alcohol to clean the play
-
back head, capstan shaft and the automatic trac
k
selector
.
CAUTION: DO NOT use carbon tetrachlorid
e
to clean components of the tape player
.
TV ANTENNA
If you plan to use a television set in your Jimmy
unit, an optional antenna will improve your recep-
tion
. A coaxial connection for the antenna cabl
e
from your TV set, and a switch which turns on th
e
amplifying system, are mounted on a wall plate
.
A light indicates when the power outlet switc
h
is on
. The plate also has a 12-volt receptacle for T
V
sets especially designed for that type of energy
.
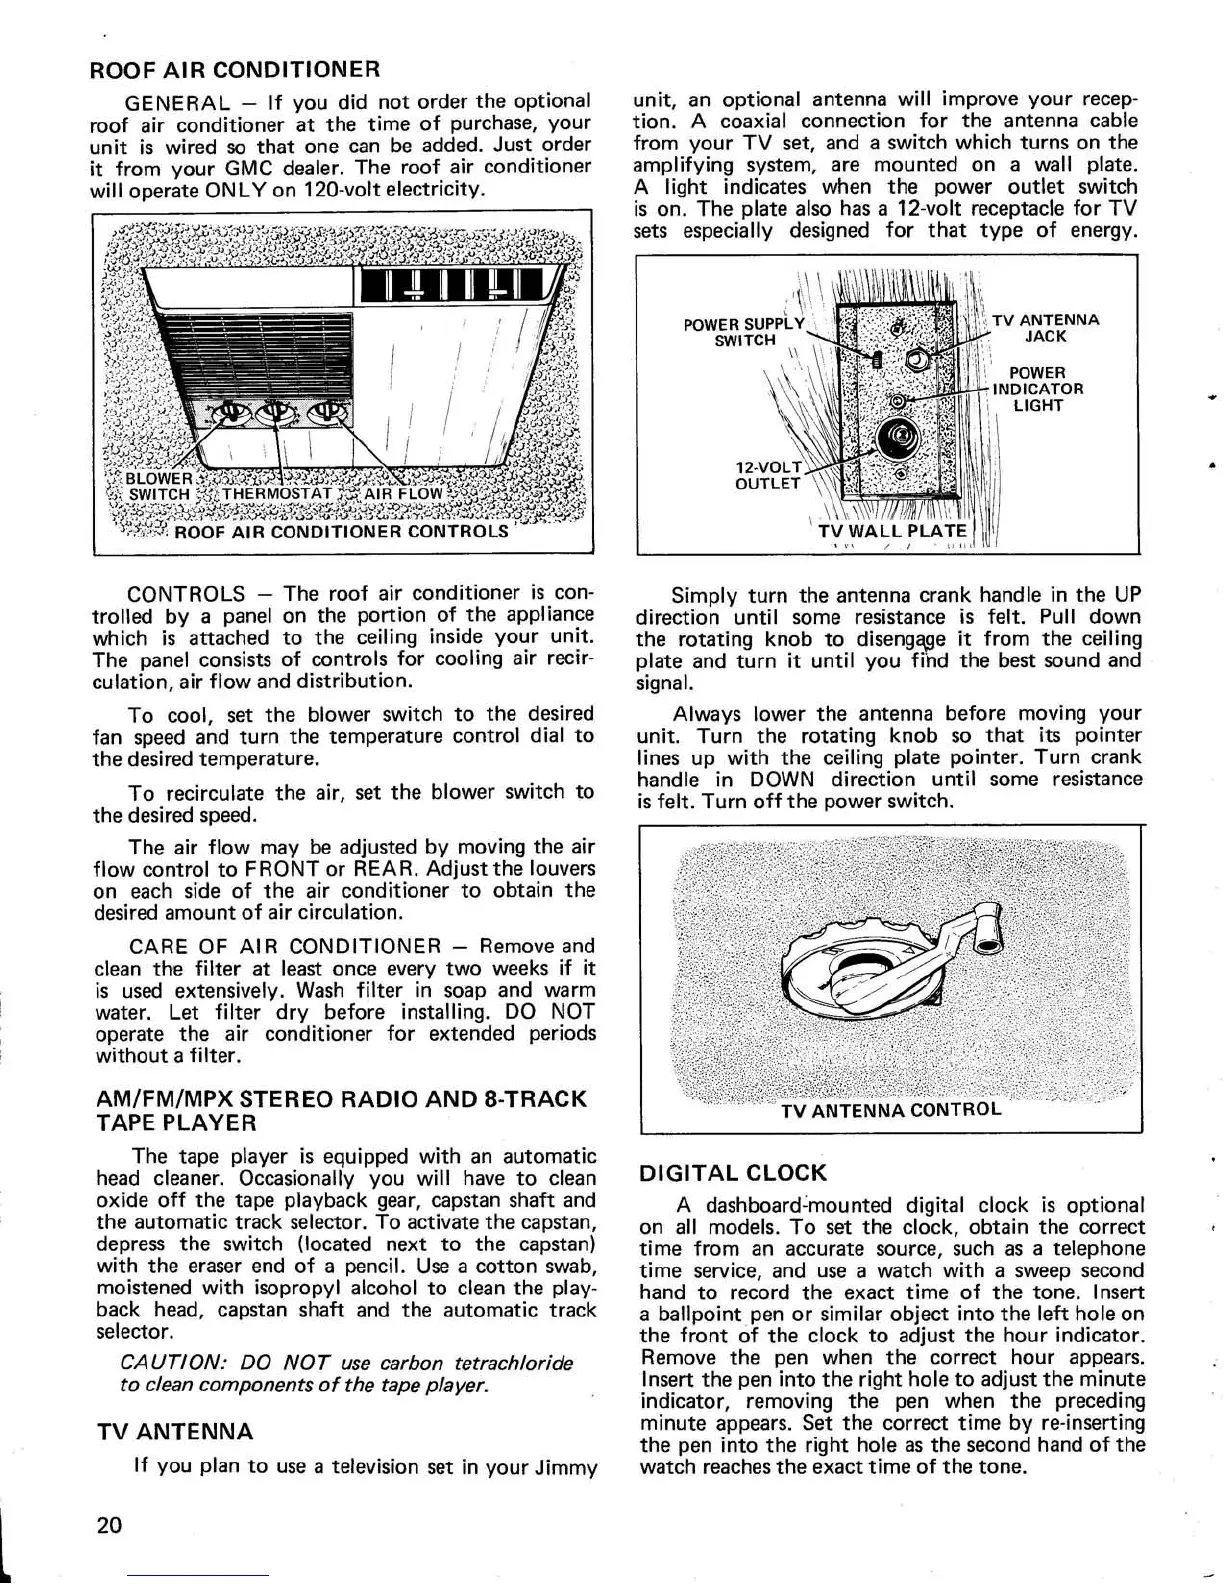
Simply turn the antenna crank handle in the U
P
direction until some resistance is felt
. Pull dow
n
the rotating knob to disengage it from the ceilin
g
plate and turn it until you find the best sound an
d
signal
.
Always lower the antenna before moving you
r
unit
. Turn the rotating knob so that its pointe
r
lines up with the ceiling plate pointer
. Turn cran
k
handle in DOWN direction until some resistanc
e
is felt
. Turn off the power switch
.
DIGITAL CLOC
K
A dashboard-mounted digital clock is optiona
l
on all models
. To set the clock, obtain the correc
t
time from an accurate source, such as a telephon
e
time service, and use a watch with a sweep secon
d
hand to record the exact time of the tone
. Inser
t
a ballpoint pen or similar object into the left hole o
n
the front of the clock to adjust the hour indicator
.
Remove the pen when the correct hour appears
.
Insert the pen into the right hole to adjust the minut
e
indicator, removing the pen when the precedin
g
minute appears
. Set the correct time by re-insertin
g
the pen into the right hole as the second hand of th
e
watch reaches the exact time of the tone
.
20