Do you have a question about the GME TX4500S and is the answer not in the manual?
User selectable duplex function for repeater channels, freeing others for simplex use.
User selectable wide/narrow receive filter, programmable receive-only channels.
Microprocessor controlled synthesis for scanning, memories, and feature options.
Measures, filters, compresses audio signals for advanced RF and audio processing.
Voice inversion scrambler and built-in CTCSS & DCS for silent channel operation.
Overvoltage protection, dual microphone input sockets for installation flexibility.
High contrast LCD, full spectrum adjustable backlighting for display customization.
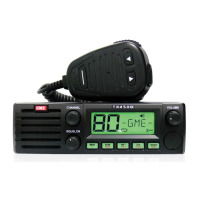
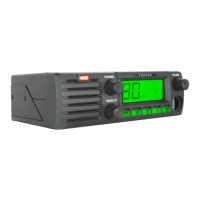
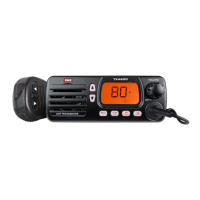
Identifies and explains controls on the front panel of the radio.
Details the icons and indicators displayed on the LCD screen.
Shows and describes the connectors and ports on the rear of the radio.
Details the microphone layout and push-to-talk functions.
Explains primary and secondary functions accessed via keypad buttons.
Instructions for adjusting the radio's audio volume level.
How to navigate and select different radio channels.
Explanation of squelch function and how to adjust its level.
Describes the signal meter display and its strength indicators.
Steps and considerations for transmitting audio on a selected channel.
Explains the built-in timer that limits continuous transmissions.
How to adjust brightness and color settings for the display and keys.
How to select between narrowband and wideband receiver filters.
How to activate and use the feature for automatic audio level compensation.
Enables or disables the short noise burst at the end of transmissions.
How to enable or disable the voice scrambler for secure communication.
Explains duplex operation for communicating through repeater stations.
Feature to instantly recall working or local repeater channels.
Steps to store a channel as Priority Channel 1.
Steps to store a channel as Priority Channel 2.
Temporarily removes busy channels from scan group to avoid interruption.
Allows scanning of channels in ascending sequence, pausing on signals.
How to select the Open Scan mode.
How to add or remove channels from the Open Scan memory.
Defines the default channel used when pressing PTT during scanning.
Steps to initiate the scanning process.
How the radio behaves and how to interact while in Open Scan mode.
How to select the Group Scan mode.
How to add or remove channels from the Group Scan memory.
Steps to initiate the Group Scan process.
How the radio behaves and how to interact while in Group Scan mode.
Allows users to communicate efficiently even when the band is congested.
How to enable the Network Scan feature and select CTCSS/DCS tone.
Step-by-step guide to enable the Net-Scan function.
How to select the Network Scan mode.
How to program channels into the Net-Scan memory.
Steps to add or remove channels from Net-Scan memory.
How to initiate the Network Scan.
How the Network Scan feature operates during use.
Explains the difference between CTCSS and DCS analogue and digital sub-tones.
Details the available CTCSS tones and compatibility.
Details the available DCS tones and their codes.
Steps to select or disable CTCSS/DCS tones in the configuration menu.
Prevents Squelch opening unless signal matches CTCSS/DCS tone.
Steps to tag and enable Silent Mode for a specific channel.
Steps to remove the Silent Mode tag from a channel.
How to temporarily monitor a channel in Silent mode.
Introduces the SelCall system for individual or group calling like a telephone.
Explains the unique SelCall ID number and how to share it.
How to add labels to SelCall IDs for easier identification.
Mutes receiver until own SelCall ID is received, allowing quiet monitoring.
Core procedures for using the SelCall system.
Step-by-step guide to enter and send a SelCall Ident.
Confirms successful SelCall transmission with an acknowledge signal.
Describes how to store and use frequently called SelCall Idents.
Steps to store a SelCall Ident into memory locations.
How to label stored SelCall Idents with a 5-character name.
How to view Alpha labels for incoming SelCalls.
Describes the alarm and display indications when receiving a SelCall.
How to respond to a received SelCall by sending your SelCall Ident back.
How to cancel the SelCall alarm and return to normal communication.
Steps to tag channels and activate Quiet Mode for selective monitoring.
How to mark specific channels for Quiet Mode operation.
How to remove the Quiet Mode tag from a channel.
Steps to activate the Quiet Mode after channels have been tagged.
Steps to turn off the Quiet Mode for all tagged channels.
How signals are received and handled while in Quiet Mode.
Steps to program and send group calls using special codes.
Notes that there is no call acknowledge for group calls.
How to store group call identifiers in memory.
Describes how group calls are received, including alarm tone differences.
How to select banks (A-E or RXA-E) for programming RX-only channels.
Table showing channel numbers for separate RX banks.
How to program frequencies into RX-only channels.
Steps to enable the channel editor for programming RX-only channels.
How to set frequency step spacing for RX-only channels (12.5 kHz or 25 kHz).
Steps to select a channel bank for programming.
Detailed steps to program a specific frequency into an RX-only channel.
Steps to delete an RX-only channel and return it to OFF status.
How to configure the display to show frequency or Alpha label.
How to switch to Alpha mode to view channel labels.
Steps to assign alpha labels to programmed RX-only channels.
Allows editing of RX-only channel frequency or Alpha label.
Step-by-step guide to install the DIN mounting bracket for the radio.
Instructions for connecting the radio to the vehicle's DC power supply.
Details the microphone sockets and connection procedures.
Guidance on installing a suitable antenna for optimal performance.
Explains the system that warns of overvoltage and its effects.
Tips for reducing or eliminating noise interference during installation.
| Type | UHF CB Radio |
|---|---|
| Frequency Range | 477.4125 - 477.9875 MHz |
| Channels | 80 |
| Power Output | 5W |
| Dimensions | 140 x 40 x 120 mm |
| Weight | 450 g |
| Power Supply | 12V DC |
| Water Resistance | IP67 |
| Waterproof Rating | IP67 |