4. Updating your GolfBuddy
4.1. Step 1
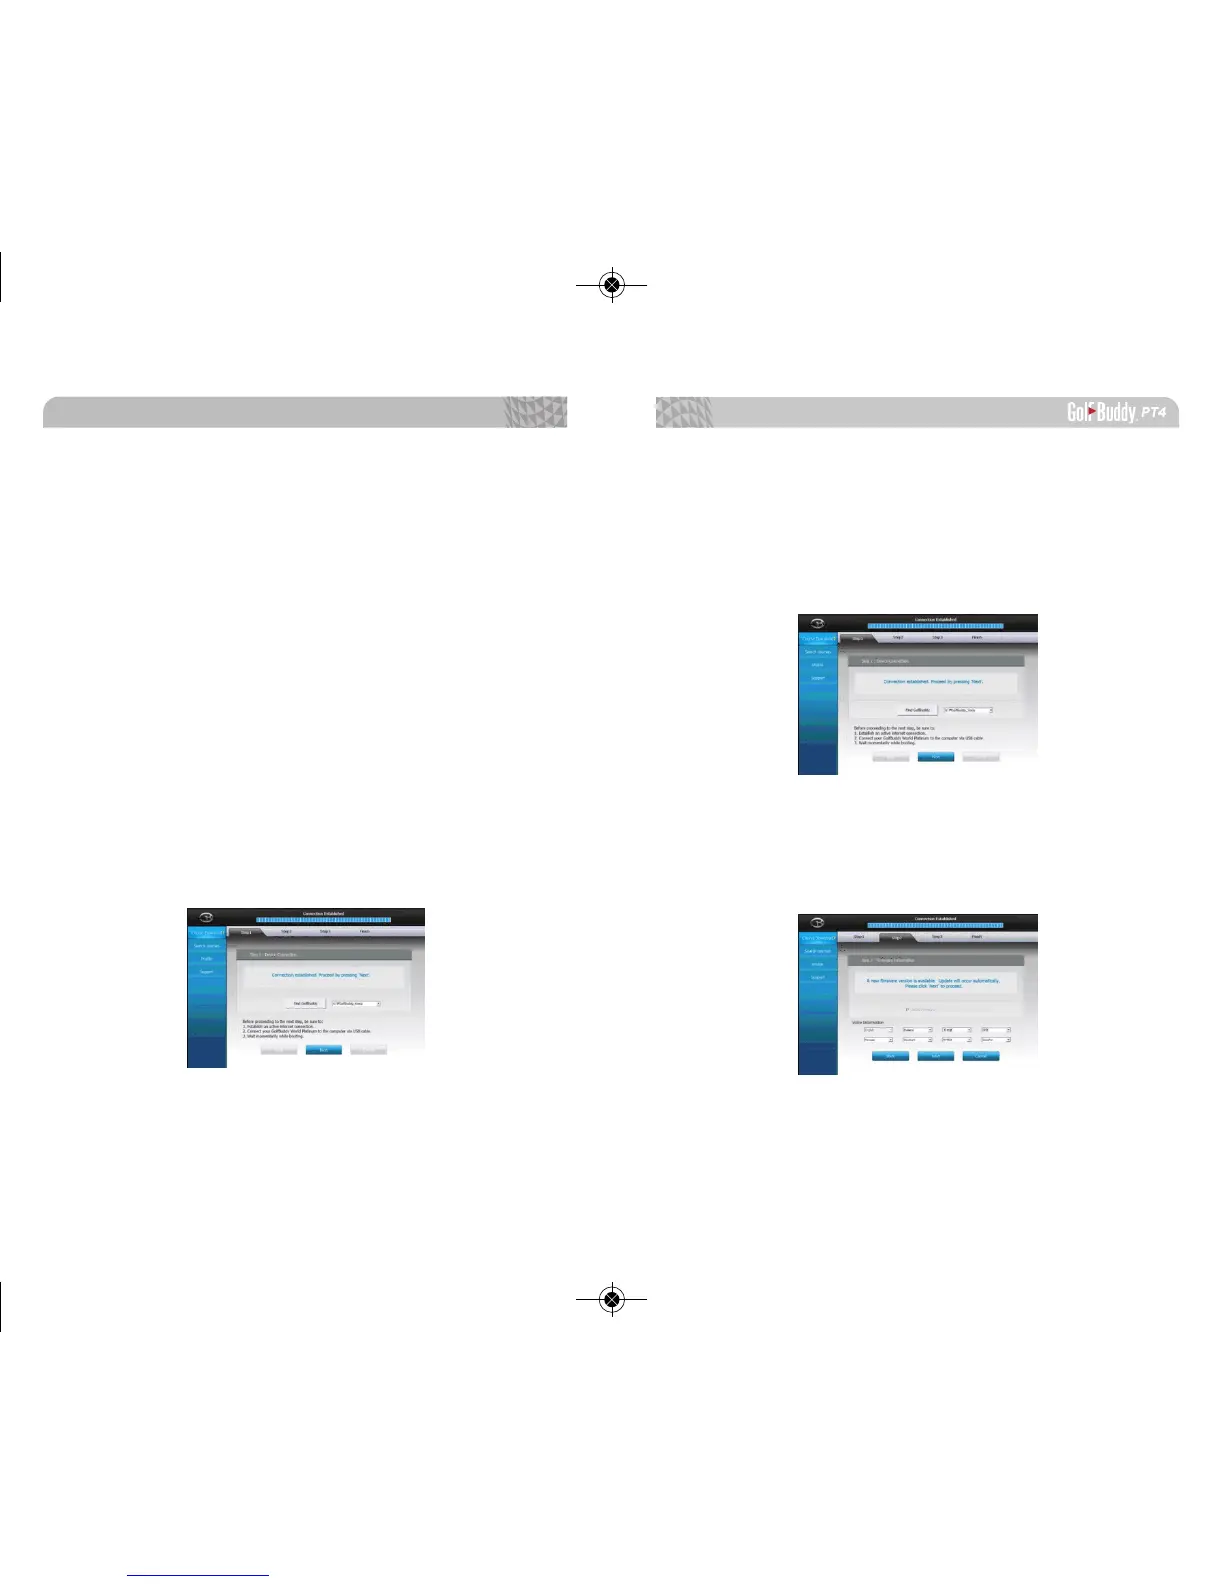
Once you get the “Connection Established” message,
please click “Next” to proceed to Step2. Firmware Update.
4.2. Step 2 : Firmware Update
At step 2, click “Next” to install the latest rmware. If the
rmware is already at the latest level, click “Next” to
proceed to step 3.
3. Registering your GolfBuddy PT4:
• Connect your GolfBuddy unit to a USB port on your
computer using the USB cable provided with the unit.
• After a short time, your GolfBuddy unit should show
an icon on the screen indicating it is connected to
the computer
Notes: You can disregard any driver download requests that
your computer may say is required.
• Click on the blue GB icon on your desktop and open
the Login Panel.
• Enter your User ID and Password. You should now see
a panel that indicates the GB Manager is searching
for the device. After a short time, you will see “Con-
nection Established”. At this stage, your unit is suc-
cessfully registered to the User ID that you created
and will not be able to connect to any other User ID.
Software Updates
4544
 Loading...