This document is an Owner's Manual for a Goodman Aurora Series Split-Type Room Air Conditioner, covering models MSH093E21AXAA, MSH123E21AXAA, MSH183E21AXAA, and MSH243E21AXAA. It provides essential information for the safe installation, operation, and maintenance of the air conditioning unit.
Safety Precautions
The manual begins with crucial safety precautions, categorized as WARNINGS and CAUTIONS, to prevent serious damage, injury, or moderate injury to persons or property.
- Installation Warnings: Emphasizes that installation, repairs, maintenance, and relocation must be performed by authorized dealers or service technicians to avoid water leakage, electric shock, or fire.
- Product Use Warnings: Advises against operating the unit if abnormal situations like burning smells occur, to immediately turn off the unit, pull the power plug, and contact the dealer. It warns against inserting objects into air inlets/outlets, using flammable sprays near the unit, operating it near combustible gases or in wet rooms, and prolonged direct exposure to cool air.
- Electrical Warnings: Stresses the importance of using the specified power cord, keeping the power plug clean, and unplugging the unit by holding the plug firmly. It prohibits the use of extension cords or connecting other appliances to the same outlet as the air conditioner to prevent fire or electric shock.
- Cleaning and Maintenance Warnings: Instructs users to turn off and unplug the unit before cleaning to avoid electrical shock. It warns against using excessive water or combustible cleaning agents, which can cause fire or deformation.
- Cautions: Highlights the need for thorough ventilation if the air conditioner is used with burners or other heating devices to prevent oxygen deficiency. It recommends turning off and unplugging the unit during long periods of non-use or storms. Users are cautioned not to operate the unit with wet hands, use it for unintended purposes, climb on the outdoor unit, or operate it for extended periods with open doors/windows or high humidity.
Unit Specifications and Features
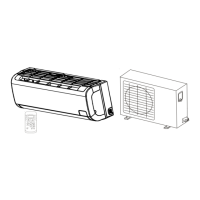
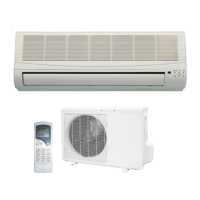
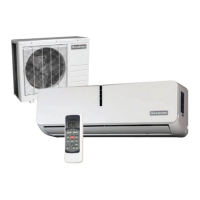
The manual details the physical components of the indoor unit, including the front panel, louver, functional filter, display window, and, for some units, a power cable and remote control holder. The display window shows various codes indicating the unit's status:
- "ON" for 3 seconds when TIMER ON, FRESH, SWING, TURBO, SILENCE, or SOLAR PV ECO features are activated.
- "OF" for 3 seconds when TIMER OFF, FRESH, SWING, TURBO, SILENCE, or SOLAR PV ECO features are turned off.
- "CF" when the anti-cold air feature is on.
- "dF" when defrosting.
- "SC" when the unit is self-cleaning.
- "FP" when freeze protection is activated.
- " " when the wireless control feature is activated (some units).
- "88" when the ECO function (optional) is activated, with '88' illuminating gradually to show the set temperature.
In Fan mode, the unit displays the room temperature; in other modes, it displays the temperature setting.
The manual provides optimal temperature ranges for COOL, HEAT, and DRY modes for both Inverter Split Type and Fixed-speed Type units. Operating outside these ranges may activate safety protection features, leading to suboptimal performance. For outdoor units with auxiliary electric heaters, it is recommended to keep the unit plugged in below 0°C (32°F) for smooth performance.
To optimize performance, users are advised to keep doors and windows closed, limit energy usage with TIMER ON/OFF functions, avoid blocking air inlets/outlets, and regularly inspect and clean air filters.
Other Features
- Auto-Restart: If power is lost, the unit automatically restarts with prior settings once power is restored.
- Anti-mildew (some units): When turned off from COOL, AUTO (COOL), or DRY modes, the air conditioner operates at very low power to dry condensed water and prevent mildew growth.
- Wireless Control (some units): Allows control via a mobile phone and a wireless connection. USB device access, replacement, and maintenance require professional staff.
- Louver Angle Memory (some units): The louver automatically resumes its former angle when the unit is turned on.
- Refrigerant Leakage Detection (some units): The indoor unit displays "EC" when it detects refrigerant leakage.
For advanced functionalities like TURBO mode and self-cleaning, users are directed to the Remote Control Manual.
Setting Angle of Air Flow
- Vertical Angle: The SWING/DIRECT button adjusts the louver's vertical angle by 6° with each press. Holding the button for 3 seconds activates continuous up-and-down swinging, which can be stopped by pressing it again.
- Horizontal Angle: For most units, the horizontal angle is manually adjusted by gripping the deflector rod. Some units allow remote control adjustment.
- Louver Angle Notes: In COOL or DRY mode, avoid setting the louver too vertically for extended periods to prevent water condensation. In COOL or HEAT mode, an overly vertical louver angle can reduce performance due to restricted airflow. Users are warned not to move the louver manually, as this can desynchronize it; if this occurs, the unit should be turned off, unplugged for a few seconds, and restarted to reset the louver. A caution advises against putting fingers near the blower and suction side due to the high-speed fan.
Sleep Operation
The SLEEP function, activated via remote control, reduces energy use during sleep. In COOL mode, the temperature increases by 1°C (2°F) after 1 hour, and another 1°C (2°F) after a second hour. In HEAT mode, the temperature decreases by 1°C (2°F) after 1 hour, and another 1°C (2°F) after a second hour. The new temperature is maintained for 5 hours, after which the unit automatically turns off. This function is not available in FAN or DRY mode.
Manual Operation (Without Remote)
In case of remote control failure, the unit can be operated manually using the MANUAL CONTROL button on the indoor unit. This is intended for testing and emergency use only.
- Procedure: Open the front panel, locate the MANUAL CONTROL button, press once for FORCED AUTO mode, press again for FORCED COOLING mode, and a third time to turn the unit off. Then, close the front panel. Regular operation should be restored using the remote control.
Care and Maintenance
- Cleaning Indoor Unit: Before cleaning, always turn off and disconnect the power supply. Use a soft, dry cloth; for dirtier surfaces, a cloth soaked in warm water. Do not use chemicals, chemically treated cloths, benzene, paint thinner, polishing powder, or solvents, as these can damage the plastic surface. Avoid water hotter than 40°C (104°F) on the front panel to prevent deformation or discoloration.
- Cleaning Air Filter: A clogged filter reduces cooling efficiency and can be unhealthy. Clean the filter every two weeks.
- Lift the front panel.
- Grip the filter tab, lift, and pull it out.
- If present, unclip the small air freshening filter from the larger filter and clean it with a hand-held vacuum.
- Clean the large air filter with warm, soapy water and a mild detergent.
- Rinse with fresh water and shake off excess.
- Dry in a cool, dry place away from direct sunlight.
- Re-clip the air freshening filter (if applicable) and slide the filter back into the indoor unit.
- Close the front panel.
- Caution: Do not touch the air freshening (Plasma) filter for at least 10 minutes after turning off the unit. Avoid touching metal parts when removing the filter to prevent cuts. Do not use water to clean the inside of the indoor unit to prevent electrical shock. Do not expose the filter to direct sunlight when drying to prevent shrinkage.
- Air Filter Reminders (Optional):
- Cleaning Reminder: After 240 hours, "CL" flashes on the indoor unit display. Reset by pressing the LED button on the remote 4 times or the MANUAL CONTROL button 3 times.
- Replacement Reminder: After 2,880 hours, "nF" flashes. Reset using the same method as the cleaning reminder.
- Maintenance - Long Periods of Non-Use: If the unit won't be used for a long time, clean all filters, turn on the FAN function until the unit dries completely, turn off the unit, disconnect power, and remove remote control batteries.
- Maintenance - Pre-Season Inspection: Before periods of frequent use, check for damaged wires, clean all filters, check for leaks, replace batteries, and ensure all air inlets and outlets are unobstructed.
- Caution: All outdoor unit maintenance and cleaning, as well as any unit repairs, must be performed by an authorized dealer or licensed service provider.
Troubleshooting
The manual lists common issues that are not malfunctions and typically don't require repairs:
- Unit not turning on: Due to a 3-minute protection feature preventing overloading.
- Unit changing from COOL/HEAT to FAN mode: To prevent frost formation; it will resume the selected mode once the temperature increases.
- Indoor unit emitting white mist: Caused by a large temperature difference in humid regions.
- Both indoor and outdoor units emitting white mist: When restarting in HEAT mode after defrosting, due to moisture.
- Indoor unit noises: Rushing air when the louver resets, or squeaking from plastic part expansion/contraction in HEAT mode.
- Both indoor and outdoor units making noises: Low hissing from refrigerant flow, or squeaking from plastic/metal parts due to temperature changes.
- Outdoor unit noises: Different sounds based on operating mode.
- Dust emitted from units: Accumulated dust during non-use.
- Unit emitting bad odor: Absorbed odors from the environment, or moldy filters.
- Outdoor unit fan not operating: Fan speed controlled to optimize product operation.
- Erratic/unresponsive operation: Interference from cell phone towers or remote boosters. Solutions include disconnecting/reconnecting power or pressing the ON/OFF button on the remote.
For persistent problems, the manual advises checking specific points before contacting a repair company:
- Poor Cooling Performance: High temperature setting (lower it), dirty heat exchanger (clean it), dirty air filter (clean it), blocked air inlet/outlet (remove obstruction), open doors/windows (close them), excessive heat from sunlight (close windows/curtains), too many heat sources in the room (reduce them), low refrigerant (check for leaks, re-seal, top off), or SILENCE function activated (turn it off).
- Unit not Working: Power failure (wait for power restore), power off (turn on), burned fuse (replace), dead remote batteries (replace), 3-minute protection (wait), or timer activated (turn off).
- Unit Starts and Stops Frequently: Too much/too little refrigerant (check for leaks, recharge), incompressible gas/moisture in system (evacuate, recharge), broken compressor (replace), or high/low voltage (install manostat).
- Poor Heating Performance: Extremely low outdoor temperature (use auxiliary heating device), or cold air entering through doors/windows (close them), low refrigerant (check for leaks, re-seal, top off).
- Indicator Lamps Flashing/Error Codes: If lamps flash or error codes (E0, E1, E2..., P1, P2, P3..., F1, F2, F3...) appear, the unit may stop or continue safely. Wait 10 minutes for self-resolution. If not, disconnect/reconnect power and turn on. If the problem persists, disconnect power and contact a customer service center, providing a detailed description and model number.
European Disposal Guidelines
The manual states that the appliance contains refrigerant and hazardous materials. It must not be disposed of as household or unsorted municipal waste. Options for disposal include designated municipal electronic waste collection facilities, retailer take-back when buying a new appliance, manufacturer take-back, or selling to certified scrap metal dealers. Disposing of the appliance in natural surroundings is harmful to health and the environment.