PAGE 5
LOCATION OF CONTROL
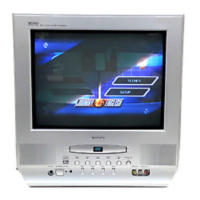
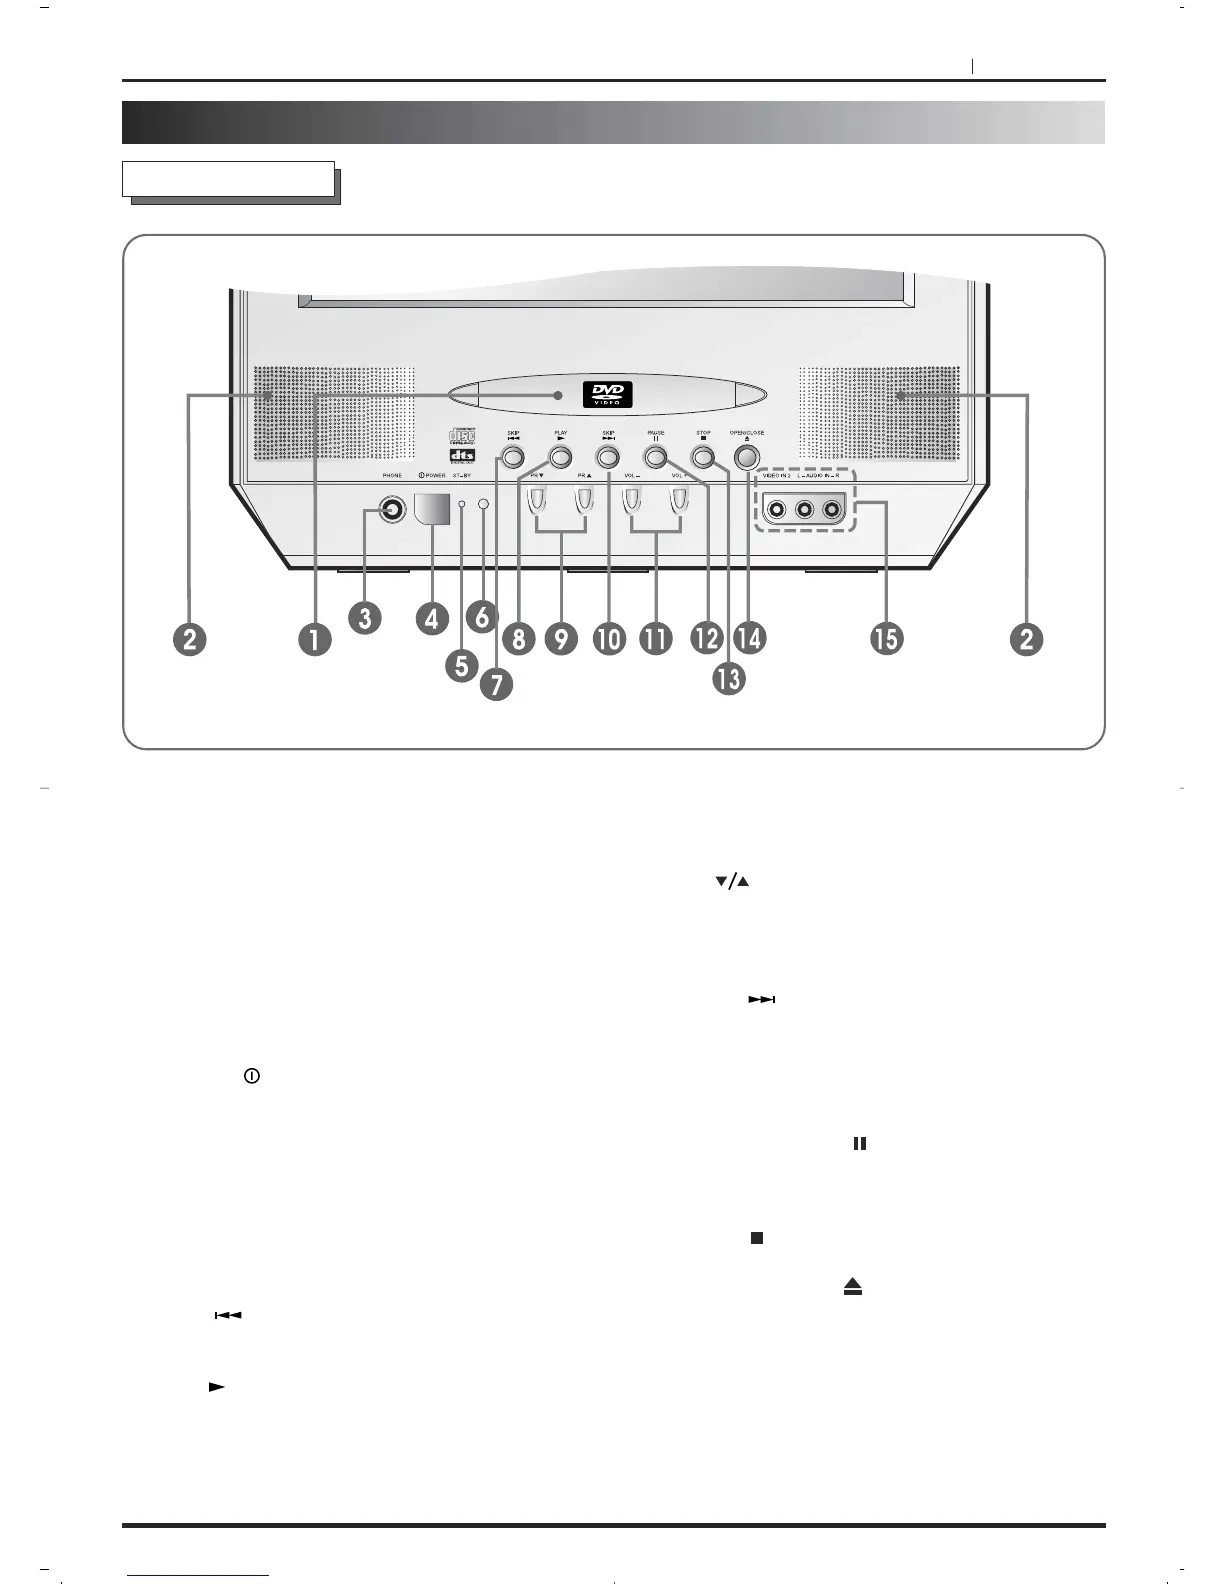
Front Cabinet
1. Disc Loading slot - To insert or remove a DVD
or CD disc.
2.
Loudspeakers
3. Headphone jack - Plug headphones with a mini
plug (3.5mm) into this jack.
4.
POWER( ) Button - Turn the unit AC power
on and off.
5.
ST-BY mode indicator - Lights up when the
power button is pressed to show the unit is on
stand-by.
6.
Remote sensor - The infrared signals from the
remote control are received here.
7.
SKIP( ) Button - Press to reverse skip a
chapter.
8. PLAY( ) Button - Press to start playback.
9.
PR( ) Button - Press to change to a higher
numbered channel set into memory and to a
lower numbered channel set into memory.
In the STANDBY mode, press to turn on the unit.
10.
SKIP( ) Button - Press to forward skip a
chapter.
11.
VOLUME(+ / –) Button - Press VOL + to
increase the volume and VOL – to decrease it.
12.
PAUSE/STEP( ) Button - This button
freezes the picture and advances it one frame
per press.
13.
STOP( ) Button - Press to stop the play back.
14.
OPEN/CLOSE( ) Button - Open or close
the disc tray.
15.
AUDIO/VIDEO IN JACKS (VIDEO 2) - Use
these inputs to connect units (e.g. a video
camera through a RCA cable) enabling you to
watch the video output on the TV screen.
DESCRIPTION OF CONTROLS
 Loading...