4
ROLE OF THE PRIMARY CAMERA
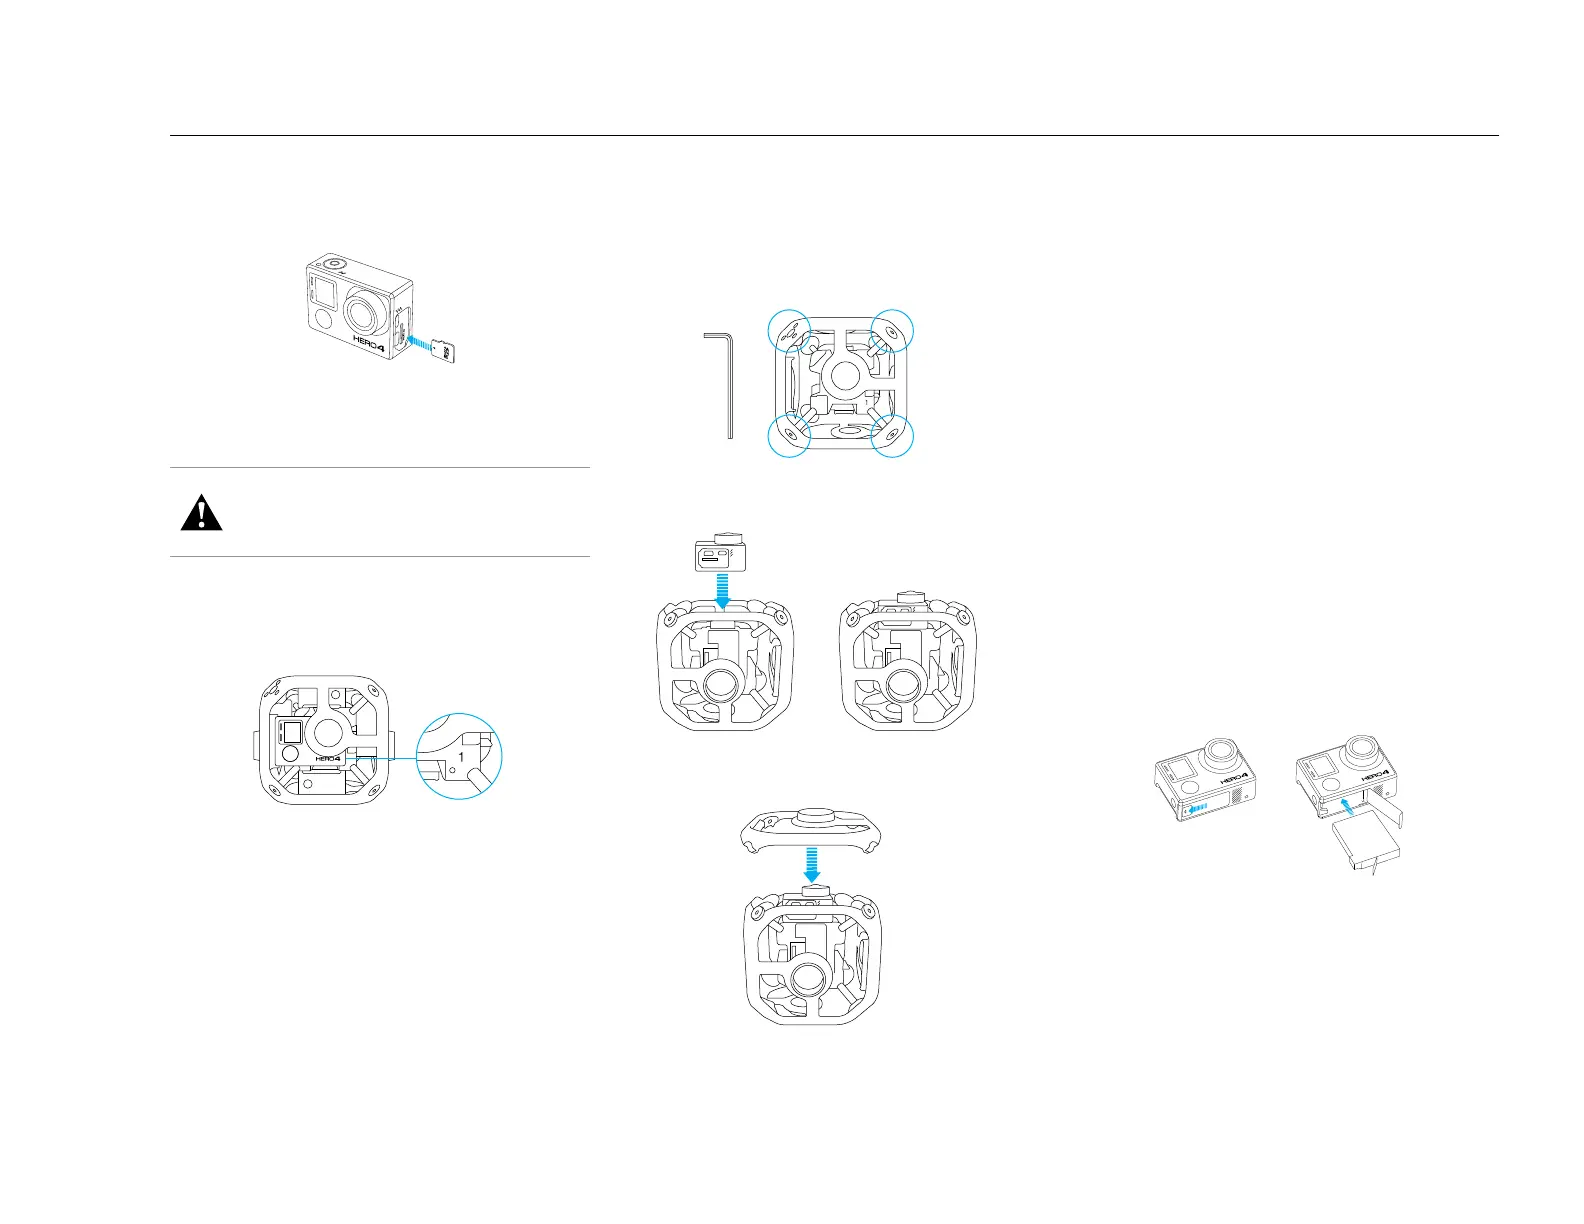
The camera that is connected to the inner cube and marked with 1 is
referred to as the primary camera. All other cameras are referred to as
secondary cameras.
The primary camera controls all cameras in the array for these functions:
• Powers all cameras on/off
• Connects to the Smart Remote so that all cameras can be
controlled remotely
• Displays Array Ready when the system is ready for use
• Displays Array Error when one of the secondary cameras experiences
an error
ASSEMBLING THE ARRAY
Installing the Cameras
The All Inclusive Omni package ships with the cameras already installed. If
you want to re-install a camera or if you have the Rig Only version of Omni,
follow the steps below.
1. Confirm that all cameras are HERO4 Black cameras. Other GoPros are
not supported.
SUPPLYING POWER TO THE RIG
You have two options for powering the rig: external power or the
camera batteries.
NOTICE: Do not switch from one power source to another (camera
batteries to external power or external power to camera batteries) without
first powering off the cameras. Failure to follow this guideline can lead to
unexpected powering off, interrupted recordings, and erratic Omni behavior.
Powering the Rig with External Power
For extended recording time, power the rig with an external power source.
1. Be sure that the battery for the external power unit is charged.
2. Remove the batteries from the cameras.
3. Connect the power cable to the power connector.
NOTICE: Do not connect a high-voltage power source to Omni. Omni
requires 5V input, but can be powered using a 12V to 5V step-down
converter, such as the Switronix XP-DV-5GP. The Omni power connector is a
2.5mm x 5.5mm polarity plug. The step-down converter has an 8A rating.
Powering the Rig with Camera Batteries + Charging in the Rig
With these options, you can charge the camera batteries without removing
the cameras from the rig.
• Using USB cables, connect the camera USB ports to the USB hub
(available with the All Inclusive Omni package).
• Use the power connector to connect the external power to the
inner cube.
The camera status lights turn on during charging and turn off when
charging is complete.
Powering the Rig with Camera Batteries + Charging Outside of the Rig
With this option, you must remove the cameras from the rig.
1. Insert the battery into the camera.
2. Connect the camera to a computer, USB hub, or other USB charging
adapter using the included USB cable. The camera status light turns on
during charging and turns off when charging is complete.
When charging with a computer, be sure that the computer is connected
to a power source. If the camera status light does not turn on, use a
different USB port.
For more battery information, see Battery (page 9).
MEMORY CARDS
HERO4 Black requires a microSD, microSDHC, or microSDXC memory card.
The card must have a minimum rating of Class 10 or UHS-I, and a capacity
of 32GB or 64GB. Visit gopro.com/help for the list of GoPro-tested
microSD cards.
NOTICE: Use care when handling memory cards. Avoid liquids, dust
and debris. As a precaution, power off the camera before inserting or
removing the card. Check manufacturer guidelines regarding use in
acceptable temperature ranges.
WARNING: Use caution when using your GoPro as part of your active
lifestyle. Always be aware of your surroundings to avoid injury to
yourself and others.
Abide by all local laws when using your GoPro and related mounts and
accessories, including all privacy laws, which may restrict recording in
certain areas.
/ Getting Started
2. Confirm that all cameras are using the same version of array firmware.
To obtain the latest array firmware for Omni, visit gopro.com/help
and log in to the Omni Support Hub. If you need to create a support hub
account, follow these instructions: https://community.gopro.com/
html/assets/GoProOmniSupportHub.pdf
3. Complete these steps for each camera:
a. Use the included hex key to loosen (but not remove) the screws on
one of the panels.
b. Gently pull the panel off of the frame.
c. Connect a camera to the HEROBus connector on the inner cube.
d. Align the outer panel with the lens, then gently slide the panel onto
the lens and move the corners into place.
e. Tighten the screws in a star pattern.
6. Tighten the screws for the panel.
7. Repeat steps 3-6 for the remaining cameras.


 To Next Page
 Loading...