Page 5For technical questions, please call 1-888-866-5797.Item 58892
SAFETYOPERATIONMAINTENANCE SETUP
Tool Set Up
TO PREVENT SERIOUS INJURY FROM ACCIDENTAL OPERATION:
Turn the Power Switch of the tool off and remove the batteries before adjusting tool
or installing accessories.
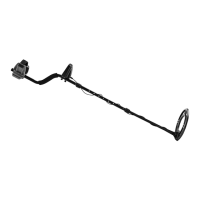
Assembling Shaft
1. Press button on Lower Shaft, then slide into
Center Shaft until button pops out of hole.
2. Press button on Center Shaft, then slide into
Upper Shaft until button pops out of hole.
3. Tighten Lock Nuts securely.
Attaching Search Coil
1. Remove Knob, Washers and Bolt.
2. Place Bushings inside both sides
of hole on Lower Shaft.
3. Place Search Coil over hole on Lower Leg. Thread
Bolt through assembly. Finger tighten Knob.
4. Hold the unit in a comfortable position, and
adjust the Shaft sections until the overall Shaft
is at the desired length. Adjust Search Coil
until it is parallel with the ground. Tighten
Knob securely, but do not overtighten.
Knob
Bolt
Search
Coil
Bushing
Lower
Leg
Bushing
Installing Batteries
1. Turn power off, then remove Battery Cover
from the back of the Control Box.
2. Insert batteries and replace the Battery Cover.
Notice: Do not install old and new batteries together.
Do not install alkaline, carbon-zinc or rechargeable
batteries together. Position batteries in proper
polarity. Do not use swollen or leaking batteries.
Note: When storing the unit for a week or more, remove
the batteries. Extend battery life by using Headphones,
as they require less power than the built-in speaker.
Battery
Cover
Attaching Control Box
1. Attach Control Box to Upper Shaft and
secure with Control Knob Screws.
2. Loosely wrap Search Coil’s Cable around Shaft and
connect it to the back of the Control Box. Rotate
the plug counter-clockwise to lock it into place.
3. Optional: Unplug the Cable and slip the
Cover over the Control Box with the elastic
band underneath. Plug the Cable back in.
Control Box
Cover
Cable
Using Headphones
WARNING! TO PREVENT SERIOUS INJURY: Do
not wear headphones while operating your detector
near high traffic areas. Pay attention to traffic safety.
Insert Headphone Plug into Headphone
Jack on the bottom of the Control Box.
Note: Speaker disables when
Headphones are plugged in.
CAUTION! TO PREVENT HEARING LOSS:
set the volume level to minimum before using
the Headphones, then adjust the level up to a
comfortable listening level. Extended high volume
listening can lead to permanent hearing loss.