22
NL
DK
DE
AR
FR
RU
ES
TR
IT
EN
SE
Limited will attempt to diagnose any technical issues over the phone or via email, based on the
customer’s description of the problem including videos/pictures of the faulty product sent to
our technical team. In certain situations, a physical examination of the tool may be required to
determine whether a technical issue falls within the scope of this 1-year limited warranty. If a
physical examination of the tool is required, shipping to our Las Vegas warranty center will be
covered by the customer, and return shipping will be covered by Nemo Power Tools.
WARRANTY DOES NOT APPLY TO FAILURES DUE TO:
• Freight damage.
• Misuse, overloading, or accidental activation of the tool in storage.
• Damage caused by parts or accessories not obtained from an authorized dealer or not
approved by Nemo Power Tools.
• Normal wear of moving parts or consumables, such as seals and lters.
7-YEAR LIMITED WARRANTY
This applies only to certain categories of tools. Please check with our Las Vegas Warranty
Center at +1 (702)-718-2433 if your tool category is eligible.
Registering your product
GRABO® products mostly include a basic warranty plan. Registering your product after your
purchase from a licensed dealer may extend your warranty and grant you further benets
(subject to your product type, location, and place of purchase). Registration is free and simple.
Please locate your product’s serial number and complete the provided form. Register online
for warranty: www.GRABO.com/REG
TROUBLESHOOTING
www.GRABO.com/GRABO-pro-troubleshoot
NOTICE: If you are having any issues with your digital display, please perform the following
steps to reset your digital display.
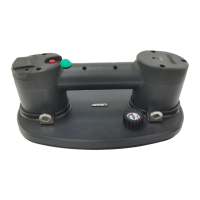
GRABO® Pro-Lifter20 learning mode/recalibration mode:
1. Place the GRABO® Pro-Lifter20 on a non-porous surface such as a polished tile.
2. Slide the power ON/OFF switch Ⓓ into the ON position.
3. Press the measurement unit selector Ⓕ for 10 seconds. When the red light turns green,
release the measurement unit selector Ⓕ.
4. Wait for about 5 seconds. The vacuum pump will start working. Let the device create full
suction. If suction does not start on its own, push the device downward to create a seal.
Full suction is reached when the digital display numbers have reached their highest point
and don't continue to increase.
5. When full suction is reached, press the measurement unit selector Ⓕ again for 3 seconds
until the green light ashes and the pump turns o.
6. Turn the device o and on again with the the power ON/OFF switch Ⓓ.
 Loading...