6 308572
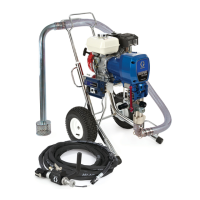
Operation
6. Pull the starter rope to start the engine. Brace one
foot on the pressure washer chassis, and pull the
starter rope out quickly. Pull and return the rope
until the engine starts.
CAUTION
Do not allow the starter rope to snap back against
the engine. Let the rope recoil gently to prevent
damage to the recoil.
NOTE: For easier starting, have one person start
the pressure washer while another person triggers
the gun.
If the engine is cold, start the engine with the
choke completely closed. In cool weather, you
might have to let the engine run with the choke
closed for the first 10 to 30 seconds. In warm
weather, open the choke completely as soon as
the engine starts.
If the engine is warm, start the engine with the
choke completely open or partially closed. When
the engine starts, open the choke completely.
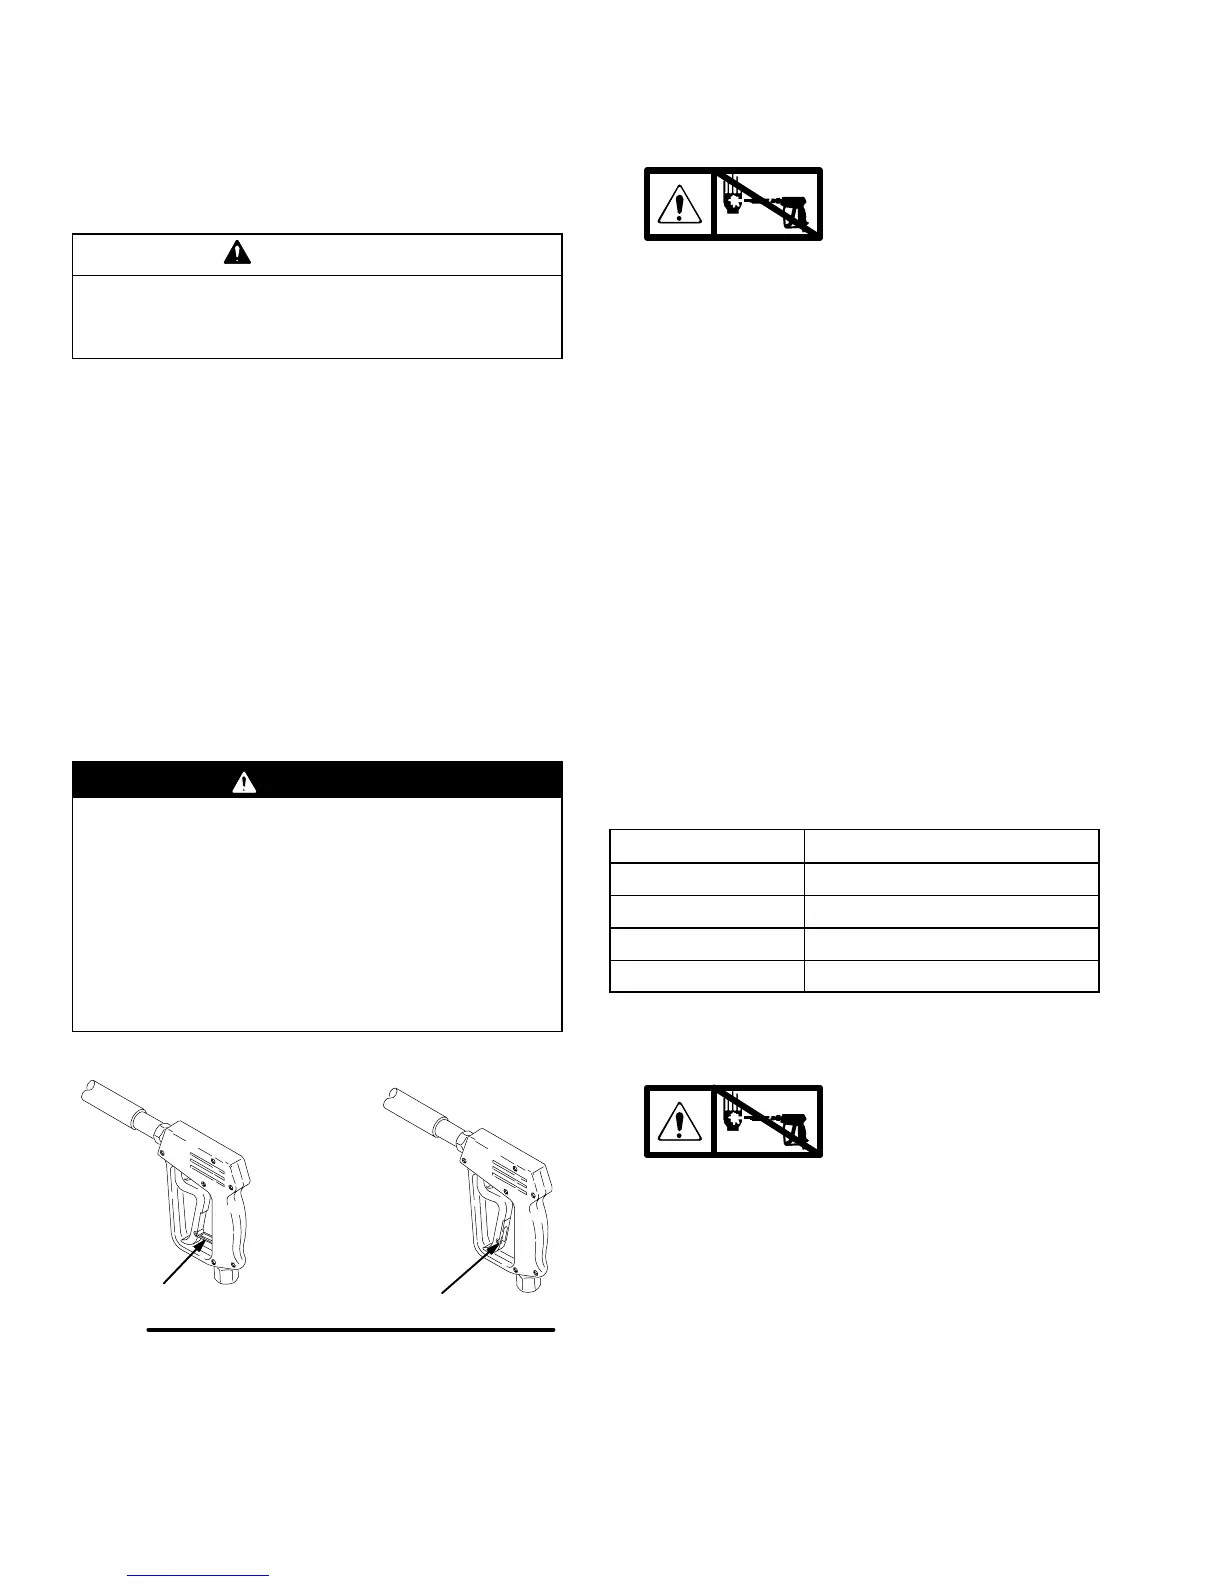
Trigger Safety Latch
WARNING
To reduce the risk of serious bodily injury, including
fluid injection and splashing in the eyes or on the
skin, always engage the trigger safety latch when
you stop spraying even for a moment. When
engaged, the trigger safety latch prevents the gun
from being triggered accidentally by hand or when
dropped or bumped. Be sure the latch is pushed
fully down, or it will not prevent the gun from being
triggered. See Fig. 1.
Fig. 1
engaged
disengaged
04612
Trigger Safety Latch
Chemical Injector Operation
1.
Relieve the pressure.
See page 5.
2. Insert the chemical filter (attached with clear tubing
to the chemical injector) into the container of
chemical.
3. Install the black large-orifice chemical tip. See
Installing and Changing Spray Tips below.
The large orifice of the chemical tip causes a drop in
pressure that actuates the chemical injector. Changing
back to a small-orifice spray tip deactivates the
chemical injector and produces high pressure for
rinsing. The chemical filter can be left in the chemical
container during high-pressure use. To regulate the
flow rate of the chemical, turn the chemical adjustment
knob on the injector. Maximum chemical flow is a full
two turns counterclockwise from the CLOSED
(clockwise) position.
Installing and Changing Spray Tips
Spray tips have 4- or 5-digit numbers on them. The
first two digits are the spray angle. Select the spray tip
appropriate for your application. Tip holding holes are
provided on the chassis.
Spray Tip Number
Spray Pattern Fan Angle
00XXX 0_ blaster (red)
15XXX 15_ (yellow)
25XXX 25_ (green)
40XXX 40_ (white)
NOTE: The chemical injector tip is brass and has a
large opening and a black plastic cap.
1.
Relieve the pressure.
See page 5.
2. Point the gun and wand away from yourself and
anyone else.
3. Without holding your hand over the spray tip (A),
pull back the quick coupler ring (B). Remove the
current tip, and install a different one. Then push
back the ring. See Fig. 2.