25-30 cm
(10-12 in.)
1
3
2
4
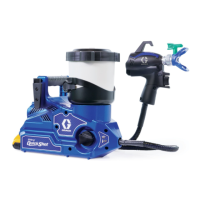
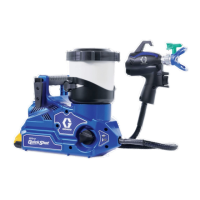
SPRAY CUP REFILLS
CLEANUP AND STORAGE
continued
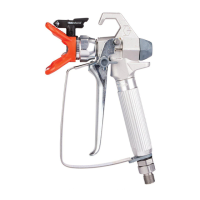
CLEAR TIP CLOGS
PAUSE IN SPRAYING
CLEANUP AND STORAGE
Circulate Cleaning Fluid:
• Fill cup half-full of water
• Reinstall Cup Lid
• Verify Storage Plug is open
• Verify Prime Knob is pointed up to
PRIME position and turn Spray Tip to
UNCLOG position.
• Disengage Trigger Lock and turn Flow
Control to 10. Point Spray Gun into a
waste pail and trigger for 15 sec.
Spray Cleaning Fluid:
• Turn Prime Knob forward to SPRAY
position and verify Spray Tip is in the
UNCLOG position.
• Point Spray Gun into a waste pail and
trigger until cleaning fluid is emptied
from the Cup.
Clean Cup:
• Verify cup is empty and remove cup
from sprayer by depressing the Cup
Release Lever and rotating Cup out of
Cup Support.
• Clean Cup, Cup Lid, and Pump Filter
in warm water.
• Wipe out Cup Support with wet rag
and reinstall Cup, Pump Filter and
Cup Support .
Repeat steps 4 and 5 as needed until clean.
Storage:
• Circulate and spray a small amount
of Pump Armor Storage Fluid.
• Engage Trigger Lock
• Turn Prime Knob to PRIME position.
• Remove Battery, Spray Tip and Spray
Tip Guard.
• Clean Spray Tip and Spray Tip Guard
with warm water and a old tooth
brush and reinstall onto gun.
• Turn Spray Tip 90 degrees for storage
and CLOSE Storage Plug on Cup Lid.
Engage Trigger Lock and turn Prime
Knob up to PRIME position to relieve
system pressure.
Remove sprayer from Tool Belt. Remove
Cup Lid from Cup and pour extra paint
back into paint can.
Remove Pump Filter from cup and set
aside for cleaning.
Engage Trigger Lock and
Turn the Prime Valve Knob
up to PRIME position to
relieve system pressure.
If desired, remove Sprayer
from the Tool Belt by
pressing the Holster
Release Clip and pulling up
on the Sprayer.
Cup refills can be performed while wearing the sprayer on the Belt
or after removing the sprayer from the Belt and setting it on a flat
surface.
Remove the cup lid from
the cup.
• The cup lid can hook onto
sprayer as shown while
refilling cup.
Remove the Pump Filter
and clean debris from the
filter screen.
Reinstall the Pump Filter
in the bottom of the cup.
Refill the cup with paint and reinstall Cup Lid.
Follow STARTUP instructions to proceed.
Paint will dry quickly and cause clogs in the sprayer. Follow these
steps whenever you pause spraying for 5 minutes to 2 hours
.
Engage Trigger Lock and remove
Battery from sprayer.
Turn Prime Knob up to PRIME position
to relieve system pressure.
Turn Spray Tip 90 degrees to seal
orifice from drying out.
Close Storage Plug in Cup Lid to seal
material in Cup.
SPRAY
If you encounter a Spray Tip clog,
Reverse the Spray Tip and spray into a
waste area to remove the clog. Return
the Spray Tip to spray position to
spray. See Owners Manual.
UNCLOG
Set Flow Control to
setting #1 (lowest
setting).
Pointing at a piece of scrap cardboard, pull the Trigger to test
the spray pattern. Adjust the following to achieve desired spray
pattern:
• Speed Control
• Hand Speed
• Distance from surface
• Spray Tip Orientation
EVEN FINISH
Good Spray Pattern
25-30 cm (10-12 inches)
parallel from surface
Aim gun here to overlap
stroke by 50%
TAILS - Gaps at edges Spray Tip Orientation
Vertical
Horizontal
Tip Wear
Pressure
too low
©2022 Graco Distribution BV 3A9323ENEU-A 06/23. Printed in Europe.
Source Manual: 3A9301, MM 3A9323.
4
5
6
7
8
1
2
3
4
5
6
1
2
3
1
2
3
4
1
2
www.graco.com
 Loading...