Repair manual GRAMMER seat suspension MSG95EAC – November 2012
Material no. 1 277 338
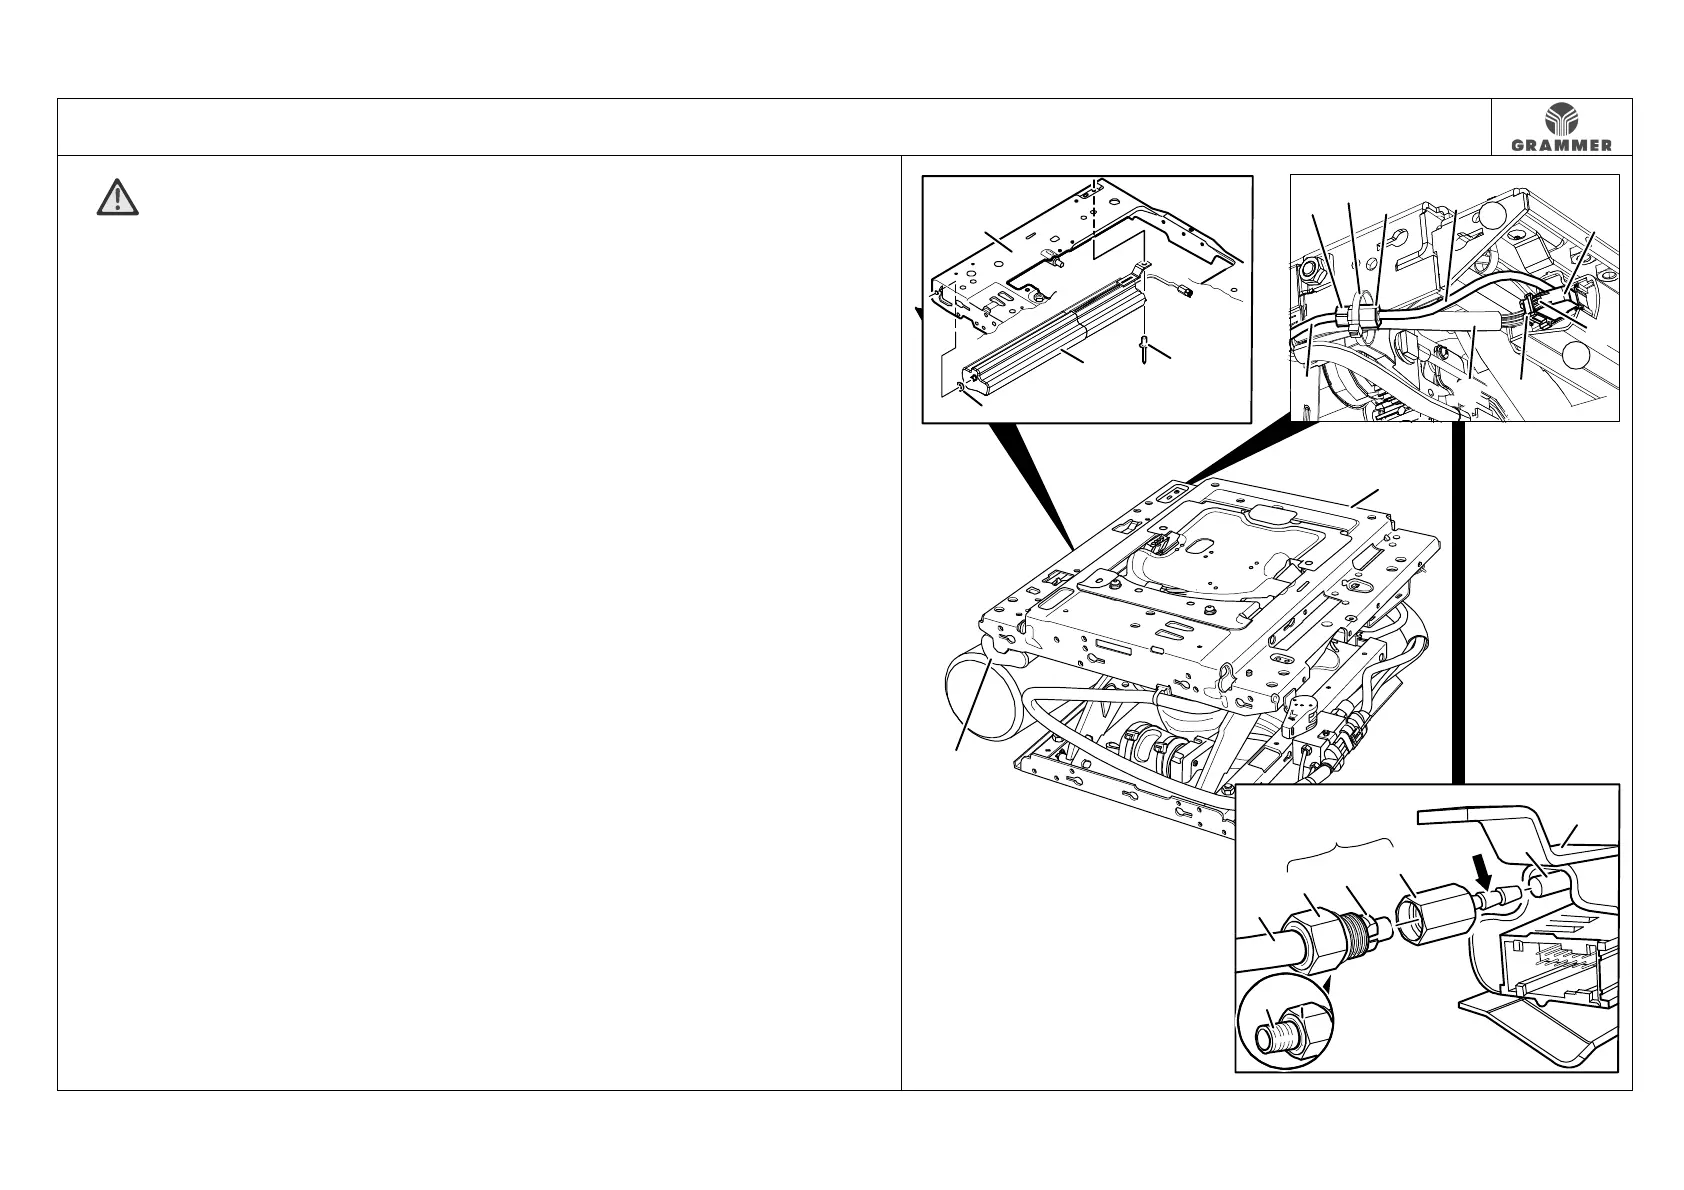
3.11 Control / air reservoir – removal and installation
Page 2 of 2
9 ATTENTION Damage! Take care
not to damage the air hose (6).
Bend open the retaining ring (9) at the
opening and pull it off at the air hose
(6).
Note:
The quick fastener coupling (14) is
preassembled at the new control / air
reservoir (1).
Installation notes:
• Pull off the existing protective cap
(15) at the quick-release fastener
screw (7).
• Insert the air hose (6) into the quick-
release fastener screw (7) as far as
possible, then pull it back approx
1 mm.
• Quick fastener coupling (14) is not
preassembled at the new control /
air reservoir (1):
Push the air hose (10) completely onto
the mandrel profile (arrow) of the quick-
release fastener nut (8).
10 Bore out the rivet head and drive out
the blind rivet (4).
Installation note:
The control / air reservoir (1) is
riveted onto the upper suspension
part (2) from below.
11 Detach the control (1) at the upper
suspension part (2) and remove it.
12 Pull off the sealing ring (3) at the
control (1).
13 Re-install the components in the
reverse order of their removal.
Note:
After installation of the new programmed
control / air reservoir (1), a calibration with
the sensor module has to be carried out
(learning program).
Pull the handle for height adjustment
quickly upwards three times (within 2
seconds) with the seat being empty.
Then (within the next second), press the
handle for height adjustment down for
exactly 3 seconds. The completed
calibration with the sensor module is
acknowledged by the compressor being
started twice. If this does not happen, the
process has to be repeated.
2867
3
2
4
1
7
6
8
1
9
10
14
7
15
11
12
1
13
7 8
16
5
2
10
6
2
1