~ 3 ~ ~ 4 ~
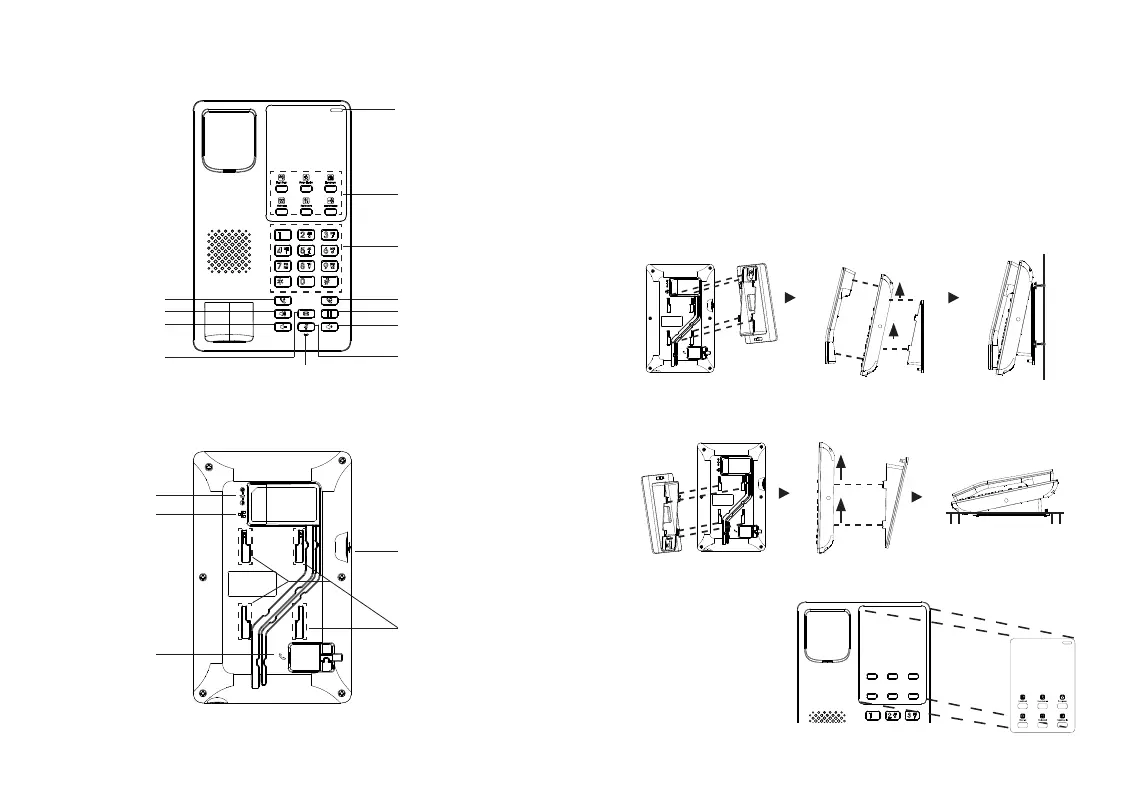
GHP620/W & GHP621/W DESCRIPTION:
Wall Mount
Front panel
Back panel
Desktop Installation
1. On the wall where the GHP620/W & GHP621/W will be mounted, mark two
dots with 100mm distance in between vertically.
2. Using a drill, make a hole on each marked dot. Put a plastic expansion bolt
and screw (not provided) into each hole. Leave enough space on the screws
to mount the GHP620/W & GHP621/W.
3. Attach the wall mount spacers to the slot for wall mount spacers on the back
of the phone.
4. Mount the GHP620/W & GHP621/W on the screws using its “Wall Mount
Slots”.
Flash
Volume Down Key
Softkeys
Redial
Alphanumeric
Keypad
Mute Indicator
Volume Up Key
HoldSpeaker
LAN Port
Mute
USB Type-C
Port
Wall Mount Stand
Slots
Message
Power
Handset Port
Message Waiting
Indicator
Note: The LED for the message waiting indicator will ash in green when
there is a message waiting.
PHONE SETUP:
Desktop
Wall
For installing the phone on the table with the phone stand, attach the phone
stand to the bottom of the phone where there is a slot for the phone stand.
INSTALLING THE FACEPLATE:
1. Remove the release
paper from the back
of the faceplate.
2. Stick the faceplate on
the indicated area.
Please refer to the
illustration.

 Loading...