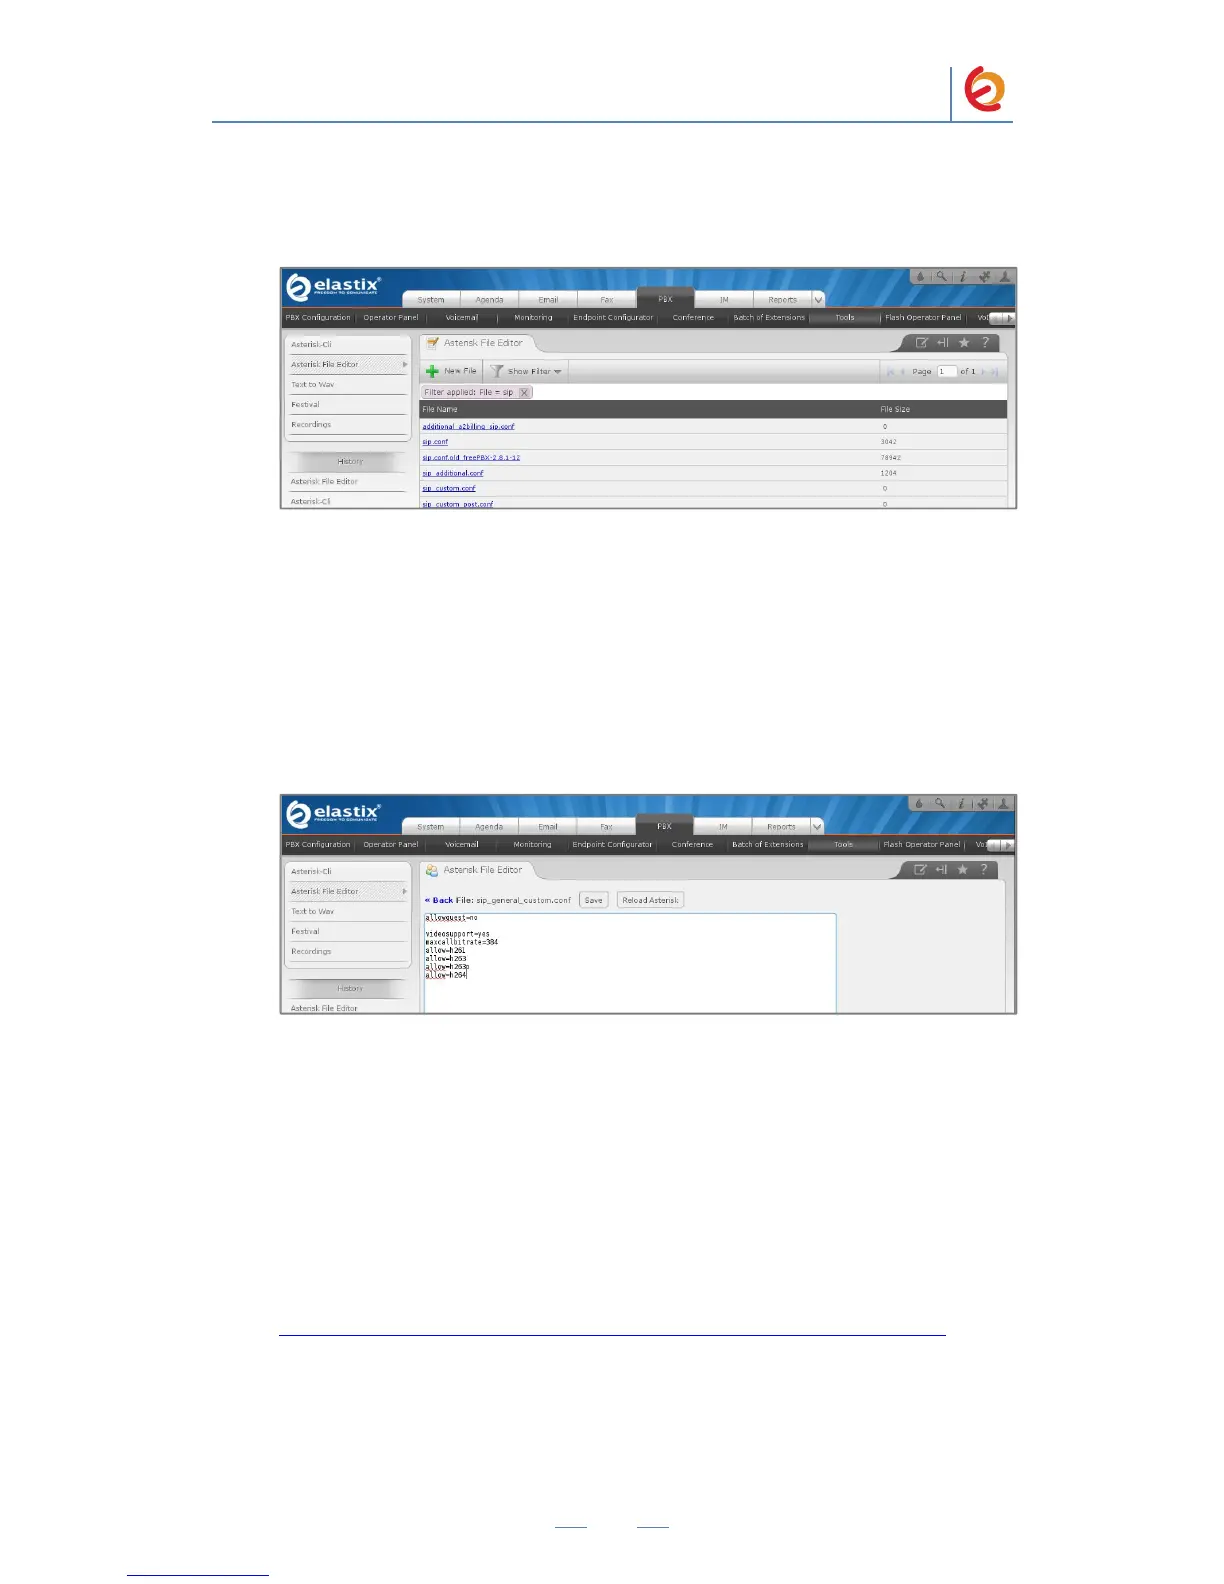
11. Go to “PBX => Tools => Asterisk File Editor”, find a file called
“sip_general_custom.conf” by clicking on “Show filter” button (Figure 4-8):
Figure 4-8. Asterisk File Editor
12. Edit the file by adding the following information (Figure 4-9):
videosupport=yes
maxcallbitrate=384
allow=h261
allow=h263
allow=h263p
allow=h264
Figure 4-9. Editing “sip_general_custom.conf” file
13. When finish, click on “Save” and “Reload Asterisk” button in that order.
14. With this you have finished configuring Elastix Server. Now we will set the
Grandstream GXV3615.
To register the Grandstream GXV3615, you will need to enter the information from the
extension created on the Elastix Server into the camera by logging into the Grandstream
GXV3615 WebUI.
Go to the Grandstream GXV3615’s WebUI by pointing your browser to its IP address.
For the initial configuration, refer to the Grandstream GXV3615 User Manual found at:
http://www.grandstream.com/index.php/products/ip-video-surveillance/gxv3615

 Loading...