15. When the WebUI is loaded, go to “Configuration” link located on the right corner of
the page (Figure 4-10).
Figure 4-10
16. Use the information from the Add SIP Extension page (Figure 4-4) to enter the
following necessary information on “Basic Settings => SIP” section (Figure 4-11):
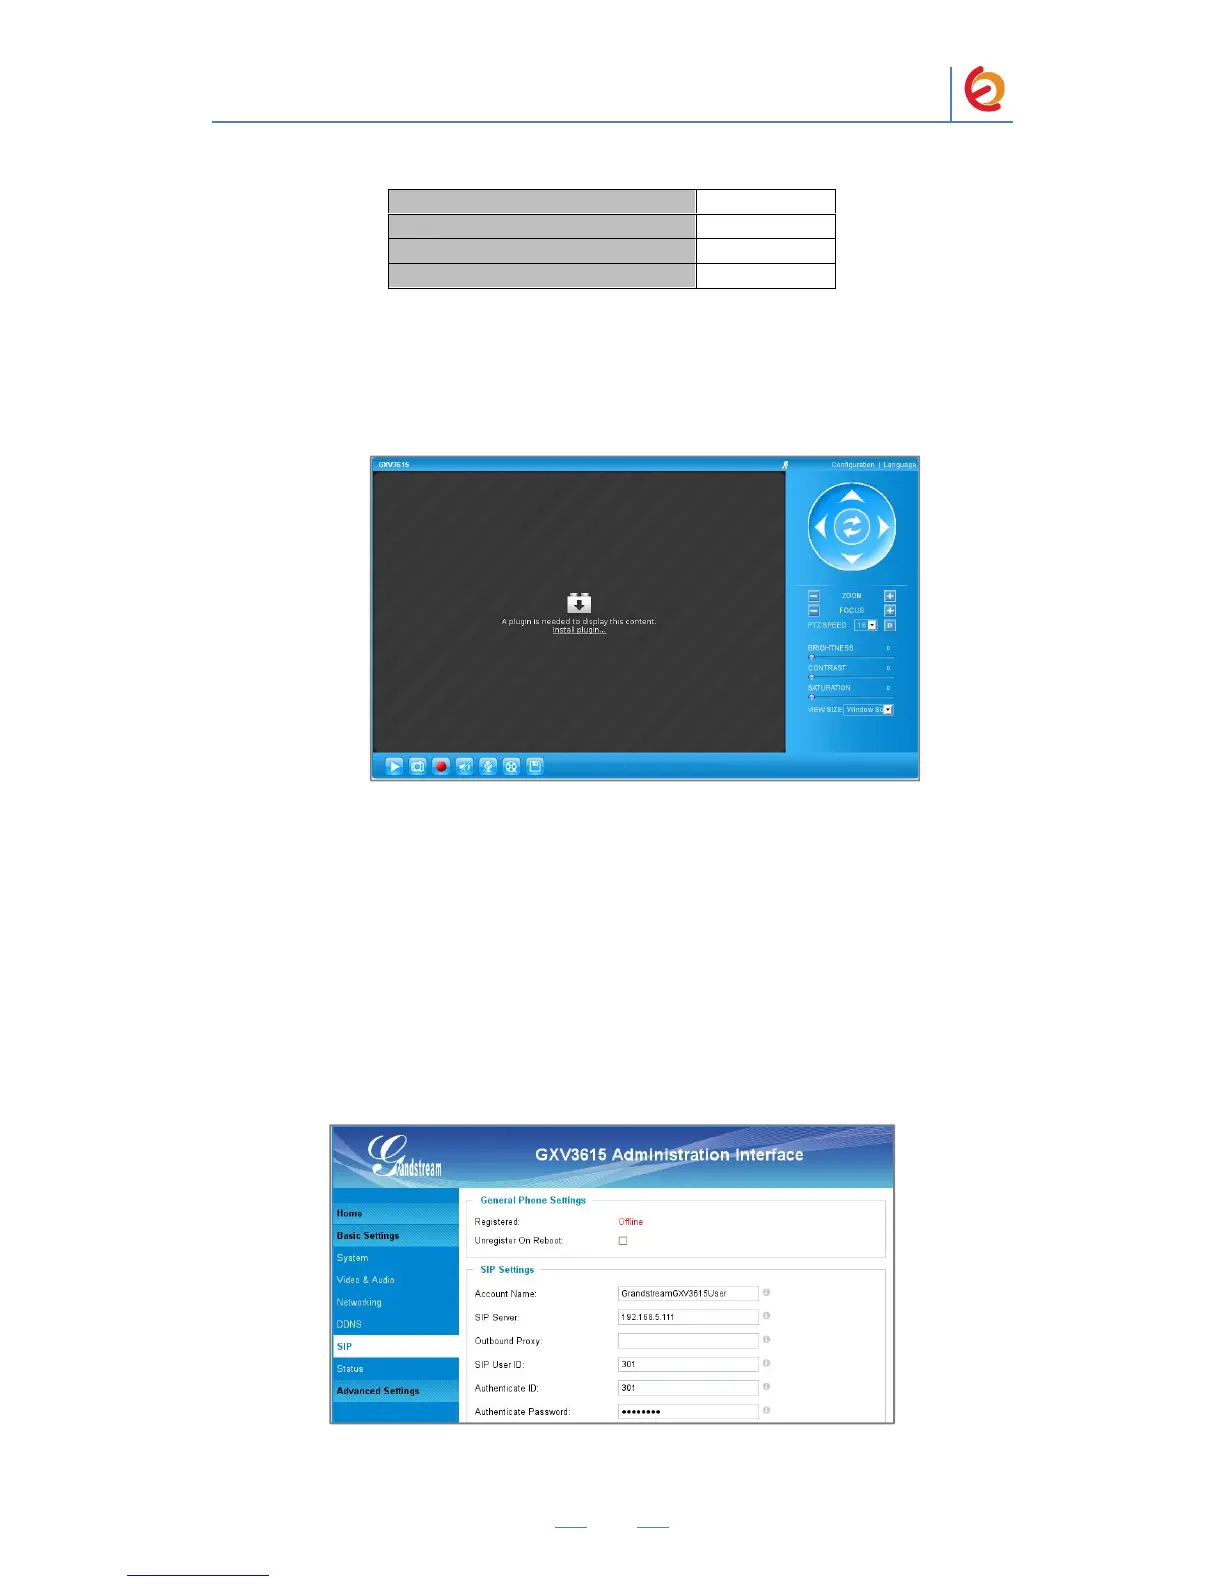
SIP Settings
Account name: The local name (GrandstreamGXV3615User in this example)
SIP Server: Elastix Server’s IP Address (192.168.5.186 in this example)
SIP User ID: (301 in this example)
Authenticate ID: (301 in this example)
Authenticate Password: (‘h7Dka3Rf9si0t’ in this example)
Figure 4-11. Account Configuration

 Loading...