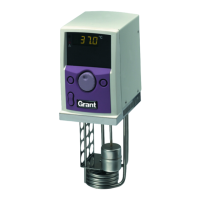
4.4 Temperature Measurement
With reference to the DISPLAY
CIRCUIT DIAGRAM the temperature
measurement probe is connected via PL5, to
pins 6 & 7 of IC3. IC3 is an A/D converter
whose digital output is fed to the processor
IC9. Diode D1 with R4 C9 & C10 provides
the reference voltage for the A/D converter.
The required temperature is set by feeding
pulses from an encoder mounted on the pcb
and controlled from the control knob on the
front of the unit, to pins 12 and 16 of the
processor IC9.
The A/D output measurement of temperature
is compared with the set temperature in the
processor IC9, this produces an error signal
which is converted to an analogue signal in
D/A converter IC8.
The analogue signal from IC8 is amplified by
IC1 and fed to the opto-isolator on the
POWER SUPPLY PCB via PL7 pins 4 & 5.
The processor displays the liquid
temperature on four LED displays via LED
driver IC7.
The processor clock is provided by crystal
XT1 and runs at 8 MHz. IC6 is a divider
which supplies clock pulses to IC3 at 2Mhz.
SW1 and SW2 are carbon track switches,
they enable the user to interface with the
processor via the 'F' (function) and 'S' (set)
buttons on the front panel.
IC10 is a programmable memory which
stores the parameters calculated for the unit
calibration.
4.5 Temperature Control.
With reference to the POWER SUPPLY
CIRCUIT DIAGRAM it can be seen that the
analogue signal from IC1 on the display
board is fed to opto isolator IC1 through PL 7
and then to pin 4 of IC2 via potential divider
R7 and R2. Trigger pulses to drive the triac
are generated when a comparator in IC2
detects that the voltage at pin 4 is greater
than the proportional control voltage at pin 3.
This proportional control voltage is provided
by the output of a low frequency ramp
generator ( 0.5V to 1.75V d.c.) which
appears at pin 1 and is fed to pin 3 through
R5.
Fig 2
Fig 1
The triac gating circuit delivers current pulses
to the triac gate at zero voltage crossing of
the a.c. supply.
This minimises interference caused by the
switching of the triac. The zero voltage
crossing points are sensed at pin 8 of IC2 via
R3.
When the set temperature is higher than the
probe temperature, an output at the zero
mains crossing points from IC2 pin 6
switches on the triac IC3 turning the heater
on. When the set temperature is lower than
the probe temperature the heater is switched
off
GD100/GD120
Part No. 17592/Issue 1 July 2002
Page 8