26
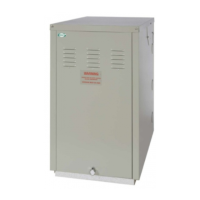
Grant Vortex Outdoor Module
5 - BOILER INSTALLATION
5 Ensure that the cable clamp is tightened and that all
cables are secure.
6 Replace the cover on the control panel, with the
yellow warning label facing outwards and secure with
the three screws.
Do not switch on the electrical power to the
Outdoor Module at this stage.
See Fig. 6
If a two pipe system is to be used refer to Section 4.4.6.
1 Remove the plug from the fuel pump oil inlet
adaptor and connect the elbow of the flexible fuel
line supplied with the boiler.
2 Connect the flexible fuel line to the rigid supply
using the adaptor supplied. The supply enters the
enclosure through one of the holes in the bottom of
the side panels.
3 If an external control system is to be connected to the
boiler (e.g. a S-plan system with programmer, room
thermostat, cylinder thermostat, motorised valves,
etc.), connect the 'switched live' from the control
system to terminal 1. For an example of connecting a
typical control system, see Fig. 25.
4 If the circulating pump is to be fitted within the
boiler enclosure, the pump live must be connected
to terminal 7 of the boiler terminal block.
Pass the pump power supply cable through the
cable grommet in the control panel, through the
cable clamp and connect to the terminal block as
follows:-
Earth (green/yellow) to terminal 10 - marked E
Neutral (blue) to terminal 9 - marked N
Live (brown) to terminal 7
Connecting the pump in this way allows it to be
isolated using the isolating switch fitted in the boiler
control panel, for servicing or maintenance work.
Burner components
5.10
Connect the fuel supply
5.9
Fig. 17 - RDB burner components
1 Pump
2 Control box
3 Reset button with lock-out lamp
4 Flange with gasket (do not remove from boiler)
7
8
1
2
3
5
4
6
5 Air damper adjustment screw
6 Air supply tube connection (balanced flue)
7 Pump pressure adjustment screw
8 Pressure gauge connection
Note:
Remove the factory fitted air inlet spigot adaptor (item 6, above) from the air intake on
the top right hand side of the burner and fit the grey plastic air inlet grille in its place.
See Note below