11
4. Installation
All operations described in this chapter must only be carried out
by qualified staff.
All electrical components described in this chapter apply to
400 volt machines. Recalculated electrical values apply to other
voltages (see technical data).
1. On delivery fi rst check that the machine has not been dam-
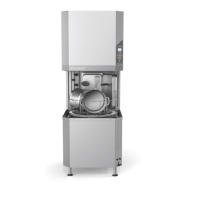
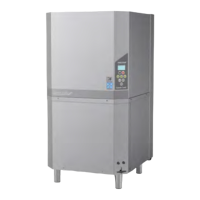
aged. The GD 600plus is delivered well packaged on a pallet.
Remove all packaging so that the machine stands free on the
pallet. Lift the machine on a pallet lift. Remove the pallet beams
and lower the machine carefully onto its feet. Remove the pallet
by unscrewing the fastening screws.
2. Put the machine in place and adjust the feet until it is level.
Check too that all external screws as well as the screws on the
door’s hinges are tightened.
3. Connect the hot water and cold water supplies. See water con-
nection.
4. Connect the drain pipe on the left to the drain. The drain
capacity should be 100 litres/minute.
Note: The plastic pipe on the right side of the machine is an
evacuation pipe and should not in any way be connected to the
drain.
5. The electrical connections in the electrical cabinet must be
tightened before the input electricity supply is connected. Con-
nect the electrical cable to the main switch on the wall. Check
that the power supply complies with the Technical Data on the
rating plate.
6. Open the water supply and switch on the power. Close the
drain valve which is located on the front plate of the machine.
Close the doors. The display then shows the message: “Fill wash
tank?”. Press the START button to start filling the machine. See
starting the machine.
7. The rinse pump operates when the machine is fi lling. Check
that the phase sequence is correct as shown in “Checking phase
connection” on page 11.
8. Set the correct user language; see further instructions on page
12.
9. Check that there are no leakages and do an operations check
according to chapter 6 p. 13.
10. Once installation is complete tighten the wash hoses. The door
hinge screws should also be checked and tightened if necessary.
Connecting the water supply
The machine must be connected to a hot and cold water supply.
Use fl exible connecting hoses with an internal diameter of no
less than 10 mm. Take care to ensure that you have at least an
extra 500 mm of hose so that you can move the machine for-
wards for servicing. The connections are located on the rear of
the machine. For further specifi cations see the technical data and
installation diagram. If the water pressure is in excess of 6 bar, a
relief valve should be installed.
Connecting drainage
Place the drain valve in open position (shown by symbols on the
front plate). Connect a plastic pipe, Ø32 mm, between the hole
in the bottom plate and the drain. See the installation drawings
on page 9. The drain capacity must be at least 100 litres/minute.
The machine should not be placed directly over a fl oor drain. It
is important for the drain to be accessible for cleaning.
Note: The plastic pipe on the right side of the machine is an
evacuation pipe and should not in any way be connected to the
drain.
Connecting to a power supply
The machine is provided with a 2.5 m electrical cable for connec-
tion to 3-phase and earth. See the rating plate for other electrical
data. The main switch is not included in the machine delivery.
Checking phase connection
The wash pump and rinse pump are affected by the phase con-
nection. This is checked in the following way.
1. Close the drain valve which is located on the front of the
machine. Start the machine fi lling by closing the doors. Check
that the display asks: “Fill wash tank?”, then press the START
button.
2. While the machine is fi lling up with water, the rinse pump
runs to fi ll the wash tank. It is diffi cult to tell from the noise
of the pump whether this is running in the right direction.
Check by carefully placing a cable tie, for example, in the
impeller. Clockwise is the correct impeller direction.
3. If the phases are incorrect, switch two phases on the incom-
ing line.
WARNING!
Only qualifi ed electricians may work
with the electrical unit.
The main fuse shall always be removed
when working with the electrical
components.
Incorrect connections can cost lives.


 To Next Page
 Loading...