8
Tools required (not included)
Various (cross-point) screwdrivers, pointed-nose pliers, flat-nose pliers, side-cutters, balsa knife or
razor blade, set of twist drills, universal glowplug spanner, Z-bend pliers, Order No. 5732.
Don’t start building the model until you have read right through the building instructions and are
familiar with all the model’s components. If you are not satisfied with any part, inform your supplier
before you start work on the model.
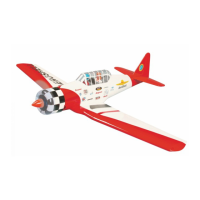
If you prefer to equip your AT 6 with a fixed undercarriage, you will find channels for the wheel legs
already present in the outboard wing panels. The kit includes the undercarriage components and
wheels as standard.
Joining the wing panels, installing the retractable undercarriage and servos
There are openings in the wing sheeting for the wing retaining screws, the aileron servos, the retract
units, the retract servo and the servo extension leads. Locate the openings with your fingertips, mark
their position with a felt-tip pen, then melt the film away using a hot (not too hot) soldering iron: simply
locate the opening with your fingers, mark the outline with a felt-tip pen, push the tip of the soldering
iron through the film and run it along the edge of the opening until all the film is removed.
Installing the retract units
Connect the pushrods to the retract units and place the mechanisms in the wing, as shown in the
series of photographs below. Drill pilot-holes for the retract unit retaining screws using the units
themselves as templates. Screw the retract units in place.
Trial-fit the plastic wheel wells, trim if necessary and glue them in place. You can use cyano or UHU
Alleskleber Kraft adhesive for this.
When gluing the wheel wells in place ensure that they make good contact with the surface of the wing:
press them down evenly all round the periphery.
The axles and wheels can now be fitted.
Secure the wheels on the axles using two collets, washers and self-locking nuts each, as shown in the
photos. Fit the axles on the retract unit legs and set a small amount of toe-in (about 3°).
“Toe-in” means that both wheels are angled inward slightly towards the motor.
File a slight flat in the retract unit legs where the wheel axle grubscrews engage; if you don’t do this
the wheels may swivel on take-off and landing.
Installing the retract servo
Attach the retract servo to the mounting plate using the screws supplied with the servo. First press the
rubber grommets (supplied with the servo) into the servo mounting lugs. Push the brass tubular rivets
into the rubber grommets from the underside, so that the flange is at the bottom. You can use the
tubular spacers as a template when drilling the pilot-holes in the mounting plate. You may find it easier
to insert the tubular rivets if you fit them on a small screwdriver first.
Place the retract servo in the mounting plate, drill 1.5 mm Ø pilot-holes and fit the retaining screws.
The output lever must be mounted on the servo in such a way that the retract units are locked
mechanically in the retracted and extended states. Select an output device of the appropriate length.
The retract pushrods are connected to the servo output disc or lever using two swivelling pushrod
connectors. Fit the pushrod connectors on the output device and tighten the retaining nuts just to the
point where the connectors swivel smoothly, but without lost motion.
Joining the three wing panels
Caution: before joining the wing panels it is essential to fit two aileron servo extension leads, Order
No. 3935.50, in the centre section.
Fit the wing joiners into the two outboard wing panels, and plug them in turn into the centre section.
Check that the facing ribs line up accurately. Mark the centreline on the wing joiners using a pencil.
Carry out any adjustments required. Do not glue the wing panels together until you have completed
this check and are satisfied that the parts fit accurately.
The wing panels are joined using UHU plus endfest 300 (slow-setting epoxy).
Mix up the resin and hardener according to the instructions on the adhesive packaging.
Apply plenty of epoxy to the inside of the joiner slot in the right-hand outboard wing panel. Apply epoxy
 Loading...