GRAUPNER GmbH & Co. KG D-73230 KIRCHHEIM/TECK GERMANY
Änderungen vorbehalten! Keine Haftung für Druckfehler Ident. # 0059200 10.2008
34
Order No. 3050 Power switch harness 1 required
Servo extension leads
Order No. 3935.105 for the ailerons 2 required
Order No. 3935.18 for connecting extension
leads to the receiver 2 required
Order No. 3935.11 for connecting extension
leads to the receiver 2 required
Order No. 3935.50 for connecting extension
leads to the receiver 1 required
Order No. 3935.180 for the elevator 1 required
Order No. 98516.1 Folding ferrite ring for the
aileron and airbrake servos 1 required
Order No. 1587 Velcro cable tie 1 pack
We recommend a receiver battery of at least 3 Ah capacity, e.g. Order No. 2490.4,
which should be properly prepared before use and maintained during its life, i.e. the
pack must be charged and discharged (cycled) several times before it reaches its full
stated capacity.
We deliberately recommend the use of rechargeable batteries for the receiver and
transmitter, as they offer the widest margin of safety in use.
Please see the main FS catalogue for details of suitable battery chargers.
Use foam rubber to pack round the receiver.
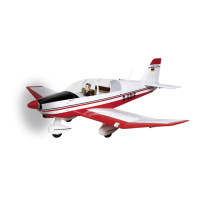
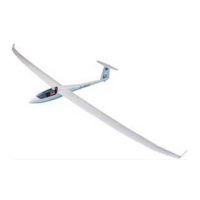
Assembling the VENTUS 2 cx
Please don’t start work on the model until you have read through the instructions and
have a clear understanding of the purpose of the various components and the
individual stages of construction. If you are not satisfied with the quality of any part,
take it back to your model shop for replacement before modifying it in any way.
The fuselage
Thoroughly sand all the joint areas inside the fuselage until they have a matt
appearance (see the note following the Adhesives table).
The outline of the wheel doors is marked on the underside of the fuselage. Use a
fine-blade saw, e.g. Order No. 860 or 860.1, to cut the doors out of the fuselage.
Note that the overall width of the wheel door opening should be about 62 mm.
Glue the two undercarriage formers in the fuselage and reinforce the joints
thoroughly with epoxy resin and woven glass cloth, as shown in the photographs.
Allow the epoxy to cure before cutting back the excess glass cloth flush with the
edges of the formers.