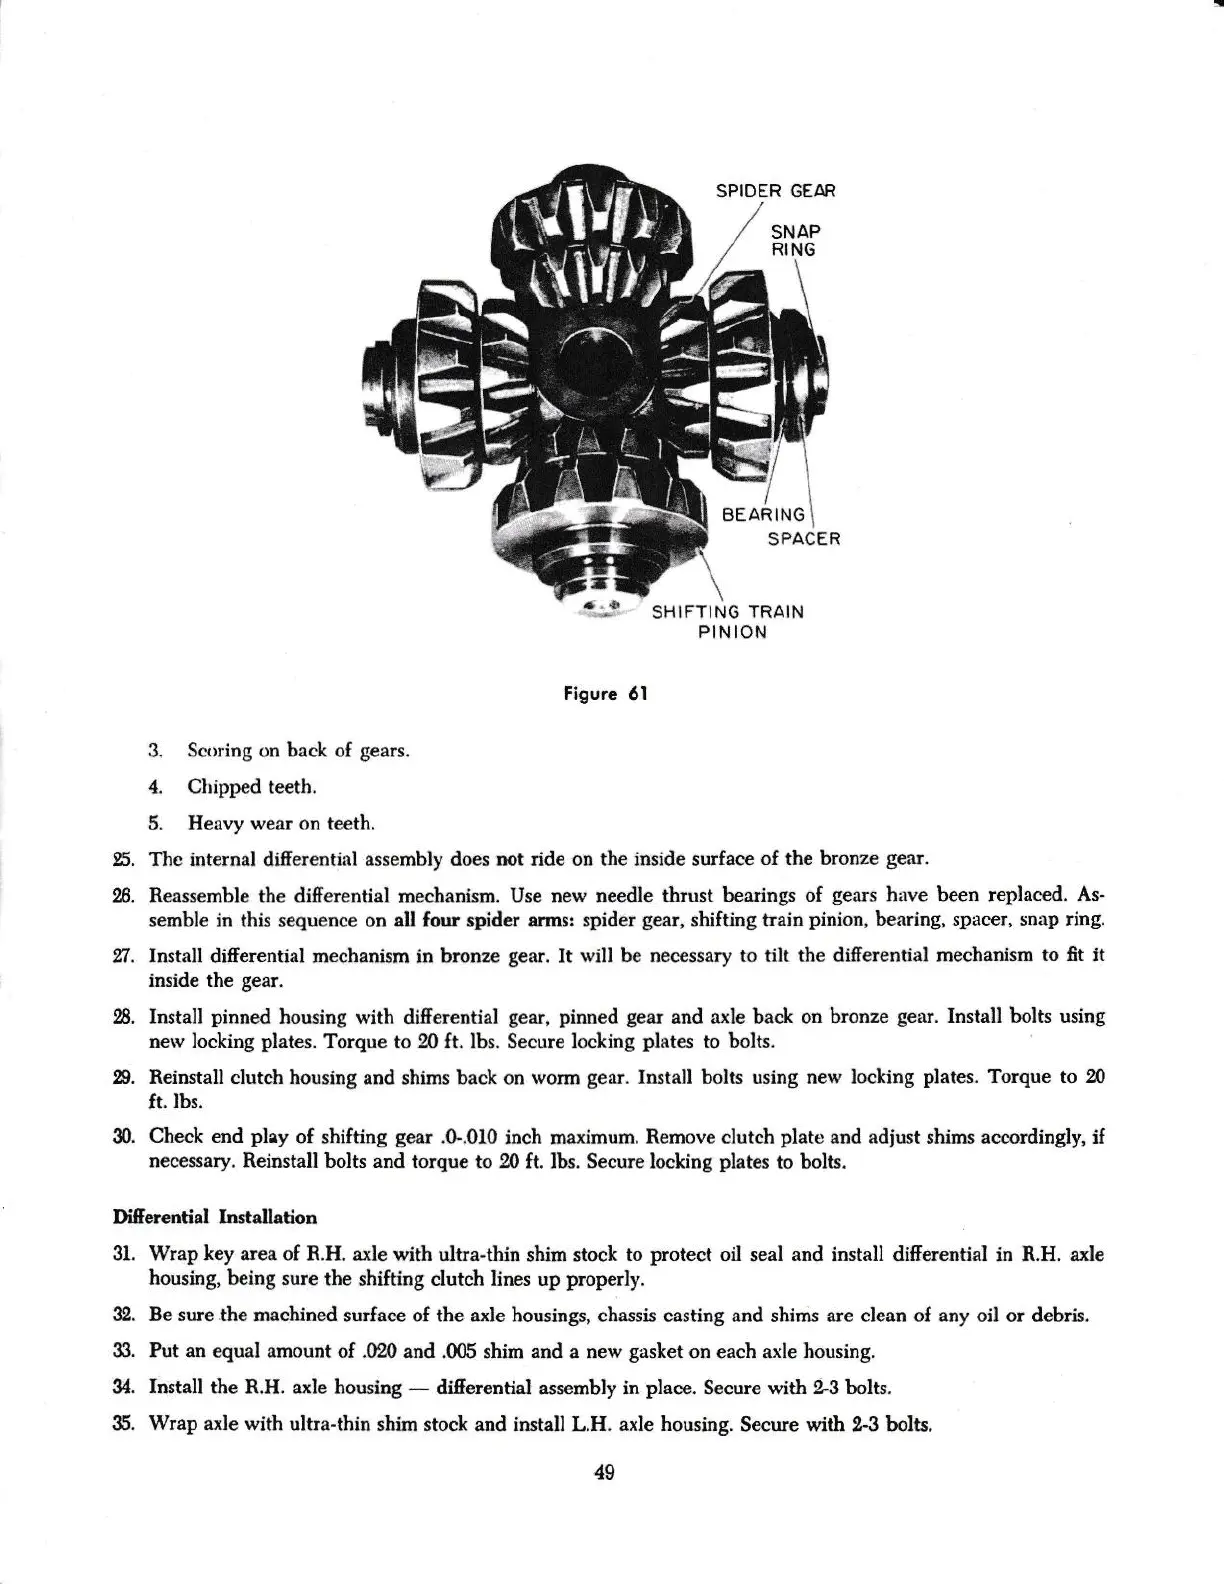
SHIFTING
TRAIN
PIN
ION
Figure
6l
3. Seoring on back of
gears.
4. Cl:ipped teeth.
5. Heavy
wear on teeth,
95, Thc internal
di.{erentirrl
assembly does not ride
on
the
jnside
surface
oI the brolze
gear.
!6.
Seassemble the
di$erential meclanism. Use new needle
thrnst
bearings of
gears
have been replaced.
As-
semble in this
sequence
on
all four
spider
arrns:
spider
gear,
shifting train
pinion,
bearing, spercer, snirp ring.
97.
lnstall
differential meclani:m in bronze
gear.
It
will
be necessary
to
tilt
the differential mechani:nr
tc *t it
inside the
gear.
98.
Install
pinned
hor:sing with
di$erential
gear, pinned gear
and axle baek
on
bronze
gear.
Iastall bolts using
nerv locking
plates.
Torqr:e
to 90 ft. lbs, Secure locking
plates
to tlolts.
29. Reinstall clutch
housing and shims back on
worrn
gear.
Install
bolts using new
locling
plates.
Torque to 20
ft.
lbs.
30.
Check end
play
of shifiing
gear
.0-.010
inch
maximum,
Remove clutch
platc
and *diust
shims accordingly, if
necettary,
neinstall bolts and torque
to
20
ft. Ibs. Secure locking
plates
to bolts.
Dif,erenlial
Installation
31. Wrap key area of R.H. axle with
ultra-thin
shim stock
to
protect
oil seal and install differential in R.H.
axte
housing,
being sure
rhe
shifting clutch lines up
properly.
32. Be sure the mac}rined
surface of
the
axle
housings,
chassis
castirrg
and
shims
are clean oI any oil
or
debris.
33.
Put
an equal amour:t
of
.S20
and .005
shirn
and
a new
gasket
on
each
axle housing.
34.
Install
the R.H. axle housing
-
diEerential
assembly
in
place.
Secure with ?3 bolts.
35.
Wrap axle with
ultra-thir:
sl:im siock
and
install
L.H.
axle housing.
Seeure with
2-3
bolts.
49