PROCEDURE
1.
Raise front
of
chassis.
Support
frame with jack-
stands, allowing
front
axle
to
hang free, relieving
pressure on the bottom bearing points. This al-
lows better grease penetration.
2.
Clean grease fittings
of
all debris.
3.
Add grease until it comes
out
around bearings.
4.
Lower chassis and remove excess grease.
Periodic light oiling
of
pivot points aids operation.
While performing chassis lubrication,
apply
a small
amount
of
general purpose grease
to
the rack and
pinion mechanism.
FRONT WHEEL BEARINGS
Repack bearings every 200 hours
of
operation with
wheel bearing grease. Repack after operation in
water above the bearings.
Thoroughly
clean the
old
grease from the bearings
and wheel parts before repacking. Do
not
use a
fiberous grease.
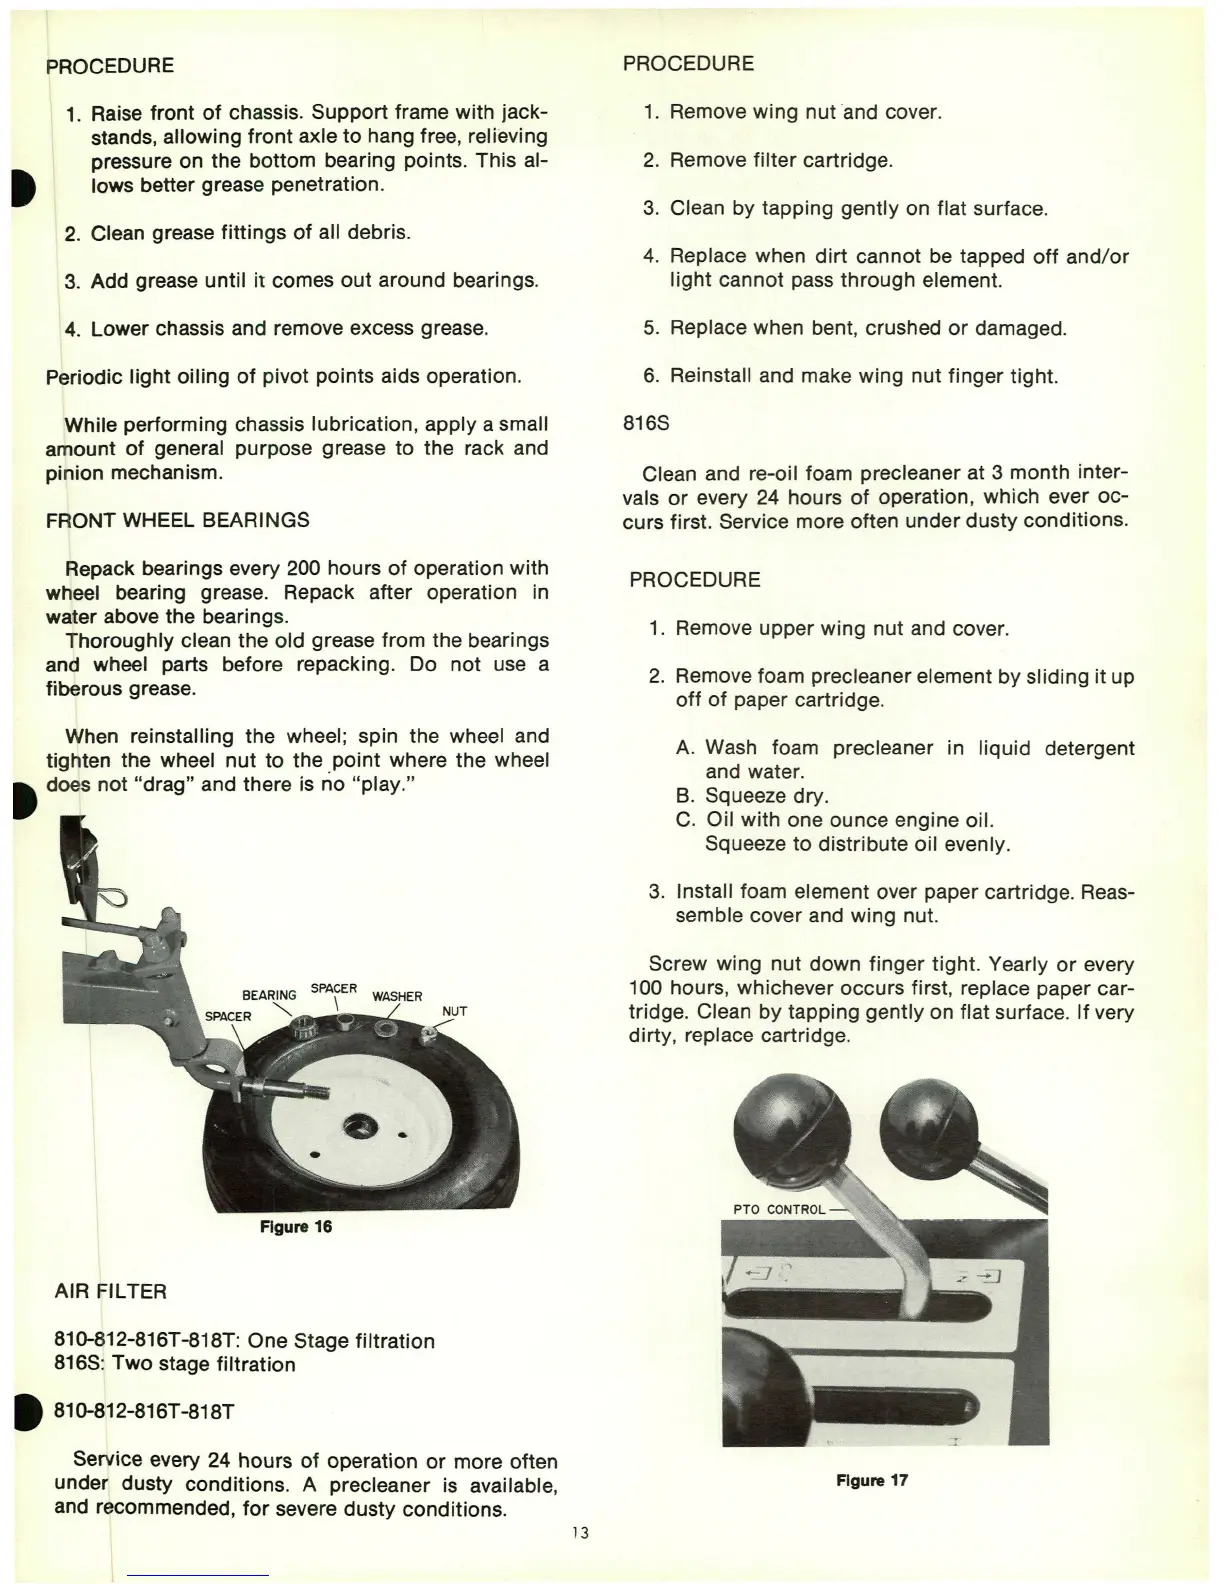
When reinstalling the wheel; spin the wheel and
tighten the wheel
nut
to
the .point where the wheel
t does not
"drag"
and there is
no
"play."
SPACER
\
Figure 16
AIR FILTER
81Q-812-816T-818T: One Stage filtration
816S:
Two
stage filtration
~
81Q-812-816T-818T
Service every 24
hours
of
operation
or
more often
under dusty conditions. A precleaner is available.
and recommended,
for
severe dusty conditions.
13
PROCEDURE
1.
Remove
wing
nut
and cover.
2.
Remove
filter
cartridge.
3.
Clean by tapping
gently
on flat surface.
4.
Replace when
dirt
cannot be tapped
off
and/or
light
cannot pass
through
element.
5.
Replace when bent, crushed
or
damaged.
6.
Reinstall and make
wing
nut
finger
tight.
816S
Clean and re-oil foam precleaner at 3 month inter-
vals
or
every 24 hours
of
operation,
which
ever
oc-
curs first. Service more often under
dusty
conditions.
PROCEDURE
1.
Remove
upper
wing
nut and cover.
2.
Remove foam precleaner element
by
sliding
it
up
off
of
paper cartridge.
A.
Wash foam precleaner in liquid detergent
and water.
B.
Squeeze dry.
C.
Oil with one ounce engine oil.
Squeeze
to
distribute oil evenly.
3.
Install foam element over paper cartridge. Reas-
semble cover and
wing
nut.
Screw wing nut down
finger
tight. Yearly
or
every
100 hours, whichever
occurs
first, replace paper car-
tridge. Clean
by
tapping
gently
on flat surface. If very
dirty, replace cartridge.
Figure 17