EN - 29
ADJUST UNIT TO DRIVE
STRAIGHT
1. Park unit on a flat, level surface.
2. Check tire pressures. If needed, adjust to
recommended pressures. See
Specifications on page 39.
IMPORTANT: DO NOT inflate tires outside
recommended range.
3. Drive machine forward, pushing both
control levers all the way to index bar.
4. Check tracking. If unit does not drive in a
straight line, adjust steering levers. See
Adjust Steering Levers on page 27.
ADJUST HOC INDICATOR
For accurate cutting, the height shown on the
HOC indicator dial must match the cutting
height.
Adjust Index Wheel
1. Release tension on HOC belt. See Adjust
HOC Belt Tension on page 29
2. Pull transport lock up to the off position.
See Transport Lock Lever on page 15.
3. Set mower deck to lowest cutting height.
IMPORTANT: Deck is in lowest position when
deck lift contact arm is seated on the lowest
position of the HOC cam. See Figure 33.
4. Rotate HOC wheel so the lowest cutting
position is indicated. Reset dial position if
necessary.
5. Tighten the belt tensioner.
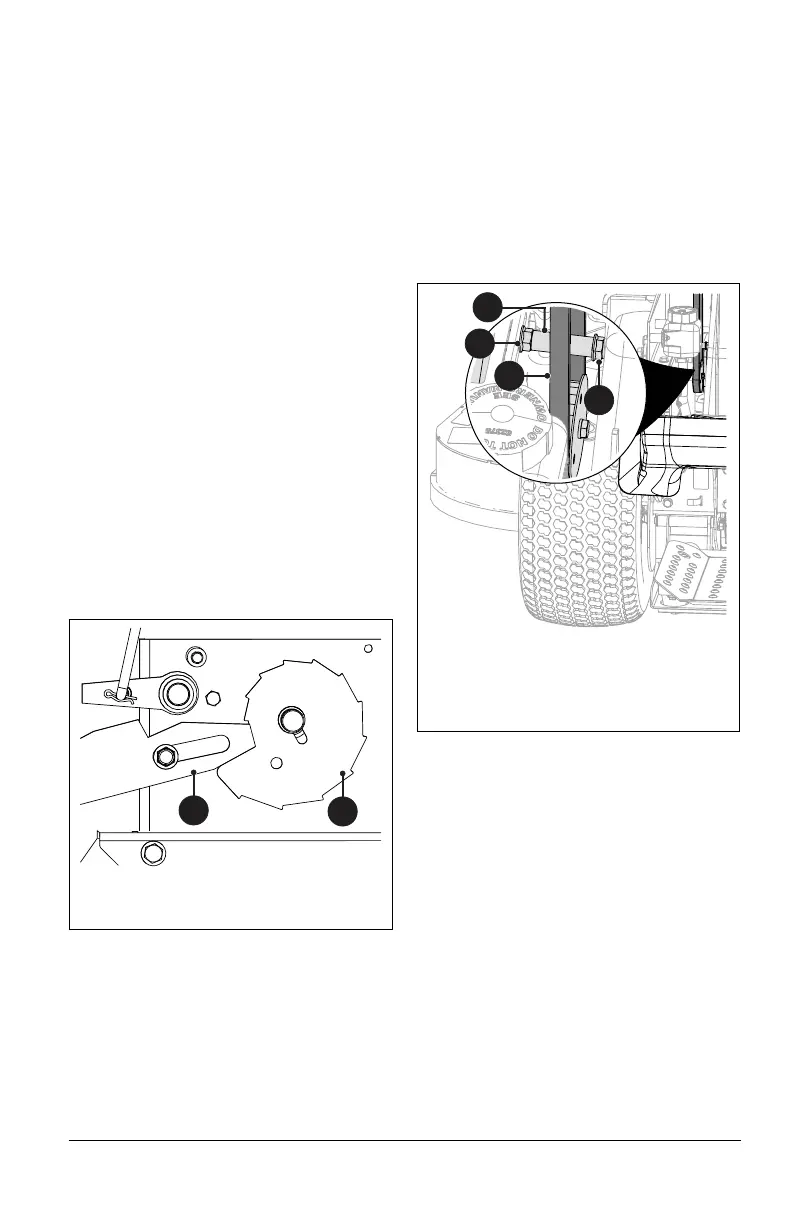
Adjust HOC Belt Tension
See Figure 34.
1. Loosen the outer lock nut on the HOC
belt tensioner.
2. Loosen the inner lock nut enough to allow
the tensioner to move.
3. Using a spring scale or similar tool,
position the tensioner to where 2.3 kg –
3.2 kg (5 lbs – 7 lbs) of force is applied to
the HOC belt.
4. Tighten lock nuts.
ADJUST PARKING BRAKE
Unit is equipped with two parking brake
cables that independently control parking
brake on each drive wheel.
1. Place unit in service position and open
the rear access panel. See Service
Position on page 19.
2. Check parking brake. See Check Parking
Brake on page 24.
3. Disengage parking brake.
See Figure 35.
4. Loosen jam nut on parking brake cable
adjuster and pull down on adjuster barrel
until cable is taut, not tight.
5. Thread bottom nut until it contacts
bracket.
6. Tighten the top jam nut.
Figure 33
1
2
1. Deck Lift Contact Arm
2. HOC Cam
Figure 34
1. Outer Lock Nut
2. Inner Lock Nut
3. Belt Tensioner
4. HOC Belt
1
2
3
4