(
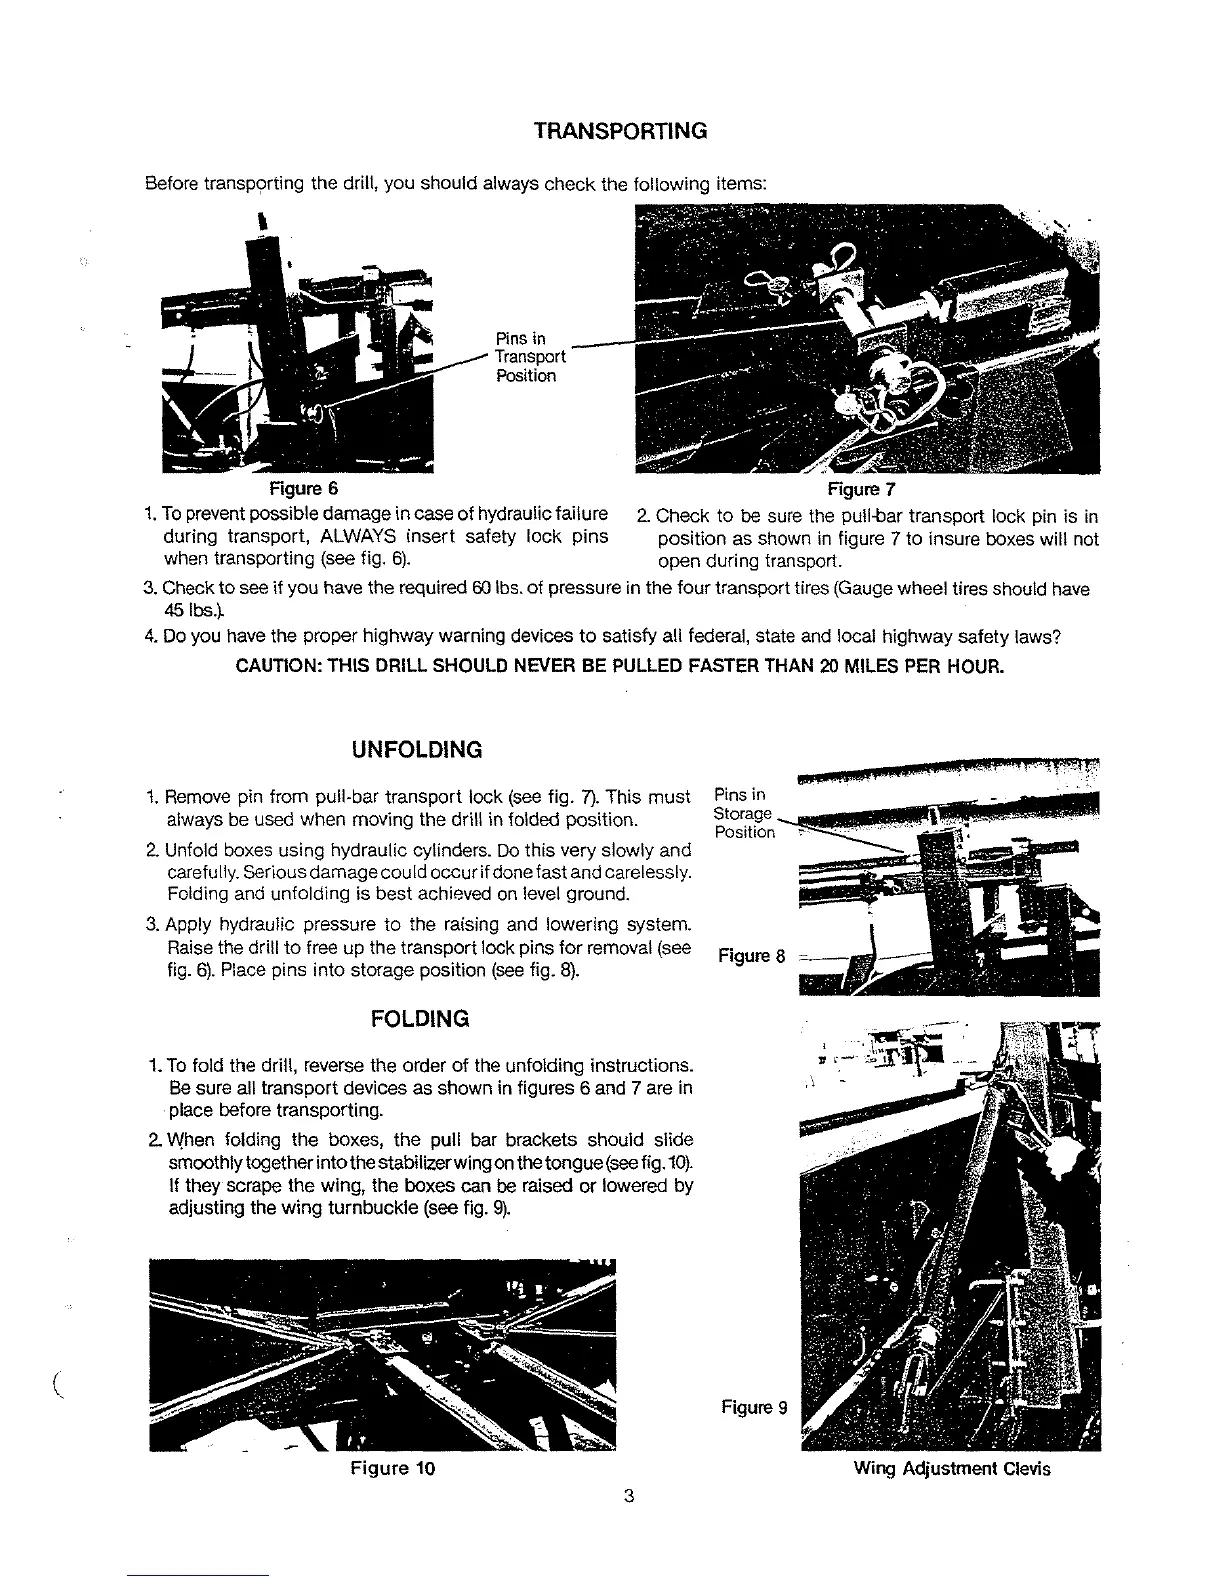
TRANSPORTING
Before tranSP9rting the drill, you should always check the following items:
,
Pins
in
Transport
Position
Figure 6 Figure 7
1.
To
prevent possible damage in case
of
hydraulic failure
2.
Check to
be
sure
the pull.tJar transport lock pin is
in
during transport, ALWAYS insert safety lock pins position as shown in figure 7 to insure boxes will not
when transporting (see fig.
6).
open during transport.
3. Check
to
see
if
you have the required
60
Ibs. of pressure in the four transport tires (Gauge wheel tires should
have
45lbs.~
4.
Do you have the proper highway warning devices
to
satisfy all federal, state and local highway safety laws?
CAUTION:
THIS
DRILL
SHOULD
NEVER
BE
PULLED
FASTER
THAN
20
MILES
PER
HOUR.
UNFOLDING
1.
Remove pin from pull·bar transport lock
(see
fig.
7).
This
must
always be used when moving the drill in folded position.
2.
Unfold boxes using hydraulic cylinders.
Do
this very slowly and
carefully.
Serious damage could occur if done fast and carelessly.
Folding and unfolding is best achieved
on
level ground.
3.
Apply hydraulic pressure
to
the raising and lowering system.
Raise the drill
to
free up the transport lock pins for removal (see
fig.
6).
Place pins into storage position
(see
fig.
8).
FOLDING
1.
To
fold the drill, reverse the order
of
the unfolding instructions.
Be
sure all transport devices as shown in figures 6 and 7 are in
place before transporting.
2.
When folding the boxes, the pull bar brackets should slide
smoothly together into the stabilizer wing
on
the tongue
(see
fig.
10).
If they scrape the wing, the boxes can
be
raised
or
lowered by
adjusting the wing turnbuckle (see fig.
9).
Figure
10
3
blJ¢
3d
,~
."Y
Pins in
Storage
-.J!!'l!!!IIIIIII.lI!II!.~
Position
Figure 8
Figure 9
Wing Adjustment Clevis
 Loading...