Do you have a question about the Gree BORA GWH12AAB and is the answer not in the manual?
Indicates a hazardous situation that, if not avoided, will result in death or serious injury.
Indicates a hazardous situation that, if not avoided, could result in death or serious injury.
Indicates a hazardous situation that, if not avoided, may result in minor or moderate injury.
Indicates important but not hazard-related information, used to indicate risk of property damage.
Explains R32 is flammable, nonpolluting, and energy-efficient.
Do not accelerate defrosting, contact authorized service, avoid ignition sources.
Appliance for children, cleaning, socket usage, power disconnection, cord damage.
Do not wash, avoid spraying water, handle filter carefully, no hot air drying.
Must be done by qualified professionals; do not self-repair.
Avoid inlets/outlets, spills on remote, abnormal phenomena, switch usage.
Follow regulations, use qualified circuits, circuit breakers, disconnection switches.
Match supply, proper cables, connect wires correctly, cut power before work.
Finish installation before power, keep cable from hot tubes, follow wiring regs.
First-class appliance grounding, yellow-green wire, grounding resistance, accessible plug.
Plug accessibility, relocation by qualified person, location choice.
Specifies operating temperature limits for cooling and heating.
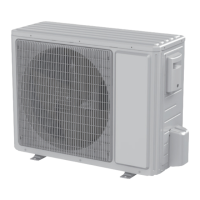
Identifies air inlet, connection wire, and air outlet on the outdoor unit.
Requires valid certification for handling refrigeration systems.
Room area, no drilling/burning pipes, leak test, ventilation.
Check ventilation, no fire source, no smoking, good appliance mark condition.
Procedure for recovery, filling with R32, leakage detection.
Use gas detector, avoid fire/smoking, follow local rules.
Illustrates required spacing around the outdoor unit for installation.
Keep circuit free from air/substances; use correct refrigerant.
Steps for safe recovery during relocation or repair.
Avoid flammable gas areas, use proper wiring, no extension cords.
Lists essential tools for air conditioner installation.
Basic requirements and outdoor unit placement criteria.
Adhere to safety regulations, ensure proper power supply, wiring, and grounding.
Importance of grounding, air switch capacity, and disconnection switches.
Selecting location, fixing support, and notes on screws and height.
Connecting the drain joint and hose to the outdoor unit.
Placing the unit on the support and fixing it with bolts.
Procedures for connecting indoor and outdoor pipes, including union nut tightening.
Instructions for connecting power and control wires with wiring diagrams.
Fixing wires with clips and notes on wire integrity.
Routing pipes along walls, bending radius, and U-shaped curves.
Proper placement and routing of the drain hose.
Step-by-step guide for vacuum pumping the system.
Using a detector or soap water to find leaks.
Items to check after installation and potential malfunctions.
Steps for performing the initial test operation.
Standard, minimum, and maximum lengths for connection pipes.
Methods for calculating additional refrigerant oil and charge amount.
Recommended additional refrigerant charging amounts based on pipe size.
Detailed procedure for expanding pipes and checking the quality.
This document is the Owner's Manual for a TOSOT Inverter Split Air Conditioner. It provides comprehensive information regarding the installation, operation, maintenance, and safety precautions for the appliance.
The TOSOT Inverter Split Air Conditioner is designed to provide cooling and heating (for heat pump models) for indoor spaces. It utilizes R32 refrigerant, which is described as a non-polluting refrigerant with no harm to the ozonosphere and a lower influence on the greenhouse effect compared to common refrigerants. The inverter technology contributes to high energy efficiency. The system circulates a special refrigerant to achieve its cooling and heating functions.
The manual lists several models: GWH09AAB-K6DNA3A/O, GWH12AAB-K6DNA3A/O, GWH18AAD-K6DNA1A/O, GWH18AAD-K6DNA1B/O, and GWH24AAD-K6DNA1A/O. The refrigerant used is R32, with a GWP (Global Warming Potential) of 675. The operating temperature range for cooling-only units is -15°C to 43°C (outdoor temperature), and for heat pump units, it is -20°C to 43°C (outdoor temperature) or -15°C to 43°C (outdoor temperature) for some models. Indoor side DB/WB (Dry Bulb/Wet Bulb) temperatures for maximum cooling are 32/23°C and for maximum heating are 27/-°C. Outdoor side DB/WB temperatures for maximum cooling are 43/26°C and for maximum heating are 24/18°C. Minimum room area requirements for installation are provided in a table based on the refrigerant charge amount (kg) and installation type (floor, window mounted, wall mounted, ceiling mounted). For example, for a charge amount of ≤1.2 kg, the minimum room area is 14.5 m² for floor location, 5.2 m² for window mounted, 1.6 m² for wall mounted, and 1.1 m² for ceiling mounted. These values increase with higher charge amounts. Maximum connection pipe lengths vary by capacity: 15m for 5000-9000 Btu/h units, 20m for 12000 Btu/h units, and 25m for 18000 Btu/h units, and 25-30m for 24000-48000 Btu/h units. Min length of connection pipe: For units with a standard connection pipe of 5m, there is no limitation. For units with standard connection pipes of 7.5m and 8m, the minimum length is 3m. Additional refrigerant charging amount (g/m) and refrigerant oil (ml) are specified based on the liquid pipe diameter and prolonged length of the connection pipe. For example, for a Φ6 liquid pipe, the additional refrigerant charging amount is 16 g/m for cooling only/cooling and heating (indoor unit throttle) and 12 g/m for cooling only (outdoor unit throttle).
The air conditioner is designed for ease of use, with instructions for test operation provided. Users can select AUTO, COOL, DRY, FAN, and HEAT modes via the remote controller. The appliance is suitable for use by children aged 8 years and above and persons with reduced physical, sensory or mental capabilities or lack of experience and knowledge, provided they receive supervision or instruction.
The manual emphasizes that maintenance must be performed by qualified professionals to avoid personal injury or damage. Users are advised not to repair the air conditioner themselves. Regular cleaning and user maintenance should not be performed by children without supervision. Key maintenance points include:
The manual includes extensive safety warnings and cautions, categorized by "DANGER," "WARNING," "CAUTION," and "NOTICE."
The manual details the installation process for the outdoor unit:
Detailed steps for vacuum pumping are provided:
Improper pipe expanding is a common cause of refrigerant leakage. The manual provides a step-by-step guide: A. Cut the pipe: Confirm length, cut with a pipe cutter. B. Remove burrs: Use a shaper to remove burrs, preventing them from entering the pipe. C. Put on insulating pipe: Place suitable insulating pipe. D. Put on union nut: Remove the union nut from the indoor connection pipe and outdoor valve, then install it on the pipe. E. Expand the port: Use an expander. A table specifies the "A" dimension (Max/Min) based on outer diameter (e.g., Φ6: 1.3/0.7mm, Φ19: 2.4/2.2mm). F. Inspection: Check the quality of the expanding port for blemishes. If found, re-expand. Illustrations show smooth and improper expanding surfaces (leaning, damaged, crack, uneven thickness).
| Brand | Gree |
|---|---|
| Model | BORA GWH12AAB |
| Category | Air Conditioner |
| Language | English |