Cassette Type Fan Coil Unit Owner's Manual
12
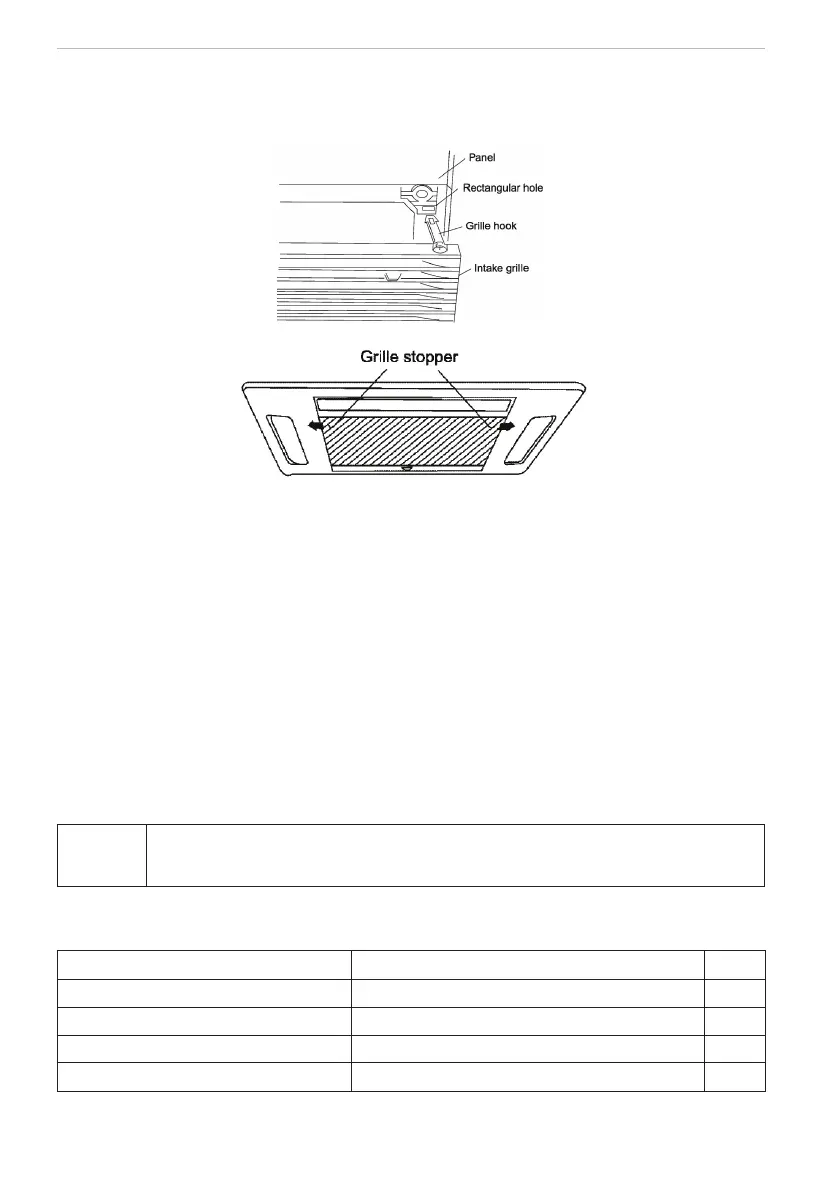
4.12 Installing/removing the intake grille
(1) Installing the intake grille
(2) Full insert the intake grille hooks into the rectangular holes in the panel.
Fig.19 Close the intake grille, then slide the tow grille stoppers outward.
Fig.20
4.13 Test operation
(1) Prepare for test
1). Do not turn on the power switch before all installation is nished.
2). Connect wires correctly and rmly.Open the check valve.
3). Remove all dust.
(2) Testing
1). Turn on the power switch and press “ ON/OFF” button.
2) Press “MODE” button select COOL, HEAT, FAN, ect to test weather it operates normally.
(3) Emergency operation.
1). When the batteries fail or when the remote controller is missing, operate as shown below.
2). On stopping you can press the “AUTO” button on cover NO.II until it is on “AUTO” mode.
3).The air conditioner select from COOL,HEAT,DRY,FAN modes automatically.
4). On operating, press the “AUTO” button, the air conditioner will stop.
NOTE
The “TEST” button on the cover NO.II is specially for testing the air conditioner. When
pressing it ,the air conditioner will forced to operate or stop. Do not press it when air
conditioner is in normal operation.
For the following items, take special care during construction and check after installation is
nished.
Items to check It not properly cone, what is likely to happen� Check
Is the unit xed rmly? The unit may drop, vibrate or make noise.
Is the gas leak test nished? It may result in insufcient cooling.
Is the unit fully insulated? Condensate water may drop.
Dose drainage ow smoothly? Condensate water may drop.