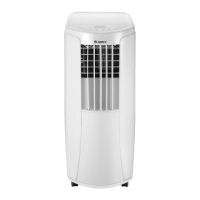
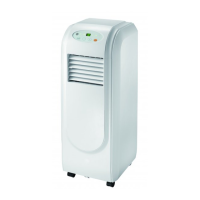
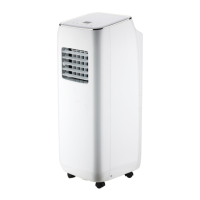
This document provides the owner's manual for a GREE local air conditioner, models GPC07AQA-K5NNA1A, GPC07AQA-K5NNA1C, and GPC09AQA-K5NNA1B. It covers operation, maintenance, installation, and technical specifications.
Function Description
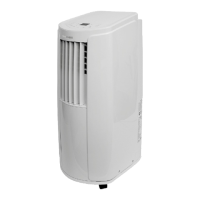
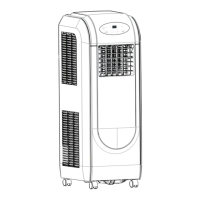
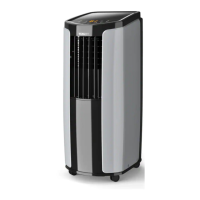
The GREE local air conditioner is designed to provide cooling, drying, and fan-only operation for indoor spaces. It utilizes R290 refrigerant, which is a flammable and inodorous fluoride. The unit features a control panel for direct operation and a remote controller for convenient adjustments.
The main operational modes include:
- Cool Mode: The air conditioner cools the room, with a temperature setting range of 16°C (61°F) to 30°C (86°F). The cool mode indicator is bright, and the dual-8 nixie tube displays the set temperature.
- Dry Mode: This mode is for dehumidification, operating at a low fan speed. The dry mode indicator is bright, but the dual-8 nixie tube does not display any temperature. Fan speed cannot be adjusted in this mode.
- Fan Mode: In this mode, the air conditioner only blows air without cooling or heating. The fan mode indicator is bright, and the dual-8 nixie tube does not display any temperature. Fan speed can be adjusted.
- Auto Mode: The unit operates automatically based on factory settings. In this mode, the set temperature cannot be adjusted.
- Sleep Mode: This function adjusts the preset temperature to maintain a comfortable environment during sleep. In cooling mode, the temperature increases by 1°C (2°F) within 1 hour and by 2°C (4°F) within 2 hours, then maintains that temperature. This function is not available in fan or dry modes.
- Timer Function: Users can set a timer for the unit to turn on or off. The timer setting can be adjusted in 0.5-hour increments within 10 hours and 1-hour increments beyond 10 hours, up to 24 hours.
- WiFi Function (Optional): The unit can be connected to WiFi, indicated by a bright WiFi indicator. This function can be turned on or off, and the WiFi module can be reset to factory settings.
Important Technical Specifications
- Refrigerant: R290, a flammable fluoride.
- Minimum Floor Area for Operation:
- GPC07AQA-K5NNA1A / GPC07AQA-K5NNA1C: 4 m²
- GPC09AQA-K5NNA1B: 11 m²
- Operating Temperature Range: 16°C (61°F) to 35°C (95°F).
- Power Supply: Must comply with specifications on the nameplate and local safety regulations. A grounded power supply is required.
- Radio Equipment Frequency: 2400MHz-2483.5MHz.
- Maximum Radio-Frequency Power Transmitted: 20dBm.
- Heat Discharge Pipe Length: Less than 102 cm (40 inches). It is recommended to use the shortest possible length.
- Minimum Clearance: A minimum distance of 30 cm (12 inches) around the air conditioner is required.
Usage Features
- Control Panel: Features ON/OFF, +/-, Fan, Mode, Timer, and Sleep buttons. The display shows cool mode, dry mode, fan mode, fan speed, timer, and WiFi indicators.
- Remote Controller: A general-use remote controller with buttons for ON/OFF, Mode, Fan, Swing, Sleep, Timer, Health, and WiFi. It also has +/- buttons for temperature adjustment. The remote controller has a signal sender and requires two AAA 1.5V dry batteries. The effective range is up to 8 meters without obstacles.
- Guide Louver: The guide louver can be opened by pressing the "PUSH" marked position. It is recommended to open it to the maximum position for better comfort.
- Fan Speed Adjustment: The fan speed can be set to low, medium, high, or auto in cool and fan-only modes.
- Temperature Display Switchover: In OFF status, pressing the "-" and "Mode" buttons simultaneously switches the temperature display between °C and °F.
- Light Function: In switch-on or switch-off state, holding the "+" and "FAN" buttons simultaneously can turn the lamp on or off. The lamp is defaulted on when energized.
- Water Drainage: The unit has two drainage options: a middle hole for continuous drainage (recommended for dry mode) and a lower hole for when the chassis is full (indicated by "H8" error and 8 beeps). For continuous drainage, a 14mm inner diameter hose or garden hose can be attached.
- Installation Accessories: Includes a joint, heat discharge pipe, rear clip, cord hook, screws, remote controller, user's manual, and optional items like window panel, adjustment panel, mothproof net, extension panel, fixed base, fixed clip, mounting plate, bracket, and screw. Tools needed for installation include a Phillips head screwdriver, tape measure, flathead screwdriver, scissors, saw, and pencil.
Maintenance Features
- Cleaning:
- Outer Case and Grille: Wipe dust with a soft towel. For grease, use a neutral abluent. Use a cleaner or soft brush for the grille.
- Filter: The filter should be cleaned about once every three months, or more frequently in dusty environments. Remove the filter by pressing the clasp. Clean with water or warm water (40°C/104°F) and a neutral abluent if very dirty. Dry in a shady place. Do not use fire or a hair dryer to dry the filter.
- Heat Discharge Pipe: Remove, clean, dry, and reinstall the heat discharge pipe.
- Pre-season Check:
- Ensure air inlets and outlets are not blocked.
- Check plug and socket condition.
- Verify filter cleanliness.
- Confirm batteries are installed in the remote controller.
- Check that the joint, window bracket, and heat discharge pipe are installed tightly.
- Check for damage to the heat discharge pipe.
- Post-season Check:
- Disconnect power supply.
- Clean filter and outer case.
- Remove dust and sundries.
- Eliminate accumulated water in the chassis.
- Check for damage to the window bracket.
- Long-term Storage:
- Ensure no accumulated water in the chassis and the heat discharge pipe is disassembled.
- Unplug the unit and wrap the power cord.
- Clean and pack the air conditioner to prevent dust.
- Refrigerant Handling: Servicing, repair, and discharge of R290 refrigerant must be performed by certified professionals in compliance with local laws and regulations due to its flammability.
- Disposal: The product should not be disposed of with other household waste in the EU. It should be recycled responsibly through return and collection systems. Batteries must be removed and disposed of safely.