Do you have a question about the Gree GPC05AK-A3NNA2B and is the answer not in the manual?
Specifies temperature range, indoor use, placement, and environmental considerations for optimal operation.
Comprehensive safety guidelines covering electrical, operational, and child safety aspects.
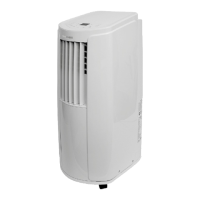
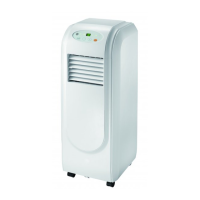
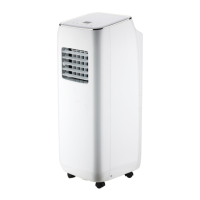
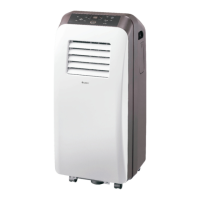
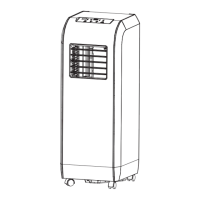
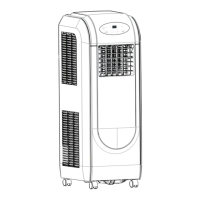
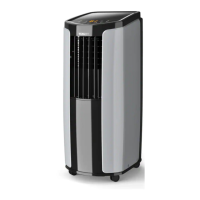
Identifies key components of the portable air conditioner unit.
Identifies the components of the remote control unit.
Details the layout and indicators on the air conditioner's control panel.
Explains how to use ON/OFF and +/- buttons for unit control and temperature adjustment.
Explains how to use MODE, FAN, TIMER, and SLEEP buttons for various operations.
Identifies buttons and explains icons on the remote controller's display.
Detailed explanations for using ON/OFF, MODE, and +/- buttons on the remote.
Detailed explanations for using FAN, SWING, SLEEP, and TIMER buttons on the remote.
Explains lock, light, and temperature unit switching functions using button combinations.
Step-by-step guide for replacing batteries in the remote control.
Safety precautions before cleaning the unit.
Instructions for cleaning the exterior parts of the air conditioner.
Steps for removing, cleaning, and reinstalling the air filter.
Instructions for cleaning the heat discharge pipe.
Procedures for checking the unit before/after season and long-term storage.
Information on proper disposal and recycling of the appliance.
Solutions for common issues when the air conditioner cannot operate.
Addresses problems related to poor cooling or heating output.
Solutions for when the remote controller is not communicating with the unit.
Solutions for issues like no fan airflow or unadjustable temperature settings.
Addresses unusual odors and abnormal sounds during operation.
Explains various error codes (H8, F1, F2, F0, H3, E8, F4) and their solutions.
Lists critical phenomena requiring immediate shutdown and dealer contact.
Important warnings regarding installation practices and safety.
Guidelines for selecting a suitable location for the unit.
Safety and procedural requirements for electrical hookup.
Lists all included accessories required for installation.
Lists the tools necessary for performing the installation.
Instructions for attaching the wire hook and winding the power cord.
Step-by-step guide for installing the drainage pipe for continuous water removal.
Explains how condensation water is naturally drained and managed internally.
Procedures for discharging accumulated water when the unit indicates it.
Instructions for using the middle hole for continuous drainage with a hose.
Important considerations for proper placement and installation of the drainage hose.
Adjusting the window frame and installing clips for the sash window.
Attaching the joint and protective grille to the window frame.
How to fix the support on the outer side of the window frame.
How to fix the rain shield onto the support.
Instructions for cutting and attaching sponge B to the window sash.
How to attach the window panel for windows less than 20.5 inches wide.
How to attach the window panel for windows between 20.5" and 37.4" wide.
How to attach the window panel for windows between 37.4" and 56.7" wide.
Instructions for cutting and attaching sponge B to the window frame.
How to close the window sash securely against the window panel.
How to seal gaps between window sashes using sponge A.
How to secure the inner window to prevent sliding.
Installing clips for the sliding sash window frame.
Attaching joint B+C into the inner side of the sliding window frame.
How to fix the protective grille onto joint B+C.
How to fix the support on the outer side of the sliding window frame.
Instructions for cutting and attaching sponge B to the sliding window sash.
How to install the window panel for sliding windows less than 20.5" high.
How to install the window panel for sliding windows between 20.5" and 37.4" wide.
How to install the window panel for sliding windows between 37.4" and 56.7" wide.
Instructions for cutting and attaching sponge B to the sliding window frame.
How to close the window securely against the window Panel.
How to seal gaps between sliding window sashes using sponge A.
How to secure the inner window with a bracket to prevent horizontal sliding.
How to rotate and attach joint A to the heat discharge pipe.
Installing the other end of the heat discharge pipe into the unit's grille.
Guidance on ensuring efficient heat discharge by keeping the pipe short and flat.
Recommendations on heat discharge pipe length and avoiding extensions.
Visual examples of correct and incorrect heat discharge pipe installations.
Steps for removing the joint A and the heat discharge pipe from the unit.
How to power on and start the unit for operational testing.
Procedures for testing auto, cooling, drying, and fan modes.
Notes the temperature limit for cooling mode operation.
Diagram showing the main board and its connected components.
Illustration of power supply and sensor connections to the main board.
Details the duration and scope of the limited warranty for the air conditioner.
Lists damages and conditions not covered by the warranty.
Section for recording owner details for warranty service.
| Brand | Gree |
|---|---|
| Model | GPC05AK-A3NNA2B |
| Category | Air Conditioner |
| Language | English |