Connect The Rods
Connect the Top Rod to the Bottom Rod
by sliding the Top Rod with the Locking
Bracket end down. Note: The groove on the
Top Rod needs to face away from you. Align
grooves to one another to ensure rods stay
in place.
Slide the Top Rod to the desired length and
tighten the Locking Bracket by turning it to the Left.
1
2
7 8
ASSEMBLY
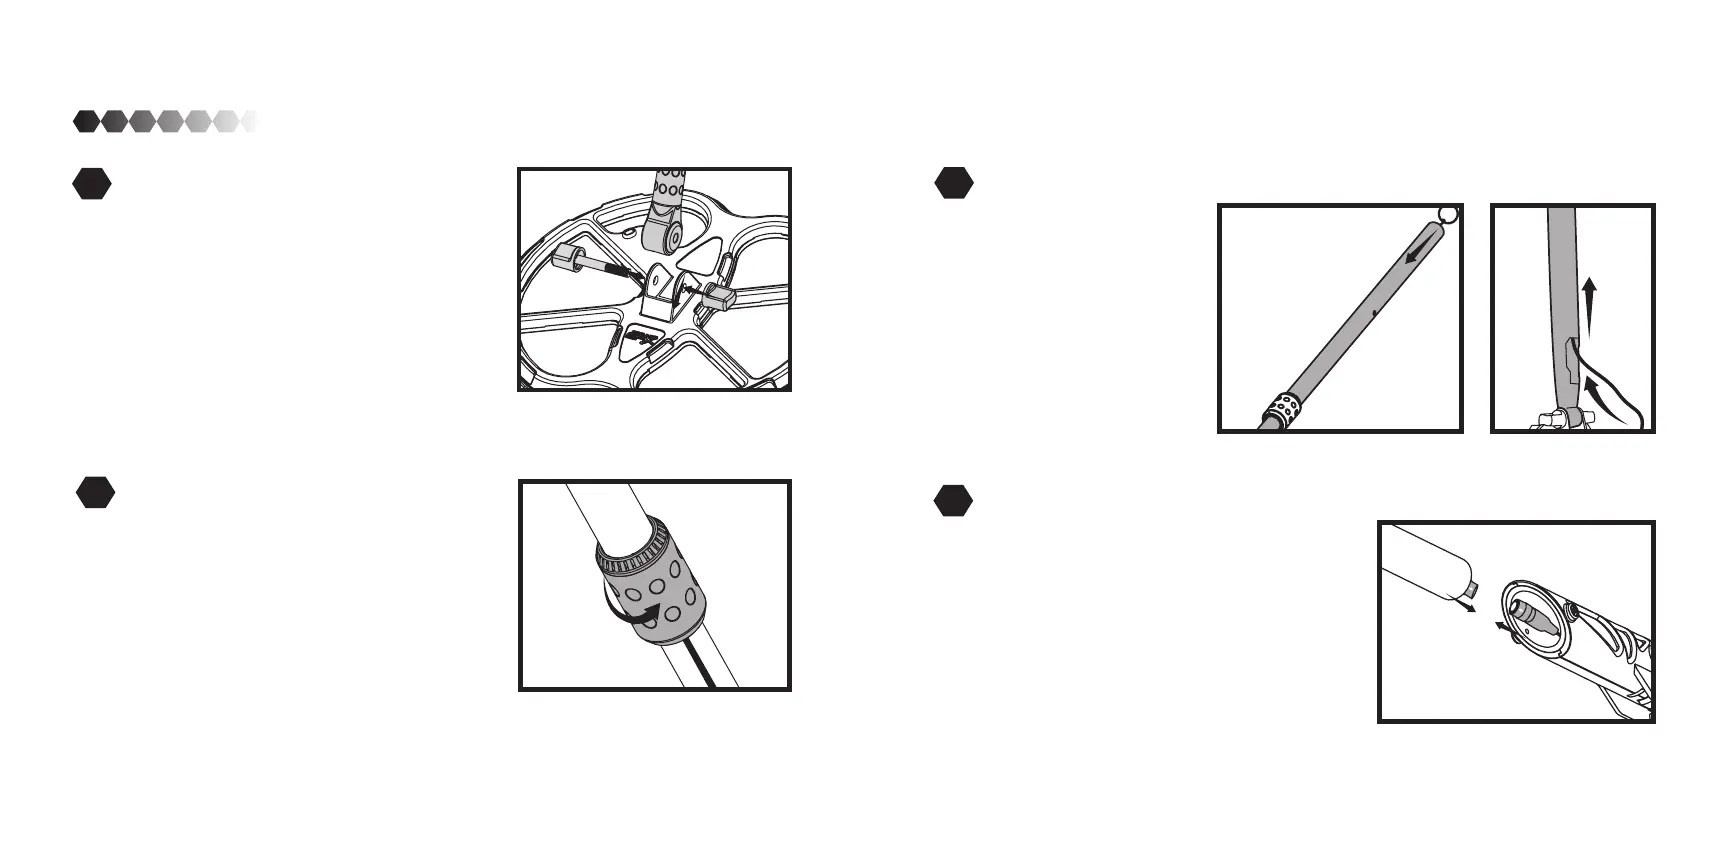
Assembling the coil unit
Unscrew the bracket from the bottom rod.
Fit the bottom rod inside the coil and re-
place the bracket. Then tighten but do not
over tighten. NOTE: The large hole faces
down. This is where the cable will enter the
rod.
Connecting the Wiring
Take the Cable Pull and
place it down the Rods.
Screw the end of the Cable
Pull to the end of the wire.
Place the connector in the
opening. Then pull the
hoop at the top to pull the
cable through the rods.
Connecting the Handle Unit
Disconnect the Cable Pull and connect the
wire head to the handles cable. Be careful
to align the white indicator arrow on the
wire head with the alignment arrow on the
handle units cable head to ensure proper
connection.
NOTE: Screw the silver piece to ensure the
cable is locked in place.
3
4
 Loading...