7
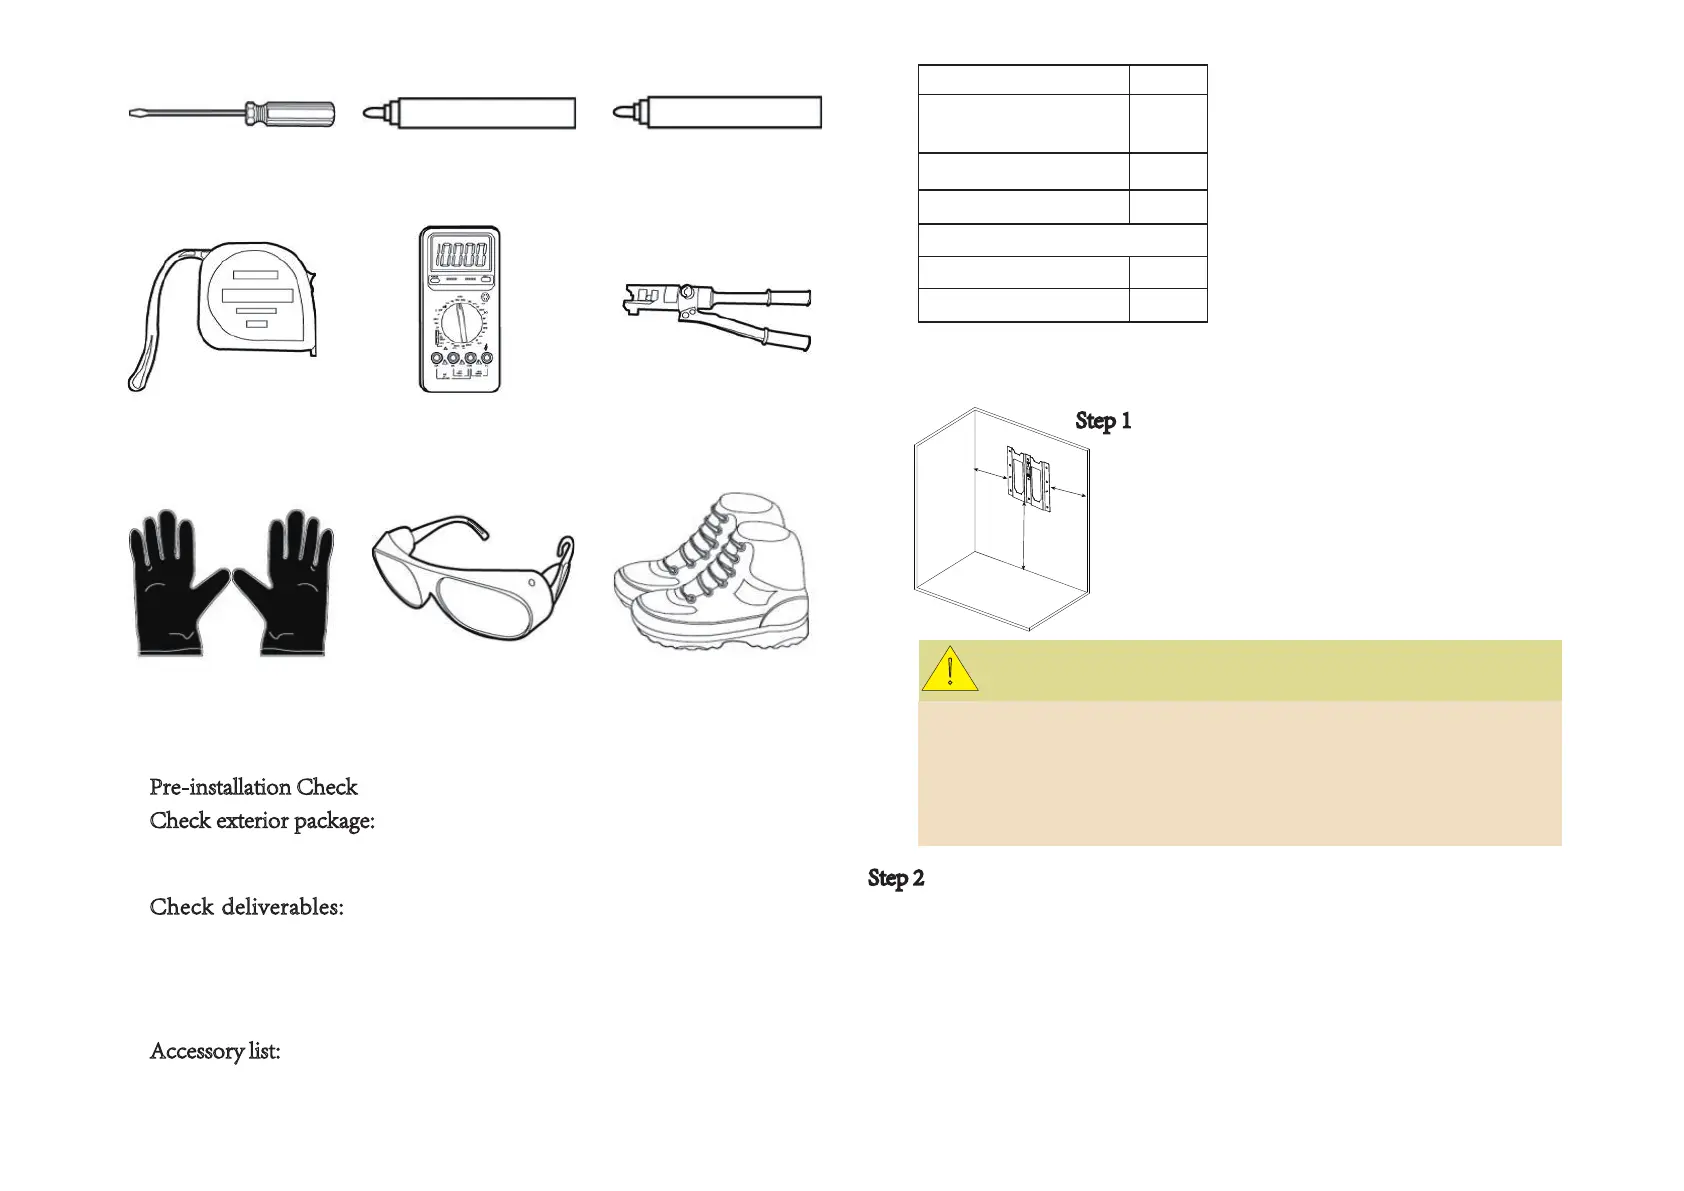
Screw driver
Cable wrench
Pencil
Tape measure
Multi-meter
Hydraulic plier
Insulated gloves Safety goggle Safety shoes
3.3 installation Procedures
before opening package, check for damages like
holes, cracks or other traces on exterior packing case. If any abnormity is
detected, do not open the package and contact your distributor.
after opening package, check if deliverables are
complete. If there is any part missing or damaged, please contact your
distributor.
Check and confirm the battery is powered off and breaker is open before
any further step.
RJ45 connector 2 PCS
Grounding Cable
M6 Nut
1 PCS
Warranty Card 1 PCS
Gradienter 1 PCS
Fastenings
M8 expansion screw 2 PCS
M8*H60 anchor 2 PCS
3.3.1 Wall Mounted Installation
Step 2 Fix bracket to wall.
Choose alloy drill bit with a diameter of 12mm and install it to a drill.
Drill in the spots that have been located in step 1 and have at
least 60mm drilling depth. Clean the soil and drive expansion tube
into the hole. One person puts the bracket on wall and minds to keep
gradienter horizontal. The other person drives M8 screw through the
bracket into hole.
Step 1 Confirm installation spot.
.noitallatsni eht etapicitrap snosrep owt tsael tA
One person places the bracket on wall and
ensures the gradienter horizontal; the other
person marks spots of screw driving.
After confirming the spots to drive screws,
put down the bracket.
The weight capacity of wall should exceed 4 times weight of battery.
Keep the distance between bracket, wall and floor as is shown
(320mm, 320mm, 765mm).
Installer should consider the specific wall shape before choosing four
drilling spots.
320mm
320mm
765mm
!
CAUTION
 Loading...