EasyManua.ls Logo

Growatt MIC 750 TL-X - User Manual

Growatt MIC 750 TL-X
2 pages
Print Icon
To Next Page IconTo Next Page
Loading...
Installing the Device
Connecting Cables
3.1 Installing the DC Input Power Cable
2. 3 Installing the Monitor
2.2 Installing the Mounting Bracket And MIC TL-X Series
Ensure that the Monitor is installed securely.
Overview
2.
2. 1 Installation Requirements
Tilt and Space
1.
3.
MIC TL-X Series
Quick Guide
Description
A
Inverter
1
B
Mounting bracket
1
C
Quick Guide
1
D
Monitor(Optional)
1
E
1
F
1
G
3
H
2
I
3
Notice
RJ 45 connector
Before installing the device,check that the pack-
age contents are intact and complete against
the packing list.If any damage is found or any
component missing,contact your dealer.
Object
Quantity
Signal connector
J
PV+/PV- terminal
1/1
K
PV+/PV- metal terminal
1/1
L
AC connector
1
M
Uninstall signal and AC connector tool
1
N
Uninstall PV connector
1
Self-tapping screws
Plastic expansion pipe
Safety-lock screws
The Inverter
Side
Pull the DC input power cable back to ensure that it is connected securely.
The Inverter
Side
Install
Remove
Fix the wall bracket
Installation & Tighten
screw assemblies
The Inverter
Side
The Inverter
Side
The Inverter
Side
The Inverter
Side
Cables
Cables
Positive metal
terminal
Positive connector
Negative connector
Negative metal
termina
4~6mm²
4~6mm²
Drilling holes
3.2 Installing the AC Output Power Cable
3.3 Installing the Signal Cable
3.4 Installing the DRMS Cable
Connect the AC output power cable to the AC connector.
The Inverter
side
The Inverter
side
The Inverter
side
The Inverter
side
The Inverter
side
NO.
1
3
NO
4
6
COM/DRM0
Notice
1.When laying out signal cables, separate them from
power cables to avoid strong signal interference
sources.
DRM Port Pin Definitions
COM Port Pin Definitions
DRM5
Definition
Definition
Unclock the housing
No.
Definition
1
2
3
4
NA
CT-P
NA
CT-N
RS 485A1
RS 485B1
This pin is
no signal
Signal for
export
limitation
(optional)
Signal for
communi-
cation
DRM8
DRM7
DRM6
No.
Definition
6
5
7
8
RS 485A2
RS 485B2
Signal for
Smart
Meter
Notice
Suggest using 4mm²cables. Ensure the exposed core wire is totally inserted into the cable hole and connected securely.
Type 1 Type 2
185
12
Question and Answer IconNeed help?

Do you have a question about the Growatt MIC 750 TL-X and is the answer not in the manual?

Summary

Overview

Installing the Device

Installation Requirements

Specifies tilt, space, and environmental needs for device installation.

Mounting Bracket and MIC TL-X Series Installation

Details drilling holes and fixing the wall bracket for mounting the device.

Monitor Installation

Instructions for securely installing the optional monitor.

Connecting Cables

DC Input Power Cable Installation

Guidance on correctly connecting the DC input power cable.

Connecting Meter

Verifying the Installation

Powering On the System

Export Limitation Setting

Overview

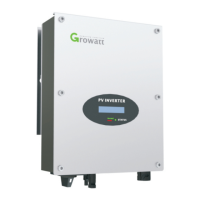
The provided manual describes the MIC TL-X Series inverter, a device designed for converting DC power from photovoltaic (PV) modules into AC power for grid connection. This quick guide covers its installation, wiring, and basic operation, including meter connection and export limitation settings.

Function Description

The MIC TL-X Series inverter serves as the central component in a solar power generation system, converting the variable DC output from solar panels into stable AC power suitable for household consumption or feeding into the electrical grid. It is designed to be user-friendly, with clear installation instructions and an intuitive interface for monitoring and configuration. The device supports connection to external meters for energy monitoring and features an export limitation function to control the amount of power fed back into the grid, adhering to local regulations or utility requirements.

Important Technical Specifications

While specific electrical ratings (e.g., voltage, current, power) are not detailed in this quick guide, the manual provides crucial information regarding physical components and connectivity:

  • Components: The package includes the inverter itself, a mounting bracket, a quick guide, an optional monitor, signal and RJ45 connectors, self-tapping screws, safety-lock screws, and plastic expansion pipes.
  • Terminals:
    • PV Input: Features PV+/PV- terminals (J) and PV+/PV-metal terminals (K) for connecting DC input from solar panels.
    • AC Output: Equipped with an AC connector (L) for grid connection.
    • Signal: Includes signal connectors (E) and RJ45 connectors (F) for communication and monitoring.
  • Tools: The package also contains uninstall tools for signal, AC, and PV connectors (M, N), indicating a design that facilitates maintenance and replacement.
  • Cable Recommendations: For AC output, 4mm² cables are suggested, emphasizing secure and complete insertion of the exposed core wire into the cable hole.
  • COM Port Pin Definitions:
    • RS485A1/A2 & RS485B1/B2: Dedicated pins for RS485 communication, crucial for data exchange with smart meters and other monitoring devices. RS485A1/B1 are for general communication, while RS485A2/B2 are specifically for smart meter communication.
    • CT-P/CT-N: Pins for export limitation (optional), allowing the inverter to regulate power output based on grid requirements.
    • NA: Indicates pins with no signal.
  • DRM Port Pin Definitions:
    • DRM5, DRM6, DRM7, DRM8, REFGEN, COM/DRM0: These pins are for Demand Response Management (DRM) signals, enabling the inverter to respond to grid demands for power reduction or shutdown.

Usage Features

The MIC TL-X Series inverter is designed with several features to enhance usability and operational efficiency:

  • Installation Flexibility: The manual details specific tilt and space requirements (e.g., ≤15° tilt, ≥500mm top clearance, >300mm side clearance, >800mm bottom clearance, >500mm front clearance) to ensure proper ventilation and accessibility, crucial for optimal performance and longevity.
  • Monitor Integration: An optional monitor can be securely installed to provide real-time data and status updates.
  • Intuitive Interface: The device features a touch-button interface for navigation and configuration:
    • Single touch: Switches display or increments numbers.
    • Double touch: Enters selections.
    • Three touch: Navigates to the previous menu.
    • Hold 5s: Confirms country settings or recovers default values.
  • Meter Connectivity: The guide provides detailed wiring diagrams and pin definitions for connecting to common energy meters like EASTRON (SDM230-Modbus) and CHINT (DDSU666), facilitating accurate energy monitoring and billing.
  • Export Limitation: A key feature allowing users to set an "ExportLimit Rate" (e.g., 80.0%) to control the amount of power fed back into the grid, as per utility permissions. This function can be toggled ON/OFF.
  • System Verification: A checklist is provided to ensure correct and secure installation of all components, including the inverter, monitor, ground cable, DC/AC switches, and signal cables, before powering on.
  • Country Setting: The initial power-on sequence includes a step to set the operational country, which is critical for compliance with local grid codes and regulations.

Maintenance Features

While the manual is a quick guide and doesn't delve deeply into long-term maintenance, it highlights several aspects that contribute to the device's maintainability and safe operation:

  • Component Check: The initial inspection of package contents for intactness and completeness is a crucial first step in preventing issues.
  • Secure Connections: Emphasis on securely connecting all cables (DC input, AC output, signal) and ensuring exposed core wires are fully inserted helps prevent loose connections, which can lead to performance degradation or safety hazards.
  • Uninstall Tools: The inclusion of dedicated tools for uninstalling connectors (signal, AC, PV) suggests a design that supports easy and safe disconnection for servicing or replacement.
  • Cable Management: A notice advises separating signal cables from power cables to avoid strong signal interference, which is a good practice for maintaining system reliability and data integrity.
  • Watertight Caps: The instruction to lock unused terminals and ports with watertight caps is essential for protecting the device from environmental elements (e.g., moisture, dust), thus extending its lifespan and ensuring safe operation.
  • LED Indicator: The tip that a green LED light indicates normal system operation provides a quick visual check for the device's health.

Growatt MIC 750 TL-X Specifications

General IconGeneral
BrandGrowatt
ModelMIC 750 TL-X
CategoryInverter
LanguageEnglish

Related product manuals