EasyManua.ls Logo

Growatt ShineLink-X - User Manual

Growatt ShineLink-X
14 pages
Print Icon
To Next Page IconTo Next Page
Loading...
GROWATT NEW ENERGY TECHNOLOGY CO.,LTD Powering Tomorrow
1
Growatt monitoring
device setup guidance
SHAWN

Other manuals for Growatt ShineLink-X

Question and Answer IconNeed help?

Do you have a question about the Growatt ShineLink-X and is the answer not in the manual?

Summary

ShineLink Monitoring Devices Overview

RF Sticks

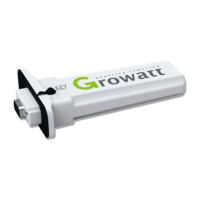
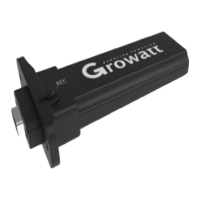
Details USB port, TL-X series compatibility, RGB light, reset button, and QR code for ShineLink-X.

ShineLink Features

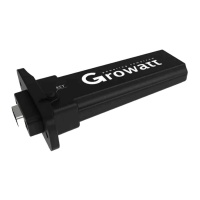
Details RS232 port, inverter compatibility, RGB light, and reset button location for ShineLink.

Start Using the ShineLink

Initial Connection Steps

Connect ShineLanBox to router and dongle to inverter, replacing existing WiFi dongle if necessary.

Connection Status Indicators

Check ShineLanBox and dongle indicators for successful connection status.

Dongle Indicator Meanings

Explains flashing blue fast (pairing) and slow (connected) states of the RF Stick.

Troubleshooting Connection Issues

Addresses issues like ShineLanBox not connecting to router and how to re-pair devices.

Re-pairing Procedure

Detailed steps to re-pair the ShineLanBox and RF stick using reset buttons.

Shinephone App Registration

Prerequisites and Download

Pair the dongle with ShineLanBox first, then download and start the ShinePhone App registration.

Registration Form Details

Guidance on using email as username, repeating email, and leaving installer code blank.

Adding Plant Information

Details on naming the plant, setting installation date, address, and PV capacity.

Add Datalogger

Scanning ShineLanBox Barcode

Scan the ShineLanBox barcode to add the datalogger to your account for monitoring.

Contact Information

Overview

The Growatt monitoring device setup guidance outlines the process for installing and configuring Growatt's ShineLink monitoring devices, which are designed to provide real-time data and management capabilities for solar power systems. The document covers the physical setup of the devices, establishing communication between them, and registering them with the ShinePhone App for remote monitoring.

Function Description:

The Growatt monitoring system primarily consists of two main components: the ShineLink-X (or ShineLink) RF Stick and the ShineLanBox. These devices work in conjunction to collect data from Growatt inverters and transmit it to the Growatt monitoring platform, accessible via the ShinePhone App.

The RF Stick (ShineLink-X or ShineLink) is a data logger that plugs directly into the communication port of a Growatt inverter. Its primary function is to gather operational data from the inverter, such as power generation, voltage, and current. The ShineLink-X is specifically designed for TL-X series inverters and uses a USB port for connection, while the ShineLink is compatible with other inverter types that feature an RS232 port. Both versions include a tricolor indicating light (RGB) to display their operational status and a reset button for troubleshooting or re-pairing. The ShineLink-X has its reset button underneath and a QR code for easy identification, while the ShineLink's reset button is located inside a rubber cap.

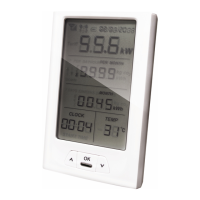
The ShineLanBox acts as a gateway, receiving data wirelessly from the RF Stick and forwarding it to the internet via a home router. It connects to the router using an Ethernet cable. The ShineLanBox also features indicator lights (Solid Green for power and network connection, Flashing Green for data transmission) to show its status and the status of its connection to the RF Stick and the internet. A reset button on the bottom of the ShineLanBox allows for re-pairing with the RF Stick and resetting its network configuration.

The ShinePhone App is the user interface for the monitoring system. It allows users to register their monitoring devices, create a "plant" (representing their solar installation), and view real-time and historical data from their solar system. The app facilitates the setup process, including entering plant details, location, and inverter capacity, and provides a platform for managing and monitoring the solar power generation.

Usage Features:

The setup process is designed to be straightforward, guiding users through physical installation and software configuration.

  1. Physical Installation:

    • The ShineLanBox is plugged into a home router using an Ethernet cable.
    • The RF Stick is plugged into the communication port of the inverter. If an existing WiFi dongle occupies the port, it must be replaced with the new RF Stick.
  2. Establishing Communication:

    • Once both devices are powered on and connected, they should automatically establish communication.
    • Users can verify successful communication by observing the indicator lights on both the ShineLanBox and the RF Stick.
      • On the ShineLanBox, the top two lights should be solid green (indicating power and network connection), and the third light should be flashing intermittently (indicating data transmission from the RF Stick).
      • On the RF Stick, a slowly flashing blue light indicates a successful connection with the ShineLanBox. A fast flashing blue light means the RF Stick is waiting to be paired.
  3. Troubleshooting Communication Issues:

    • If the second light on the ShineLanBox (next to the cloud icon) is flashing green, it suggests a router connection issue. Users should try a different Ethernet port on their router.
    • If the top two lights on the ShineLanBox are green but the third light is off, it indicates a pairing issue between the ShineLanBox and the RF Stick. A re-pairing procedure is provided:
      • Push the reset button on the bottom of the ShineLanBox until all four lights turn on.
      • Push the reset button on the RF Stick for 6 seconds until its LED becomes solid blue.
      • Short push the reset button on the ShineLanBox; the bottom light should start to flash.
      • Short push the reset button on the RF Stick again to complete the re-pairing. The RF Stick's LED should then show a slowly flashing blue light.
  4. ShinePhone App Registration:

    • After successful device communication, users download the ShinePhone App.
    • The registration process involves creating an account using an email address as the username, setting a password, and confirming the email.
    • Users then add their "plant" by entering details such as the plant name, installation date, and address (which can be automatically filled using phone permissions). The inverter's rated power (PV capacity) also needs to be entered.
    • Finally, the datalogger (ShineLanBox) is added to the account by scanning its bar code (serial number and check code) located on the back of the device. This links the physical monitoring hardware to the user's online account, enabling solar system monitoring.

Maintenance Features:

The monitoring system is designed for minimal ongoing maintenance, primarily focusing on ensuring continuous data flow and addressing communication issues as they arise.

  • Indicator Lights for Diagnostics: The tricolor LED on the RF Stick and the indicator lights on the ShineLanBox serve as primary diagnostic tools. By observing the patterns and colors of these lights, users can quickly identify the status of the devices and pinpoint potential issues, such as a lost connection to the inverter, a network problem, or a pairing failure between the RF Stick and the ShineLanBox.
  • Reset Buttons for Troubleshooting: Both the RF Stick and the ShineLanBox are equipped with reset buttons. These buttons are crucial for re-establishing communication or resetting network configurations in case of connectivity problems. The re-pairing procedure, detailed in the usage features, is a key maintenance step to resolve communication breakdowns between the two monitoring components.
  • Firmware Updates (Implied): While not explicitly detailed in this document, monitoring devices often receive firmware updates to improve performance, add new features, or address security vulnerabilities. These updates are typically managed through the online platform or the app, ensuring the devices remain up-to-date.
  • Remote Monitoring and Alerts: The ShinePhone App provides remote monitoring capabilities, allowing users to track their solar system's performance from anywhere. This feature enables proactive maintenance, as users can receive alerts for system malfunctions or underperformance, prompting them to investigate and resolve issues promptly.
  • Data Logging and Reporting: The system continuously logs data from the inverter. This historical data is invaluable for performance analysis, identifying long-term trends, and detecting any gradual degradation in system efficiency, which might indicate a need for professional inspection or maintenance.
  • Robust Design: The devices are designed to be robust and operate reliably in various environmental conditions, minimizing the need for frequent physical intervention. The RF Stick, being plugged directly into the inverter, benefits from the inverter's protective housing, while the ShineLanBox is typically placed indoors near the router.

In summary, the Growatt monitoring system offers a user-friendly approach to solar energy management, with clear setup instructions and built-in diagnostic tools to ensure reliable operation and facilitate troubleshooting when necessary.

Growatt ShineLink-X Specifications

General IconGeneral
ModelShineLink-X
CompatibilityGrowatt inverters
Operating Temperature-20°C to 60°C
Power SupplyDC 5V
Protection DegreeIP20
Operating Voltage5V
Communication InterfaceWiFi
Supported ProtocolsTCP/IP
Humidity Range0% ~ 95% (non-condensing)

Related product manuals