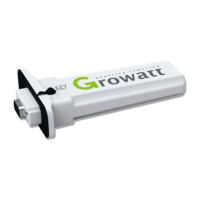
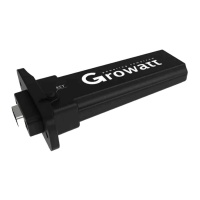
The Growatt ShineMaster is a data logger designed for monitoring and managing photovoltaic (PV) systems. It facilitates communication between PV devices and the Growatt ShineServer, enabling data display, monitoring, and parameter setup.
Function Description:
The ShineMaster acts as a central communication hub for PV installations. It supports various network communication methods, including wired LAN, 4G, and cloud server connectivity, to upload monitored data to the Growatt server. This allows users to access and manage their PV systems remotely through the server's domain name.
The device utilizes industrial standard RS485 and wireless RF communication (though RF is temporarily not supported) to monitor and control connected devices. It can also perform online upgrades for follower devices. Users can access the ShineMaster's internal IP address to enter a built-in web page for parameter setting, device adding, and inspections.
Specifically, the ShineMaster monitors photovoltaic devices such as inverters, weather stations, smart meters, and combiner boxes. It collects data from these devices and transmits it to the ShineServer for comprehensive system overview and analysis.
Important Technical Specifications:
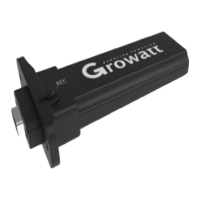
- Dimensions (Length * width * height): 130mm * 84mm * 25mm
- Net Weight: 180±5g
- Protection Grade: IP30
- Ambient Temperature: -40°C ~ +60°C
- Installation: Indoor
- Wireline Communication: RS485 maximum stability monitoring 64 inverters
- Wireless Communication: Not supported temporarily
- RS485 Communication Distance: 500 meters maximum (twisted shielded cable)
- Power Supply: 5V power adapter (included)
- Connectivity:
- ANT1: RF antenna interface
- ANT2: Antenna, used to receive wireless signals
- KEY: Reset button
- POWER: Power supply port
- SIM: SIM card slot (for 4G version)
- LAN: RJ45 port for connecting to local network/Shine Server
- RS-485: Twin-channel RS485 port for connecting to PV devices
Usage Features:
- Device Overview: The ShineMaster features seven LED indicators (Power, Network, Device, Configuration, RF, 4G, Status) that display its operational status and the number of connected devices.
- Installation:
- Can be installed on a vertical or horizontal surface.
- Connects to PV devices via RS485 ports.
- Communication mode options: standard version uses network cable (max 100m), 4G version requires 4G antenna and SIM card.
- Requires connection to a power supply.
- RS485 shielded wire must be grounded (PE) for stable long-distance communication.
- Supports parallel connection of up to 64 inverters via RS485.
- Double 485 ports should be connected to matched resistance with 120 ohms when multiple inverters are connected.
- Internal Web Page Access:
- Method 1 (via Router): Connect the PC and ShineMaster to the same router. Obtain the ShineMaster's IP address from the router's DHCP server client list and enter it into a web browser.
- Method 2 (Direct Connection): Connect the PC directly to the ShineMaster with an Ethernet cable. Amend the computer's IP address to 192.168.0.XXX (2-253 range) and access the default IP 192.168.0.254 in a web browser.
- Parameter Setting (Internal Page):
- Login: Default username and password are "admin".
- ShineMaster Status: View system status information, serial number, server address, and number of connected devices.
- Datalogger Management:
- Add Device: Before monitoring, devices must be added via the "ShineMaster Data Collector Settings" page. Select the meter channel (e.g., RS485_1), device type (e.g., INVERTER, SDM120, SDM630, WeatherStation, CHNT_DDSU, CHNT_DTSU), and communication address. Multiple devices with continuous addresses can be added at once (e.g., 1-10).
- Delete Device: Select the monitoring method, PV plant type, and communication address, then choose "Del" and save.
- Baud Rate Setting: Adjust the Baud Rate for RS485_1 or RS485_2 channels (default 9600).
- Network Settings:
- LAN: Select "LAN" for wired communication. DHCP can be "ON" (automatic IP) or "OFF" (fixed IP, requiring manual entry of IP, netmask, gateway, and DNS).
- 4G: Select "4G" for 4G communication (requires 4G antenna and SIM card).
- Server Address Setting: Choose between connecting to the server via domain name (e.g., server.growatt.com) or IP address (e.g., 47.91.67.66). If using IP, turn off the "Domain Name Analysis Function".
- Data Uploading to ShineServer:
- Register and log in to the ShineServer (http://server-cn.growatt.com for Chinese users, http://server.growatt.com for overseas users).
- Add the datalogger to the server using its serial number and check code (found on the package box).
- Monitor data: After registration, access "plant" -> "plant data" to view daily power charts for the entire plant or individual inverters.
- Manage monitoring devices: In the Server page, navigate to "Device Management" -> "Data Logger" to add, delete, or modify monitoring devices and set their baud rates.
Maintenance Features:
- Reset ShineMaster: Pressing the "reset" button for five seconds will erase all registered device information, but server communication settings will be retained.
- Troubleshooting:
- Cannot enter internal page: Ensure router DHCP is enabled, and the PC and ShineMaster are on the same network segment.
- Internal page shows not connected: Check router's internet connection and verify the server address (http://server-cn.growatt.com or http://server.growatt.com).
- Online but device disconnected: Check communication cable stability, ensure devices are added correctly in the internal page "datalogger settings", verify communication addresses match, and confirm PV device serial numbers are 10 digits (English letters and numbers only).
- Configuration page unresponsive: Refresh the page or log in again.
- General Maintenance:
- Avoid frequent power cycling.
- Handle with care.
- Designed for indoor use; avoid humid environments or direct sunlight.