7.B7.A
OPERATION (continued)
HANDPIECE OPERATION
Unlike traditional or push engraving
^OLYLHÄYTNYPWHUKTHU\HSMVY^HYK
force is required, the GRS pneumatic
handpiece requires only a light grip and
guidance.
Relax, allowing the engraving system to
move the tool forward and through the
material with guidance. Most graver slips
are due to manual hand pushing and an
V]LYS`ÄYTNYPWVU[OLOHUKWPLJL
A tight grip actually lessens impact
power.
For heavy work, decrease grip
while increasing power with the foot
throttle; an increasingly relaxed grip will
increase the power. However, do not lose
control while guiding the tool.
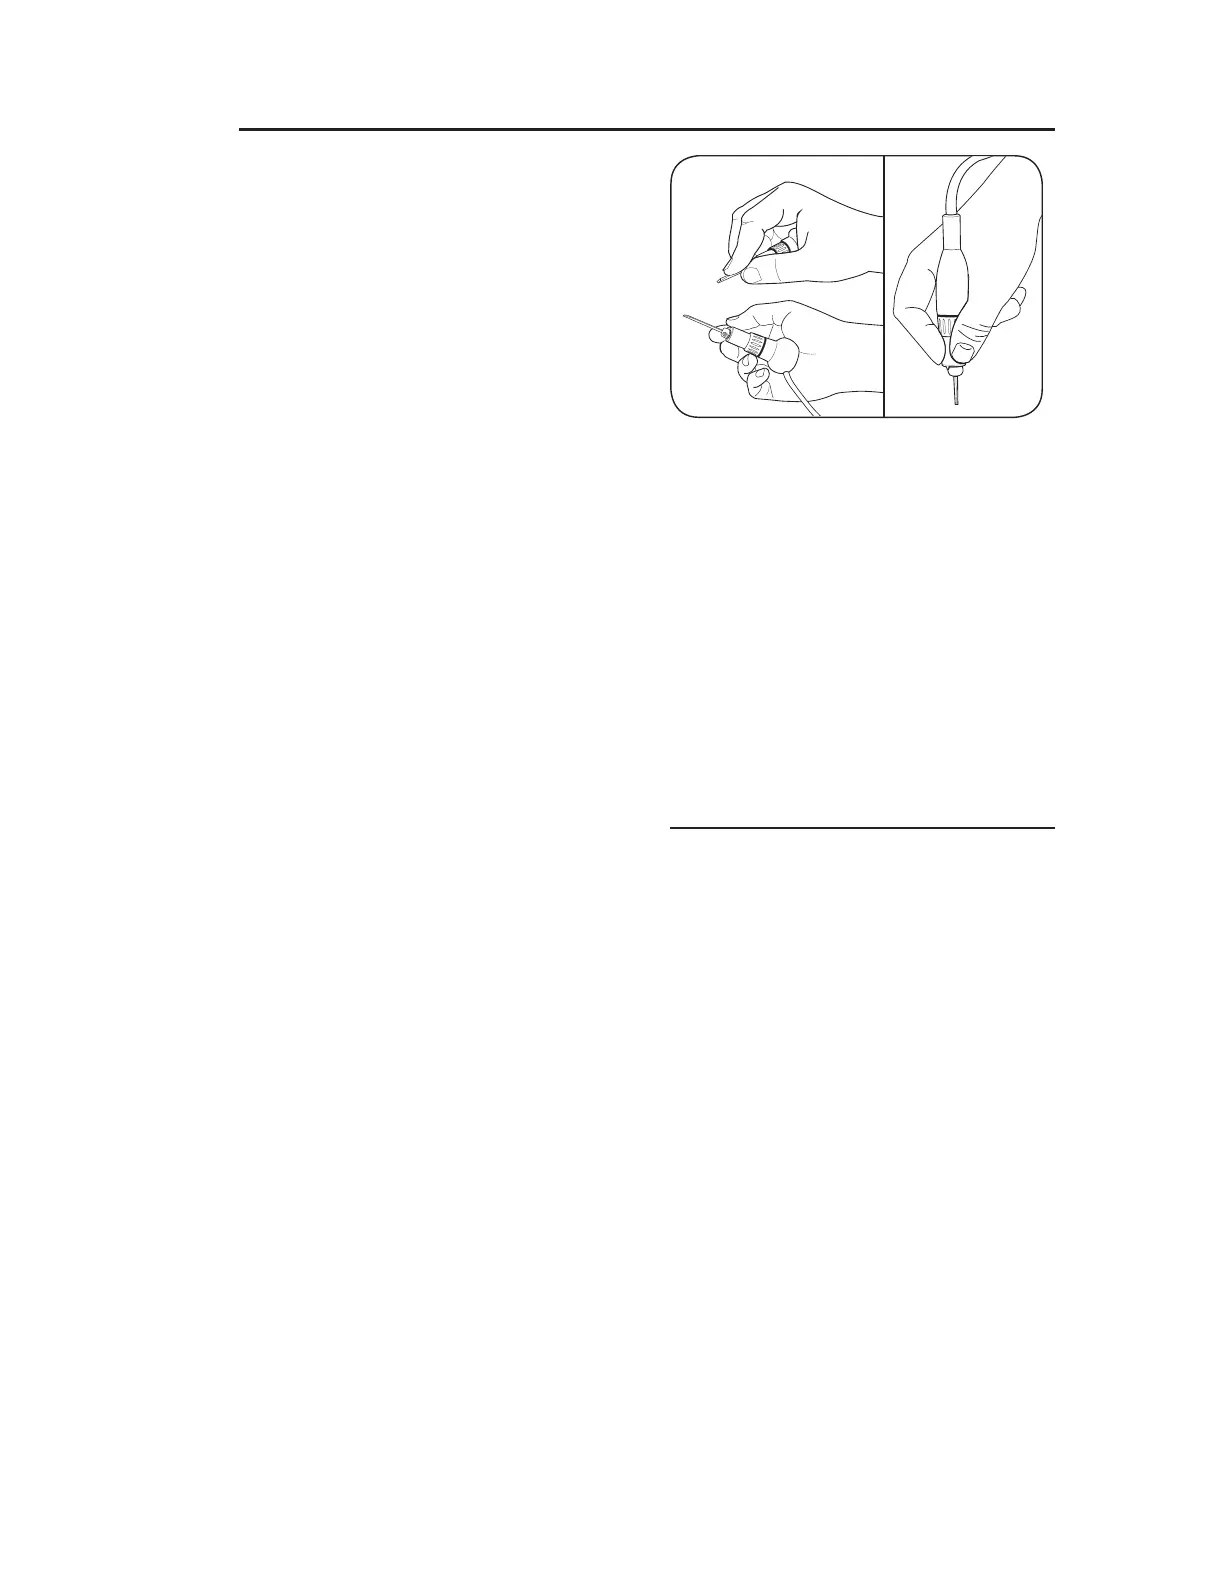
For general cutting techniques, position
the handpiece as in FIG. 7.A; this
is similar to holding a dinner knife.
For stippling, hammering, or similar
techniques, position the handpiece as
in FIG. 7.B; this is similar to holding a
pencil.
For hammering work, press the hammer
[PWKV^UÄYTS`[V[OLTH[LYPHSZ\YMHJL
and then operate the foot throttle.
;OPZZ`Z[LTPZUV[SPRLHÅL_PISLZOHM[
hammer; do not operate the hammer
tool by holding the tip slightly above
the surface. Use just enough downward
pressure to keep the hammer in place
while working.
ADJUSTMENTS USING THE BIAS
CONTROL
Use the bias control to adjust the starting
position of the foot throttle. This feature
TH`IL\ZLM\SMVYÄULKL[HPS^VYRZ\JOHZ
bulino engraving. Open the bias control
fully to activate the handpiece without
depressing the foot throttle. This feature
may be useful for stippling or hammering.
Turn the primary air pressure control
knob (FIG. 4.B) to add 1-2 psi
(0.07-0.14 bar) air pressure to the
current setting.
Turn the bias control (FIG. 4.C)
slightly to open the bias valve, just
until the handpiece is activated;
then slowly close the bias valve
when the handpiece stops stroking.
Note the foot throttle requires less
pressure to activate the handpiece.