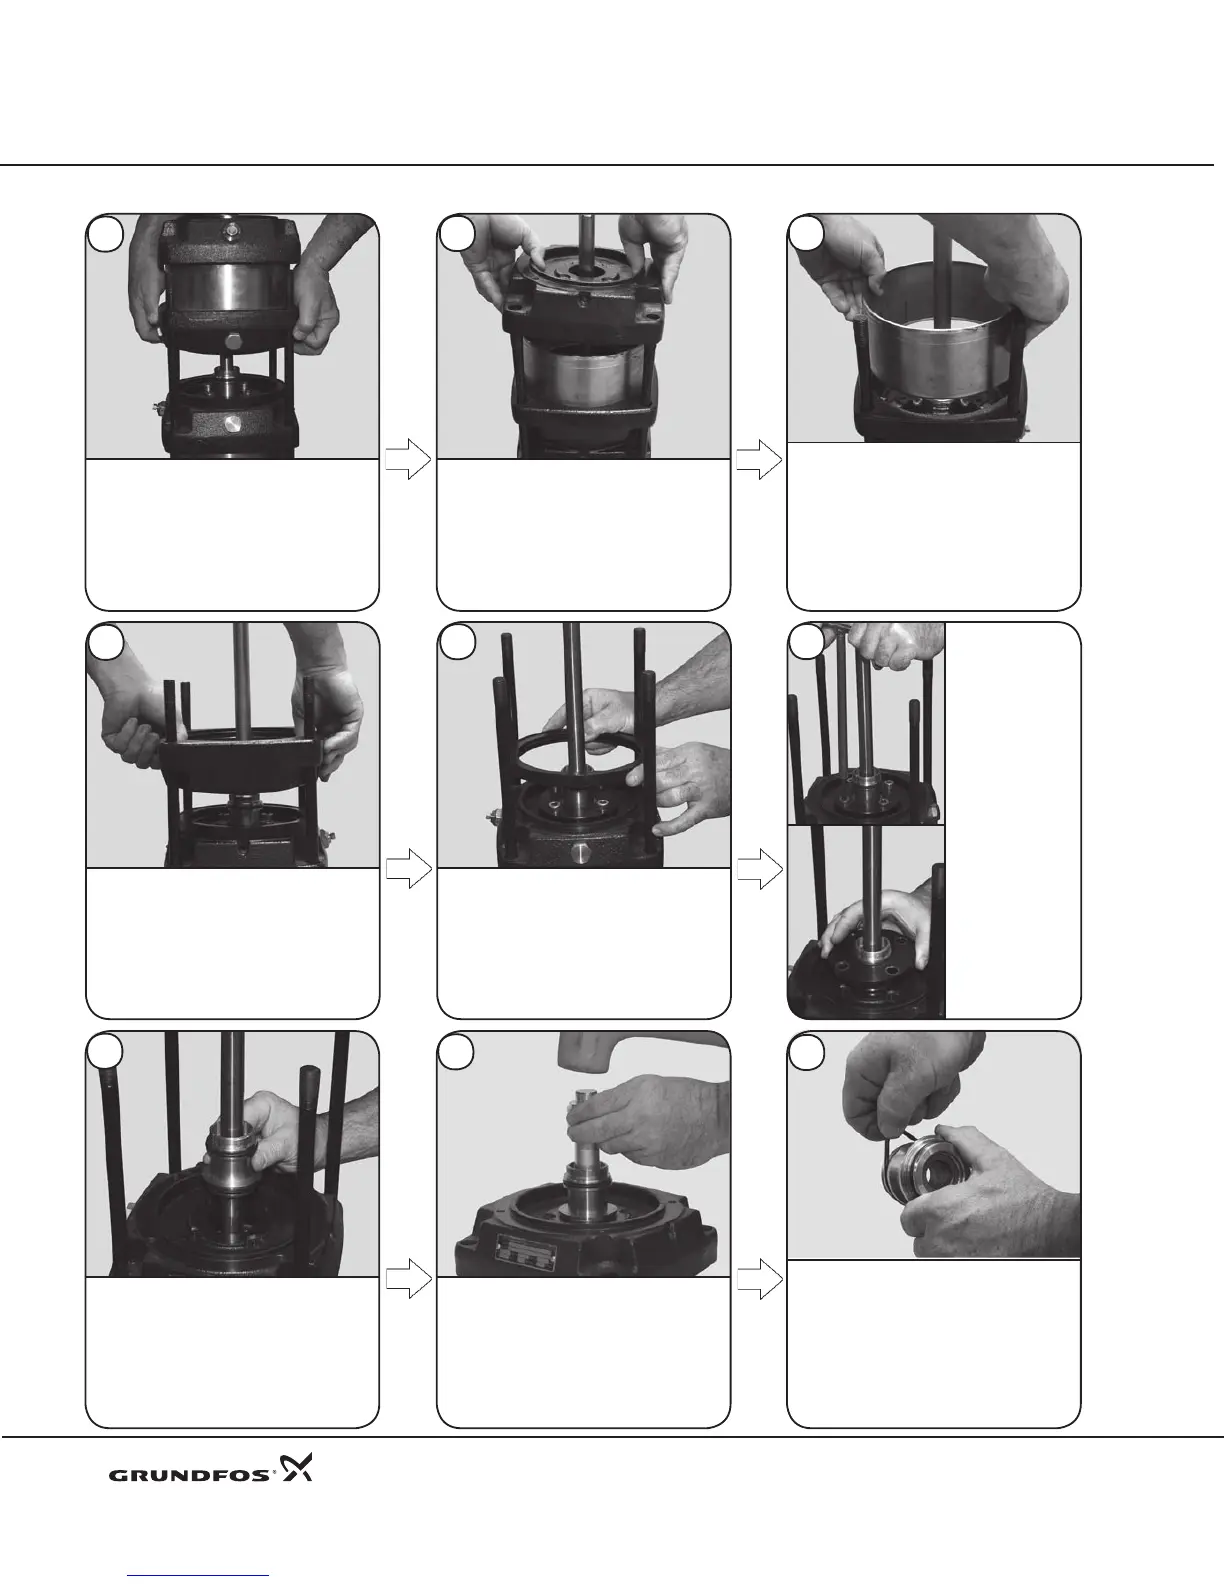
Dismantling Procedures CR, CRN 32•45•64•90
4
14
To remove the upper sleeve, diagonally
grip the Staybolts (Pos. 26). Using
your thumbs, press against the
sleeve to release the sleeve from the
middle pump head. If it does not move
freely, light blows with a rubber mallet
might be required. Once loose, lift the
sleeve off.
Cool-Top®
Remove the upper most Pump Head
(Pos. 2b), Upper Sleeve (Pos. 55a)
and middle Pump Head (Pos. 2c) as a
complete assembly if it has not leaked,
then skip to step 16. If the assembly
has leaked follow steps 13 to 15.
Remove the upper most pump head.
This may require light upward blows
with rubber mallet to the underside
of the pump head.
13
12
17
Loosen and
remove the
8 mm hex socket
Retainer Screws
(Pos. 58d).
Remove
the Connecting
Pipe Retainer
(Pos. 58c).
Lift off the middle pump head. Lift off the Spacing ring (Pos. 116).
16
15
Remove the O-rings (Pos. 109a
and 109b). For reassembly of the
connecting pipe go to the Reassembly
section step 18. To continue
disassembly, proceed to step 50.
Remove the Connecting Pipe (Pos.
149).
Place the connecting pipe into one
of the pump heads. Use 00SV2128
and a rubber mallet to drive out the
Retainer Ring (Pos. 47h) and Bushings
(Pos. 47g).
18
19
20

 Loading...