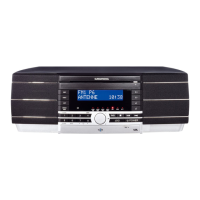
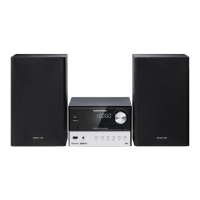
The GRUNDIG MICRO SYSTEM CDM 900 is a portable audio system designed for the playback of audio signals from CDs, radio, and cassette tapes. Any other use is expressly prohibited.
To ensure long-term satisfaction and enjoyment, the device should be protected from moisture. When placing the device, be aware that furniture surfaces may contain chemical additives in varnish and plastic that can corrode the device supports, leaving difficult-to-remove residues. Do not use cleaning agents; instead, clean the device with a clean, moist leather cloth. The casing should never be opened, as the manufacturer accepts no liability for damage resulting from improper handling. Thunderstorms pose a danger to all electrical devices; even when switched off, the system can be damaged by lightning strikes to the mains or antenna cable. Always disconnect the mains and antenna plugs during a storm.
Environmental Note
The packaging uses minimal materials: cardboard (box), polystyrene, and polyethylene (bag). Local regulations for disposing of packing material should be observed. Batteries, including heavy metal-free ones, should not be disposed of with household waste but at public collection points.
This device is noise-suppressed according to applicable EC directives (89/336/EEC, 73/23/EEC, and 93/68/EEC). It conforms to safety regulations DIN EN 60065 (VDE 0860) and IEC 60065. The type plate is located on the bottom of the device. Technical and optical modifications are reserved.
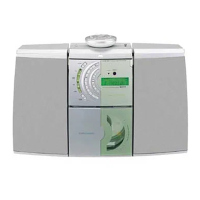
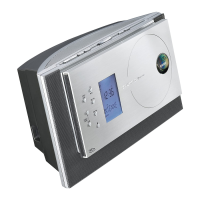
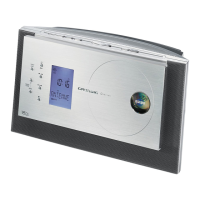
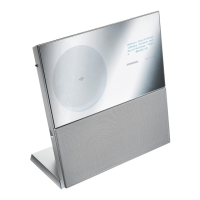
Overview of the Device
General Functions (Front Panel)
- STANDBY : Switches the device on and off. A red "STANDBY" indicator lights up when the device is off (except in battery mode).
- CD : Selects the CD input source.
- TUNER/BAND : Selects the TUNER input source and switches between FM and MW frequency bands.
- TAPE : Selects the TAPE input source.
- UBS (Ultra Bass System) : For "boosting" the bass.
- DSC (Digital Sound Control) : Selects sound settings: FLAT, ROCK, POP, JAZZ, DISCO.
- MEMO. : For setting the clock and timer.
- MODE/TIMER : Switches Timer mode on and off.
- + VOLUME - : Adjusts the volume.
- PHONES : Headphone jack (ø 3.5 mm) on the top of the device.
- DISPLAY/RDS : In mains mode, temporarily lights up the display. In battery mode, calls up the time and temporarily lights up the display.
CD Mode Functions
- CD OPEN/CLOSE : Opens and closes the CD compartment.
- DISPLAY/RDS : Switches between elapsed track playing time and remaining track playing time.
- MEMO. : Calls up the function for creating a track memory.
- MODE/TIMER : Calls up Intro, Random, Repeat 1, and Repeat All functions in succession.
- ►►I : Press briefly to select the next track; hold down to search for a particular passage.
- I◄◄ : Press briefly to select the previous track; hold down to search for a particular passage.
- ►II PLAY/PAUSE : Starts CD playback; pauses playback.
- ■ STOP : Ends CD playback.
TUNER Mode Functions
- MEMO. : For storing radio stations.
- I◄◄ / ►►I : Hold down to start station search; press briefly to change frequency in small steps.
- DISPLAY/RDS : Calls up RDS functions.
Tape Mode Functions (Under the Cover Panel)
- Open/Close Button : Opens and closes the tape compartment.
- Pause Button : Pauses recording or playback.
- Stop Button : Stops drive functions.
- Fast Forward Button : Fast forwards the tape to the end.
- Rewind Button : Rewinds the tape to the beginning.
- Play Button : Starts playback.
- Record Button : Starts recording.
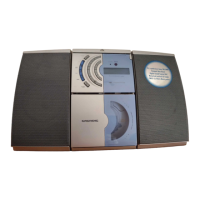
Connections and Controls (Back of Device, Behind Cover Panel)
- R L + - : Connections for supplied loudspeakers (R = right channel, L = left channel).
- FM ANTENNA Υ FM 75 Ω : Antenna socket for rooftop or telescopic antenna.
- Winding Brackets : For winding up loudspeaker cables.
- FM BEAT CUT STEREO/MONO Switch : For FM stereo/mono reception and reducing interference during MW radio program recording.
- OPTICAL OUT : Audio signal output for copying a CD to a digital recording device.
- AC ~ : Mains socket for connecting the mains cable. The only way to disconnect the device from mains supply is to pull out the plug.
Remote Control
The remote control has a magnet for attachment to the top of the device, but note that the magnet can damage data on disks and tape recordings.
- STANDBY : Switches the device on/off. In battery mode, only switches off.
- PLAY/PAUSE ►II : Starts/pauses CD playback.
- STOP ■ : Ends CD playback.
- UBS : For "boosting" the bass.
- DSC : Selects sound settings (FLAT, ROCK, POP, JAZZ, DISCO).
- VOLUME ▲/▼ : Adjusts volume.
- R-SKIP/DOWN, F-SKIP/PRESET UP : In Tuner mode, calls up previous/next preset station. In CD mode, selects next/previous track; hold down to search for a passage.
- SLEEP : Activates sleep timer.
- MODE/TIMER : Switches Timer mode on/off.
- TUNER/BAND : Selects TUNER input source; selects FM/MW bands.
- CD : Selects CD input source.
Inserting Batteries in Remote Control
- Open the battery compartment by twisting off the lid.
- Insert AAA (UM4, R03) batteries, observing polarity.
Note: Replace flat batteries promptly. No liability for damage from leaking batteries.
Power Supply
Mains Operation
- Check if mains voltage matches the type plate (bottom of device).
- Plug the supplied mains cable into the "AC ~" socket on the device.
- Insert the mains cable plug into the mains socket.
Note: The only way to disconnect from mains is to pull out the plug.
Battery Operation
- Unplug the mains cable and remove the back cover panel.
- Insert eight C-cell (LR14 or AM2) batteries, observing polarity.
Note: Remove flat batteries or when not in use for long periods. Batteries are switched off during mains operation.
Memory Back-up Batteries
Two additional AAA (R03/UM4) alkaline batteries must be inserted to preserve saved settings when the device is off, regardless of power supply.
Important Notes for Users in the U.K.
- Mains Plug: Fitted with an approved moulded 13 Amp plug. To change a fuse: remove cover, fix a BS1362 5 Amp (A.S.T.A. or BSI approved) fuse, refit cover. If the plug is unsuitable, cut it off and fit an appropriate plug. If the mains plug contains a fuse, it should be 5 Amp. If a plug without a fuse is used, the distribution board fuse should not exceed 5 Amp. The severed plug must be disposed of safely.
- How to Connect Plug: Blue wire to neutral (N) or black terminal; brown wire to live (L) or red terminal. Do not connect either wire to the earth terminal (E or e, or green/yellow). Ensure the cord grip clamps over the sheath of the lead.
Connection
Attaching Loudspeakers
- Place the loudspeaker in the guide from behind and slide it onto the device casing.
- To remove, push out the locking mechanism and slide back.
Connecting Loudspeakers
- Connect loudspeakers to the "R L + -" terminals on the back.
- Press spring buttons to insert speaker cables. Insert "-" wire into black (-) terminal and "+" wire into red terminal.
Note: Cables can be wound around brackets after connection.
Connecting the Antenna
- Plug the telescopic antenna or roof antenna cable into the "FM ANTENNA" socket.
Note: Use the telescopic antenna for local FM (VHF) reception if no rooftop aerial system is available.
Volume/Tone
Switching On/Off
- Use the "STANDBY" button. Red "STANDBY" indicator lights up in mains mode when off.
Adjusting Volume
- Use "+ VOLUME -" buttons. Display shows "VOL 00" to "VOL 60".
Digital Sound Control (DSC)
- Press "DSC" repeatedly to select sound effect (FLAT, ROCK, POP, JAZZ, DISCO).
Ultra Bass System (UBS)
- Press "UBS" to switch on/off. Display briefly shows "UBS ON", then "UBS".
Headphones
- Connect headphones to the "PHONES" jack (ø 3.5 mm). Loudspeakers automatically switch off.
Note: Prolonged listening at loud volumes can damage hearing.
Radio Mode
Antennas
- For FM (VHF) stations, connect roof antenna or extend/tilt/turn telescopic antenna for best reception.
Note: If FM signal is too strong, push in telescopic antenna.
Poor Reception: If FM stereo reception is impaired, set "FM" switch to "MONO". "((STEREO))" light goes out.
- For MW reception, the radio has a built-in rod antenna. Turn the device to point the antenna.
Tuning to Radio Stations
Up to 30 FM and MW stations can be stored.
- Press "STANDBY" to switch on. Red "STANDBY" indicator goes out.
- Select TUNER input using "TUNER/BAND". Display shows "TUNER", frequency, and band.
- Select frequency band (FM or MW) using "TUNER/BAND".
- Press "I◄◄" or "►►I" to tune. Display shows frequency (e.g., "97.90"), "FM", and "((STEREO))" for FM stereo, or "810" and "MW" for MW.
Note: Briefly pressing "I◄◄" or "►►I" changes frequency in small steps; holding down starts automatic search.
- Press "MEMO.". Display shows "97.90", "MEMORY" flashes.
- Within 5 seconds, select preset station number using "I◄◄" or "►►I". Display shows "03 97.90".
Note: Store within 5 seconds, or function ends.
- Select "MEMO." to store. Display shows "03 97.90".
Selecting Channel Position
- Use "DOWN PRESET" or "PRESET UP" on remote control. Display shows "03 97.90".
Stereo/Mono Reception
- "((STEREO))" appears in display for FM stereo program.
- If FM stereo signal is weak, use "FM" switch on back to select Mono reception ("MONO"). "((STEREO))" disappears.
RDS Functions
Switching Device Display
- Repeatedly press "DISPLAY/RDS". Display cycles through station name, program type, radiotext, time, frequency, and station name again.
RDS Programme Service
RDS stations transmit station names ("RDS" in display). If not provided, "RDS" does not appear.
PTY Programme Type Code
RDS shows FM program types.
- Keep pressing "DISPLAY/RDS" until program type appears.
Note: If not provided, "PTY" does not appear.
Radiotext
Some RDS stations transmit radiotext (additional information). Appears as ticker text.
- Keep pressing "DISPLAY/RDS" until "Radiotext" appears.
Note: Poor reception may cause gaps. If not provided, "RT" disappears.
RDS Time
Some RDS stations transmit time information.
- Keep pressing "DISPLAY/RDS" until "CT" appears. Then "CT ON" and current time.
Note: Time updates every minute; accuracy depends on station. Tune for several minutes for transmission. Time update can be deactivated (see "Setting the time" point 7).
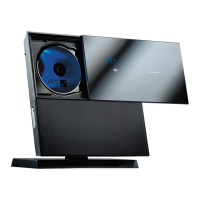
CD Mode
Suitable for music CDs with the specified logo or CD-Rs with audio data. Keep compartment closed to prevent dust. Do not attach labels to CDs. Keep surfaces clean.
Preparation
- Press "STANDBY" to switch on.
- Select CD input using "CD". If no CD, "NO DISC" appears.
- Press "CD OPEN/CLOSE" to open. Display shows "OPEN".
- Insert CD label facing forward.
- Press "CD OPEN/CLOSE" to close. Display shows "CLOSE", then "CD", number of tracks, and total playing time.
CD Playback
- Press "►II" to start. Playback begins with first track. Display shows "CD", "►II", and "01 0:02".
Note: Press "DISPLAY/RDS" to switch between elapsed and remaining time.
- To pause, press "►II". Display shows "►II" and "►II" flashes. To resume, press "►II" again.
- To end, press "■".
Selecting a Different Track
- During playback, keep pressing "I◄◄" or "►►I" on device or "R-SKIP" or "F-SKIP" on remote until desired track number appears. Playback starts automatically.
Searching for a Passage
- During playback, press and hold "I◄◄" or "►►I" on device or "R-SKIP" or "F-SKIP" on remote until desired passage is found.
Note: Volume is reduced during search.
Repeating a Track
- During playback, press "MODE/TIMER" once. Display shows "REPEAT 1".
- To end, press "MODE/TIMER" twice.
Repeating Whole CD (REPEAT)
- During playback, press "MODE/TIMER" twice. Display shows "REPEAT ALL DISC".
- To end, press "MODE/TIMER" once.
Playing Introductions of Each Track
- Press "MODE/TIMER" when CD is in STOP position. Display shows "INTRO".
- Press "►II" to start. First ten seconds of each track play.
- To play whole current track, press "MODE/TIMER" three times. "INTRO" indicator disappears.
Playing Tracks in Random Order
- Press "MODE/TIMER" twice when CD is in STOP position. Display shows "RANDOM".
- Press "►II" to start. Tracks play in random order.
- Exit by pressing "■". "RANDOM" indicator disappears.
Note: Cannot select if a music program is saved in memory.
Playing Tracks in Selected Order (Track Memory)
Store up to 20 tracks in a specific order.
Selecting and Storing Tracks
- Place CD in compartment. Device must be in STOP.
- Press "MEMO.". Display shows "01 P-01", "MEMORY" flashes.
- Select track using "I◄◄" or "►►I" on device or "R-SKIP" or "F-SKIP" on remote. Display shows "04 P-01".
- Store track by pressing "MEMO.". Display shows "04 P-02".
Note: Repeat for other tracks. If more than 20 tracks, memory is deleted.
Playing Track Memory
- Press "►II" to start. Playback begins with first programmed track.
- To end, press "■".
Deleting Track Memory
- With CD stopped, press "■" or open CD compartment.
Note: Memory also deleted if device switched off, mains cable unplugged, or batteries removed.
Tape Mode
Only play tapes using buttons on the device.
Preparation
- Press "STANDBY" to switch on.
- Select TAPE input using "TAPE". Display shows "TAPE" and time.
- Open tape compartment (top right).
- Insert cassette with tape side up, full reel on right.
- Close compartment.
- Open button cover panel.
Playback
- Press "►" to start. Playback stops at end of tape side.
- Press "►II" to pause. To resume, press "►II" again.
- To end, press "■".
Recording
Erase Protection
New recordings overwrite existing ones. Protect cassettes by breaking safety tabs. Pre-recorded commercial cassettes are protected. To record on a protected cassette, cover opening with adhesive tape.
Note: Use only NORMAL-type (IEC I) cassettes. CHROME (IEC II) or METAL (IEC IV) tapes are not suitable. Volume and UBS/DSC settings do not affect recording.
Recording from Radio
- Insert cassette with protection tabs intact. Press "I◄◄" and "►►I" to find right position.
- Select TUNER input using "TUNER/BAND". Display shows frequency and waveband.
- Select preset station using "DOWN PRESET" or "PRESET UP".
- Press "●" to start. "●" button engages automatically. Device stops at end of tape.
Note: If MW recording has interference, move "BEAT CUT STEREO" switch (in battery compartment).
- To pause, press "►II". Resume by pressing "►II".
- To break off, press "■".
Recording from CD (CD Synchro)
- Insert cassette with protection tabs intact. Press "I◄◄" and "►►I" to find right position.
- Select CD input using "CD".
- Press "●" to start. "●" button engages, and CD playback starts automatically from beginning of CD or stored track memory.
Note: To record a particular track/passage, select it using "I◄◄" or "►►I" on device or "R-SKIP" or "F-SKIP" on remote, then press "●".
Fast Forward/Rewinding Cassette
- From STOP position, press "I◄◄" or "►►I". "►►I" fast forwards; "I◄◄" rewinds.
- Press "■" when desired position is reached.
Timer Mode
Setting the Time
- Press "STANDBY" to switch off.
Note: Press "DISPLAY/RDS" to light up display.
- Press "MEMO.". Display shows "0:00", hours flash.
- Set hours using "I◄◄" or "►►I". Hold down for quicker adjustment.
- Press "MEMO.". Display shows "12:00", minutes flash.
- Set minutes using "I◄◄" or "►►I". Hold down for quicker adjustment.
- Press "MEMO.".
- Deactivate/activate automatic time update with "I◄◄" or "►►I".
- Store time by pressing "MEMO.".
Note: If no button pressed within 10 seconds, setting cancels. Start again at Step 2.
Sleep Timer (Falling Asleep to Music)
- Press "STANDBY" to switch on.
- Select function by pressing "SLEEP" on remote. Display shows "SLEEP" and "120" (max period).
- Use "SLEEP" button to enter switch-off time (120, 90, 60, 45, 30, or 15 minutes). Device shuts off after set time.
Note: Radio can be switched off before sleep period ends by pressing "STANDBY".
ON/OFF Timer
Setting the ON/OFF Timer
Note: Use device buttons for this setting.
- Press "STANDBY" to switch off.
Note: Press "DISPLAY/RDS" to light up display.
- Press "MODE/TIMER". Display shows "TIMER", "0:00", "ON" flashes.
- Press "MEMO." and enter ON time hours using "I◄◄" or "►►I".
- Press "MEMO." and enter ON time minutes using "I◄◄" or "►►I".
- Press "MEMO." to store ON time. Display shows "TIMER", "20:15", "ON" flashes.
- Press "MODE/TIMER". Display shows "TIMER", "0:00", "OFF" flashes.
- Press "MEMO." and enter OFF time hours using "I◄◄" or "►►I".
- Press "MEMO." and enter OFF time minutes using "I◄◄" or "►►I".
- Press "MEMO." to save OFF time.
- Conclude by pressing "MODE/TIMER". Display shows current time, "TIMER", "ON", and "OFF" light up. Device switches on/off at entered times.
Note: If no time selected within 10 seconds, setting cancels. Can enter ON or OFF time only.
Switching Off the ON/OFF Timer
- Press "MODE/TIMER" then "■". Display shows "TMR CLR" briefly, then "TIMER", "ON", and "OFF" go out.
Note: To reactivate, repeat setting.
Technical Data
Power Supply
- Mains operation: 230 V, 50/60Hz
- Battery operation: 8 x 1.5 Volt (LR14, AM2)
- Back-up battery: 2 x 1.5 Volt (R03/UM4 AAA)
- Remote control: 2 x 1.5 Volt (R03/UM4 AAA)
Output
- DIN 45324, 10% THD
- Music signal power: 2 x 10 W
- Sine wave power: 2 x 7 W
Radio Unit
- FM: 87.5 ...108.0 MHz
- MW: 522 ... 1611 kHz
- Antennas: Telescopic antenna for FM, Antenna socket (75 Ω) for FM, Ferrite rod antenna for MW
CD Unit
- Frequency response: 20 Hz ... 20 kHz
- Noise voltage ratio: ≥ 65 dB
Cassette Unit
- Sound recording medium: Compact cassette according to DIN 45516
- Tape speed: 4.76 cm/sec.
- Frequency range: 80 Hz ... 10 kHz
- Noise voltage ratio: ≥ 45 dB
- Band speed fluctuation: ≤ 0.35%
- Automatic recording level control
Dimensions and Weight
- Device: W x H x D: 170 x 275 x 210 mm, Weight: 3.15 kg
- Loudspeakers: W x H x D: 143 x 275 x 205 mm, Weight: 1.15 kg
Maintenance Features
Tape Unit
- Protect cassettes from humidity, dust, heat, and cold.
- Do not store near strong magnetic fields (TVs, stereo speakers).
- After use, return cassettes to protective cases.
- Cleaning: Clean parts (capstan idler, capstan, magnetic heads) after every 50 hours or monthly. Open compartment, moisten cotton swab with alcohol/head-cleaning fluid. Play to clean capstan idler (3). Pause to clean capstan (2) and magnetic heads (1). Close compartment. A cleaning tape can also be used for magnetic heads.
CD Unit
- If the device cannot scan CDs perfectly, use a standard commercial cleaning CD to clean laser optics. Other cleaning methods may damage optics.
- A symbol similar to the one shown is on the bottom of the device. CLASS 1 LASER PRODUCT means the laser is designed to ensure maximum permissible emission value is not exceeded.
- Improper operation or methods other than specified may lead to dangerous emissions.
- Invisible laser radiation is emitted if the CD compartment is opened and the safety locking mechanism is shorted. Do not expose yourself to this radiation.
Troubleshooting
If problems occur, refer to this information before seeking repair. If issues persist, contact your local dealer or service specialist. Do not attempt repairs yourself, as this invalidates the guarantee.
| Problem | Possible Cause