EC 4790 CD Allgemeiner Teil / General Section
GRUNDIG Service 1 - 3
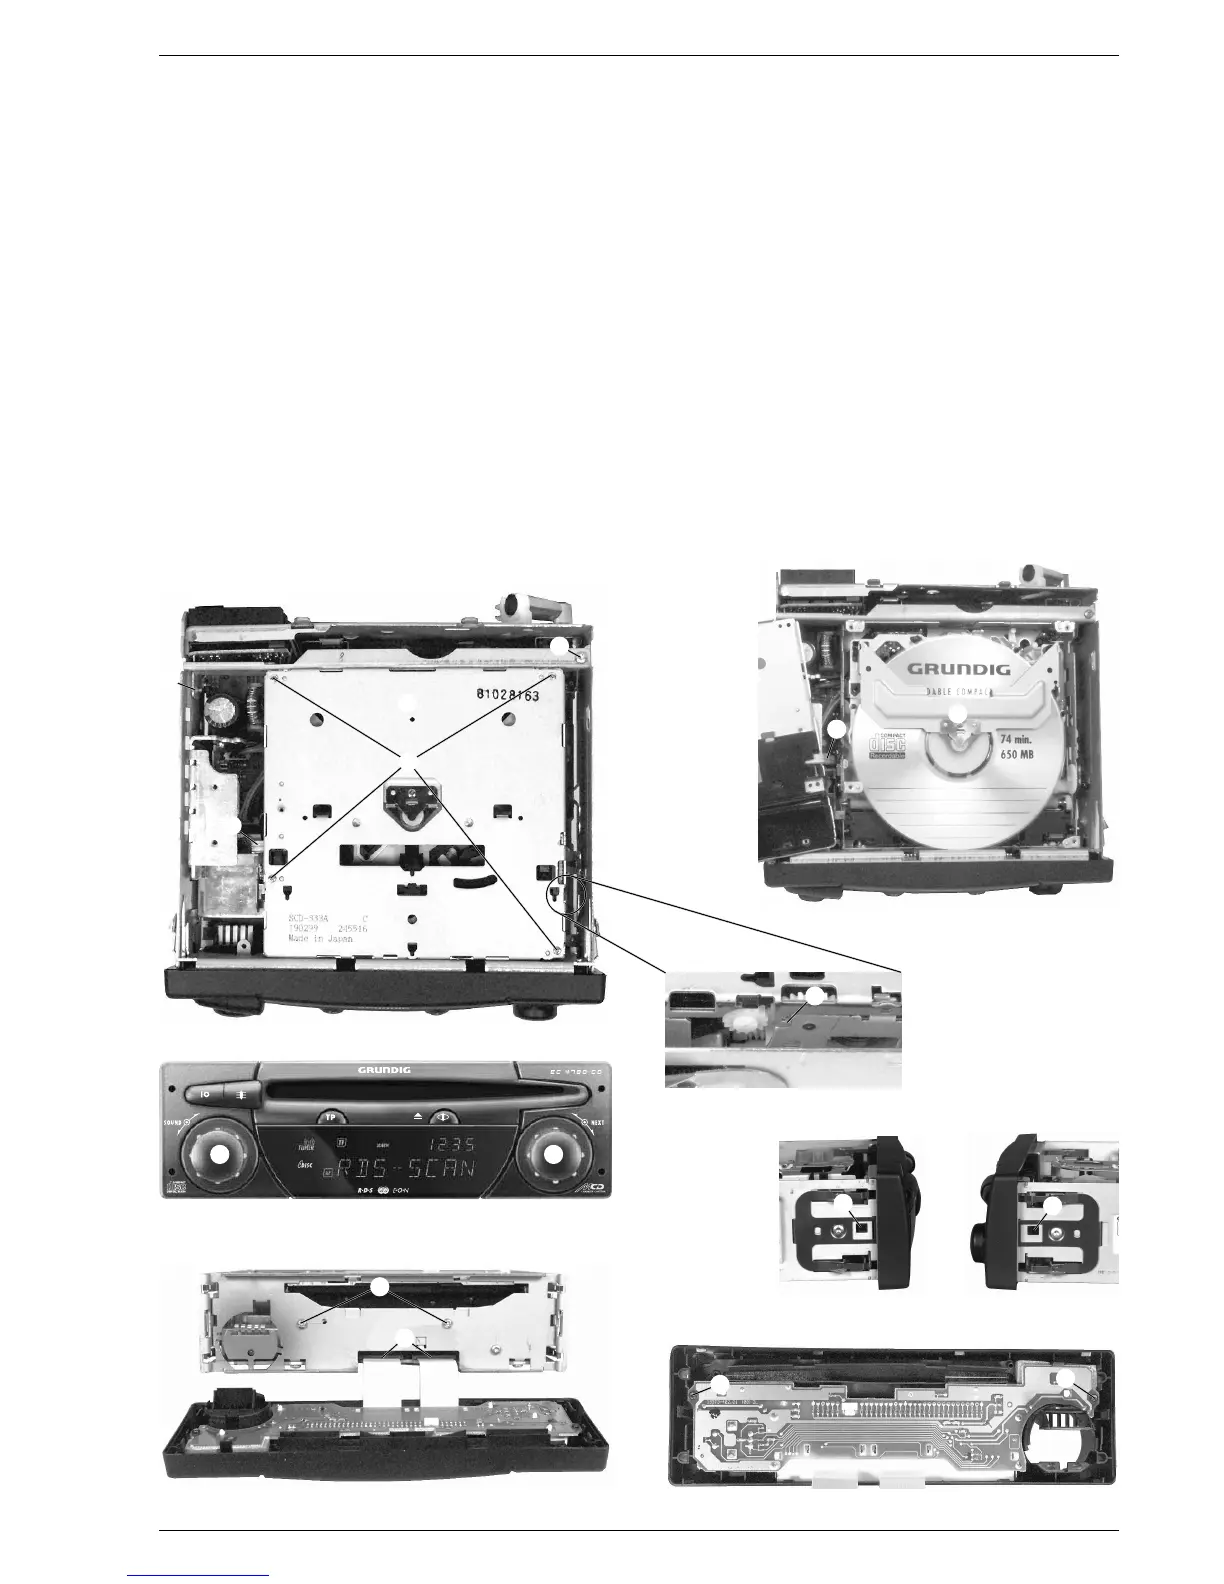
Fig. 5
G
Fig. 6
G
Disassembly Instructions
1. Removing a CD when the Drive is defective
- Take off the cover plate of the radio.
- Undo 4 screws A (Fig. 1) and remove the cover B (take care of the
cable C!).
- Lift the CD flap D (Fig. 2) and take out the CD.
- When reassembling look for the catch E (Fig. 3).
2. Removing the front panel
- Take off the cover and bottom plates of the radio.
- Pull off operating knob F (Fig. 4).
- Undo 2 catches G (Fig. 5 and 6) and pull off the front panel.
- Open 2 flexprint connectors H (Fig. 7) if necessary.
3. Disassembling the front panel.
- Remove the front panel (para 2).
- Pull off knob J (Fig. 4).
- Undo 2 screws K (Fig. 8) and remove the PCB.
4. Removing the CD Drive
- Remove the front panel (para 2).
- Undo 2 screws L (Fig. 1) and 2 screws M (Fig. 7).
- Lift the CD Drive and open flexprint connector.
Fig. 1
Ausbauhinweise
1. Entnehmen einer CD bei defektem Laufwerk
- Deckelblech abnehmen.
- Die 4 Schrauben A (Fig. 1) herausschrauben und die Abdeckung
B hochheben (Achtung: Kabel C!)
- Den CD-Deckel D (Fig. 2) hochheben und die CD herausnehmen.
- Beim Wiederzusammenbau auf die Rastung E (Fig. 3) achten.
2. Frontblende abnehmen
- Deckel- und Bodenblech abnehmen.
- Bedienknopf F (Fig. 4) abnehmen.
- Die beiden Rastnasen G (Fig. 5 und 6) ausrasten und Frontblende
nach vorne abziehen.
- Bei Bedarf die beiden Flexprintstecker H (Fig. 7) öffen.
3. Frontblende zerlegen
- Frontblende abnehmen (Pkt. 2).
- Knopf J (Fig. 4) abziehen.
- Die 2 Schrauben K (Fig. 8) herausschrauben und die Leiterplatte
herausnehmen.
4. CD-Laufwerk ausbauen.
- Frontblende abnehmen (Pkt. 2).
- Die 2 Schrauben L (Fig. 1) und die 2 Schrauben M (Fig. 7)
herausschrauben.
- CD-Laufwerk nach oben hochheben und Flexprintstecker öffnen.
Fig. 4
F J
Fig. 2
Fig. 3
Fig. 8Fig. 7
A
B
D
E
C
H
K
K
M
L
L
C



 To Next Page