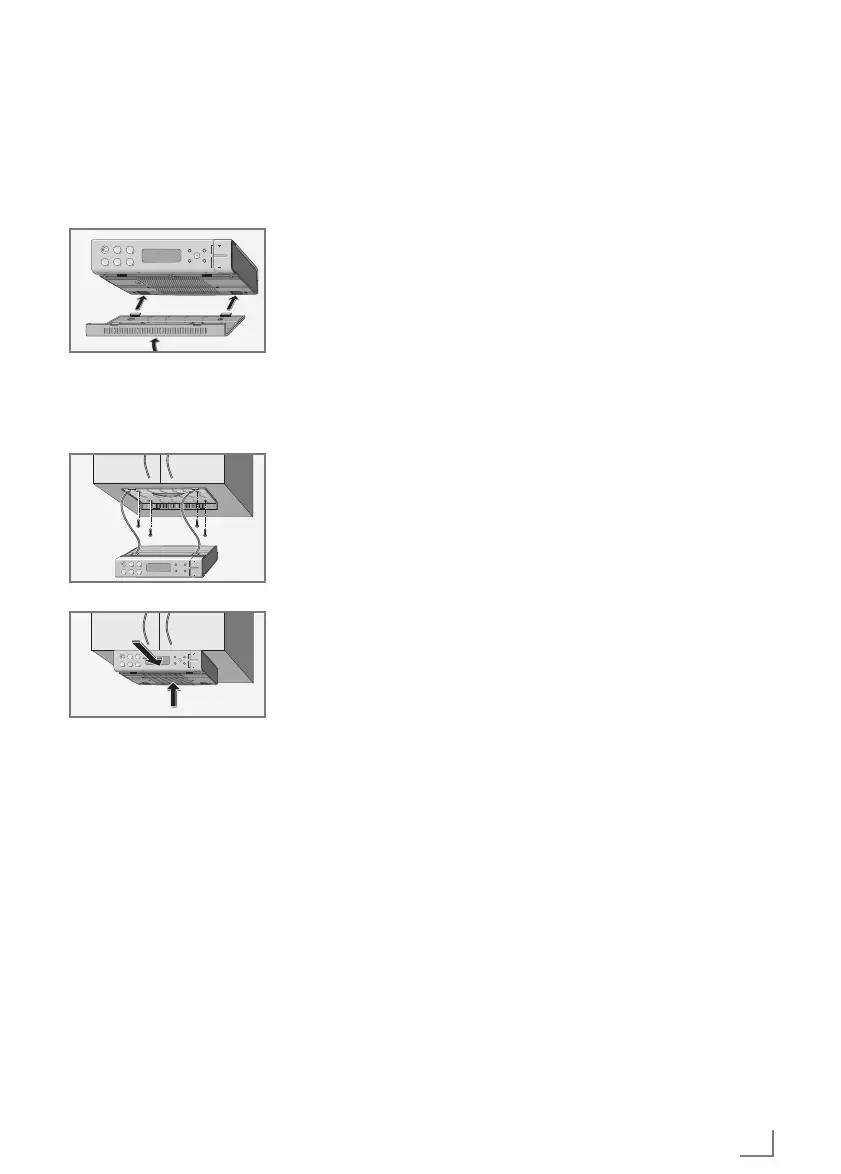
3 Insert the device in
the holder.
Note:
7
To remove the device, press the snap-catch at the
back and remove by pulling forward.
INSTALLATION AND SETTINGS ________________
Setting the time
1 Switch off device with »ON/OFF«.
– In the display, »12:00« flashes.
2 Press »MEMO SET« and hold down.
3 Set the time with »UP« or »DOWN«.
– When »UP« or »DOWN« are held down, the time
can be set more quickly.
4 Release »MEMO SET«.
Setting radio stations
There are 10 channel positions available for radio stations.
1 Switch on the device with »ON/OFF«.
2 Begin station search by pressing and holding down
»UP« or »DOWN«.
– The search stops, as soon as a radio station with a
sufficiently strong signal is found.
Note:
7
You can also set the frequency step-by-step (50 kHz)
by briefly pressing »UP« or »DOWN«. Only 100
kHz steps are shown in the display.
3 Save radio station by pressing »MEMO SET«
(»P -« flashes in the display ), select the desired chan-
nel position within 10 seconds with »1 … 10« and
confirm with »MEMO SET«.
– »1 … 10« press once for channel positions
1 … 5, twice for channel positions 6 … 10.
– Display: the channel position is shown briefly, and
then the frequency.
4 To set further radio stations, repeat this procedure start-
ing at pt. 2.
Note:
7
If no channel position is selected within 10 seconds,
the device interrupts the setting procedure. Start
again at pt. 3.
RADIO MODE
_________________________________________________________
Radio reception
When your device is switched off, the current time is
shown in the display.
1 Switch on the device with »ON/OFF«.
– The channel position appears in the display, short-
ly thereafter the station frequency.
– The previous channel position is automatically se-
lected.
2 Select channel position with the »1 … 10« buttons.
– »1 … 10« once Press once for channel positions
1 … 5, twice for channel positions 6 … 10.
3 Switch off device with »ON/OFF«.
– In the display, the current time appears.
Adjusting the volume
1
Adjust the volume
with »+ VOL.« or »VOL. – «.
Switching the display
The display on your device supplies information about
the current time or the station frequency.
1
Call up the desired
information
with »MODE«.



 To Next Page