1 - 4 GRUNDIG Service
Allgemeiner Teil / General Section UMS 11 … UMS 12-S
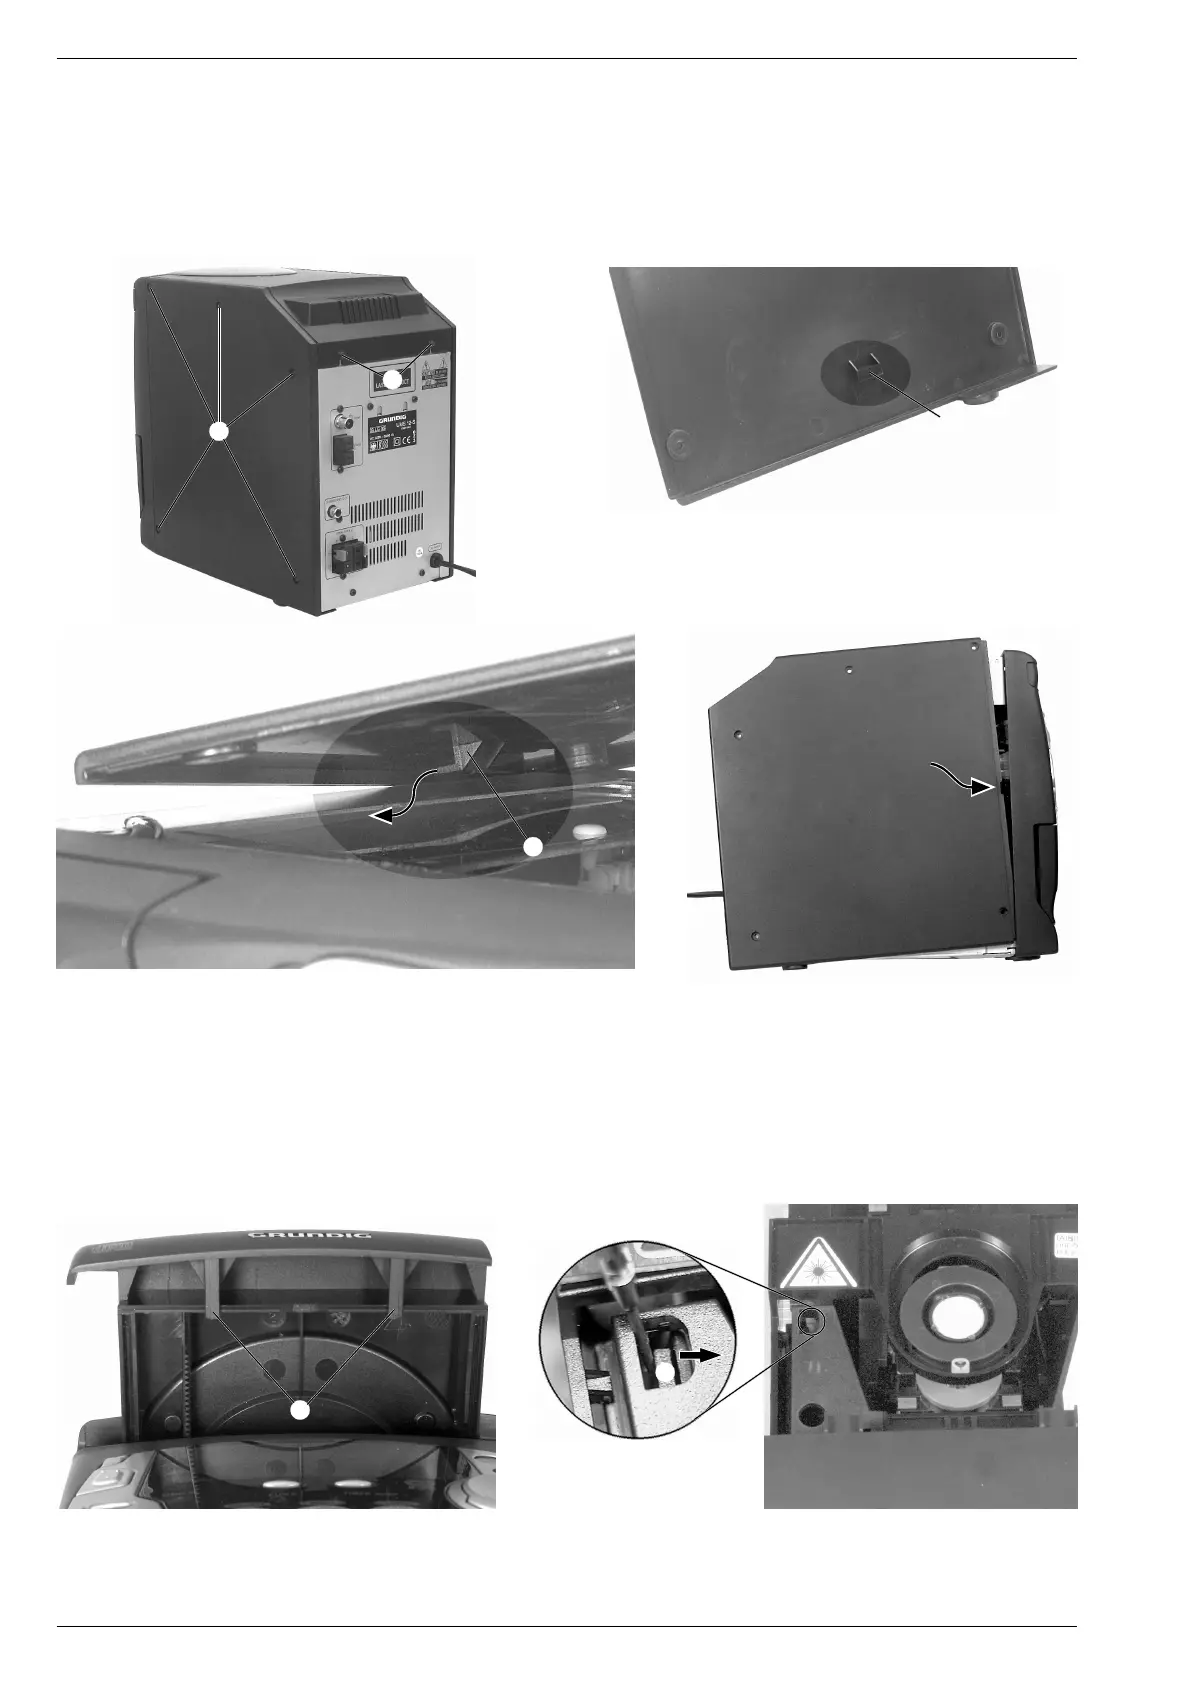
Fig. 1
Fig. 2
Fig. 3 Fig. 4
A
A
B
B
D
Fig. 5 Fig. 6
C
Ausbauhinweise
Gehäuse öffnen
- 12 Schrauben A herausschrauben, die beiden seitlichen und die
obere Abdeckungen abnehmen (Fig. 1).
- Beim Einbau muß darauf geachtet werden, daß die Nasen B
(Fig. 2, 3) der seitlichen Abdeckungen in die Bodenwanne einge-
schoben werden (Fig. 3, 4).
1. CD-Schubladenblende ausbauen
- CD-Schublade vorsichtig herausziehen, 2 Rastnasen C ausrasten
und CD-Schubladenblende nach oben abziehen (Fig. 5).
2. CD-Schublade ausbauen
- CD-Schublade vorsichtig bis zum Anschlag herausziehen.
- Mit einem kleinen Schraubendreher die Rastung D nach rechts
drücken und dadurch ausrasten (Fig. 6).
- Die CD-Schublade kann jetzt ganz herausgezogen werden.
Disassembly Instructions
Removing the cover
- Undo 12 screws A and remove both side covers and the top cover
(Fig. 1).
- When reassembling look for the noses B (Fig. 2, 3) of the side
covers to fit in the guides of the bottom (Fig. 3, 4).
1. Removing the CD tray cover
- Pull out the CD tray carefully, disengage the 2 catches C and pull
off the CD tray cover (Fig. 5).
2. Removing the CD tray
- Pull out the CD tray carefully until its stop.
- Using a small screw driver, push the catch D to the right to
disengage it (Fig. 6).
- The CD tray can now be pulled out completely.




 To Next Page