EasyManua.ls Logo

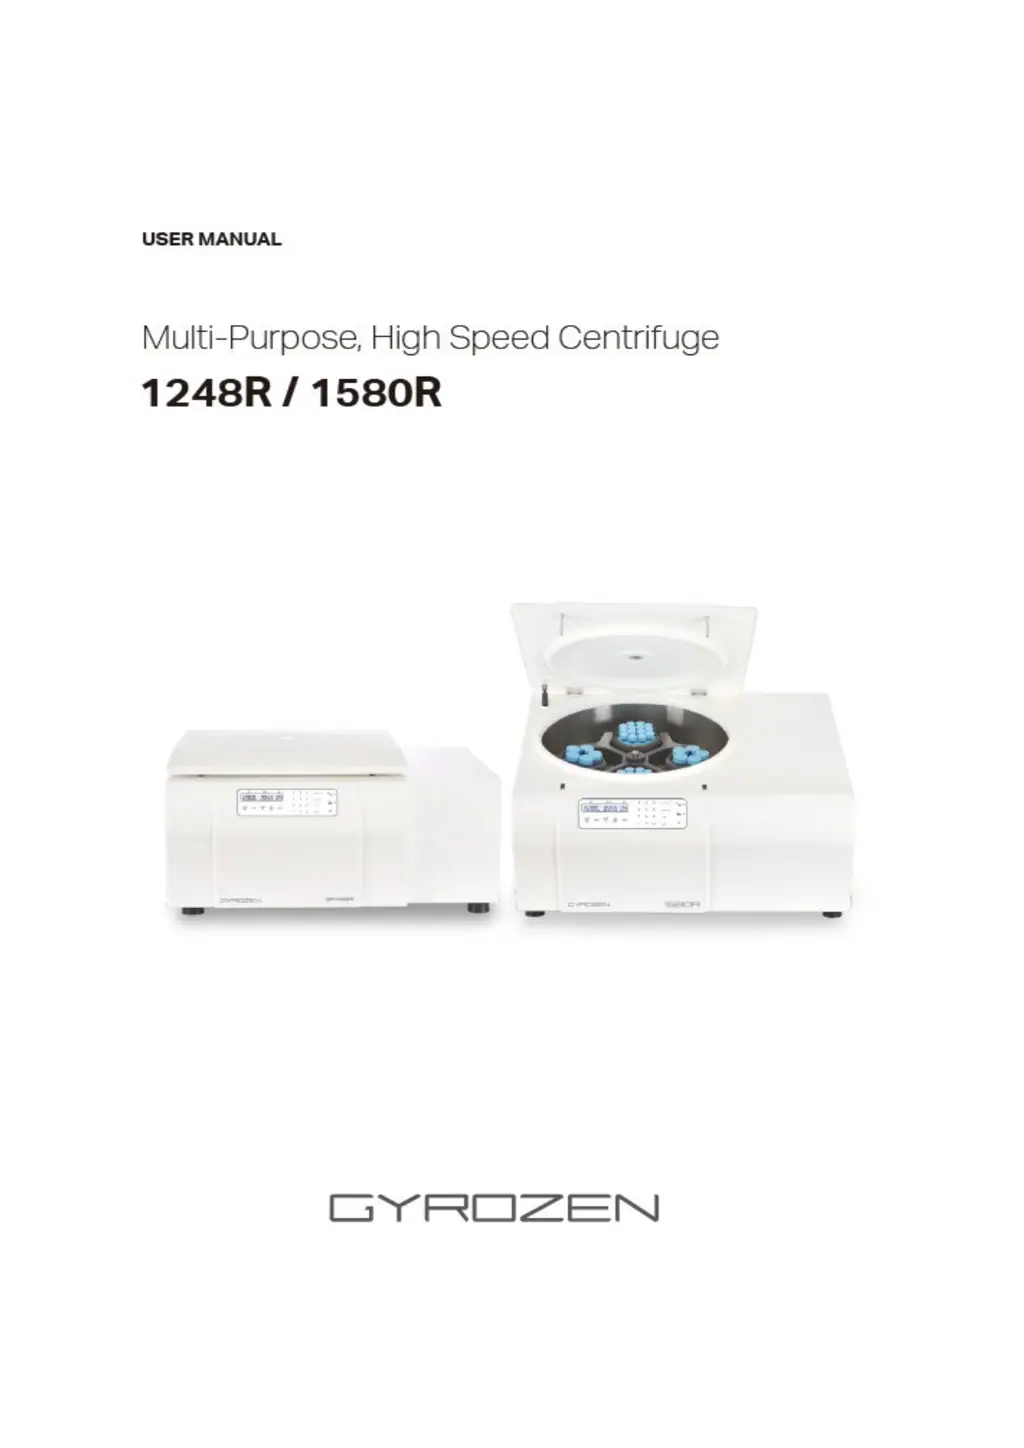
GYROZEN 1248R - User Manual

GYROZEN 1248R
50 pages
Print Icon
To Next Page IconTo Next Page
Loading...

Questions and Answers

  • M
    Michael HowardAug 13, 2025
    Why is my GYROZEN 1248R Laboratory Equipment not turning on?
    • B
      Brandy SanchezAug 13, 2025
      If your GYROZEN Laboratory Equipment is not turning on, ensure the AC power cord is securely connected to both the instrument and the power outlet. Also, verify that the power switch is in the 'on' position.
  • M
    Michelle RichardsonAug 17, 2025
    What to do if my GYROZEN Laboratory Equipment won't run?
    • J
      Jeff MontoyaAug 17, 2025
      If your GYROZEN Laboratory Equipment does not run, it might be due to the lid not being completely closed. Check the Lid LED on the display window and ensure the lid is fully closed.
  • P
    Pamela HughesAug 21, 2025
    Why is my GYROZEN 1248R making noise and vibrating?
    • P
      Perry BanksAug 21, 2025
      Noise and vibration during the operation of your GYROZEN Laboratory Equipment can be caused by several factors: * Check the balance of the table and the instrument. * Ensure the rotor is correctly coupled to the motor shaft, the Rotor Locking Nut is properly fixed, and the Rotor Lid matches the rotor. * Verify that samples in the rotor are balanced, loading the same weight of samples symmetrically.
  • A
    Anthony PhillipsAug 25, 2025
    What to do if I can't open the lid of my GYROZEN 1248R?
    • F
      flowersnancyAug 25, 2025
      If you cannot open the lid of your GYROZEN Laboratory Equipment, check the main fuse to ensure power is supplied to the laboratory. If the issue persists, use the emergency lid-lock release tool manually to open the lid for sample safety.
  • H
    hernandezcherylAug 28, 2025
    How to fix a GYROZEN 1248R Laboratory Equipment lid that won't close?
    • A
      Amber CrawfordAug 28, 2025
      If the lid of your GYROZEN Laboratory Equipment won't close, start by removing any dirt from the lid latch, and then try closing the lid again completely. If the lid still does not close due to a mechanical issue, contact the service team.
  • C
    Catherine EricksonAug 31, 2025
    Why does my GYROZEN Laboratory Equipment decelerate too slowly?
    • M
      Mrs. Shelley RobertsSep 1, 2025
      If your GYROZEN Laboratory Equipment decelerates too slowly, check if the deceleration step is set to 0. If it is, change the step to a higher number for faster deceleration.
  • K
    Kayla SmithSep 4, 2025
    What to do if I can’t set the RPM value on my GYROZEN Laboratory Equipment?
    • E
      ebakerSep 5, 2025
      If you can't set the RPM value on your GYROZEN Laboratory Equipment, check the rotor’s maximum value. This value can typically be found either on the rotor itself (for swing-out rotors) or on the rotor lid (for fixed angle rotors).
  • D
    donaldmorrisonSep 8, 2025
    What to do if the rotor is stuck in my GYROZEN Laboratory Equipment?
    • G
      Gregory WilliamsSep 8, 2025
      To address a stuck rotor in your GYROZEN Laboratory Equipment, apply lubricant to the motor shaft. Wait a few minutes, then try removing the rotor again. If it remains stuck, avoid excessive force and contact the service center.

Summary

Operation

Key Functions of Control Panel

Explains the purpose and function of each button on the control panel.

Setting the RPM; RCF Value

Instructions for setting the rotational speed (RPM) or relative centrifugal force (RCF).

Setting the Time Value

Guide on how to set the centrifugation time duration.

Setting Temperature and FASTCOOL

How to set the desired temperature and use the fast cooling function.

Acceleration; Deceleration

Controls for acceleration and deceleration ramps.

Program Saving & Recalling

How to save and recall operational programs.

Start; Stop

Procedures for starting and stopping the centrifugation process.

Change Settings During Operation

Ability to modify parameters while the centrifuge is running.

Key Lock Function

Function to prevent accidental changes to settings.

Repeat Count and Sound Pitch of End Alarm

Configuration of alarm sounds and repeat counts.

Pulse

Short-run centrifugation mode.

Manual Lid-Lock Release

Procedure for manually opening the lid in emergencies.

Open Drain Hole

How to drain accumulated water or condensate.

Safety Warnings and Cautions

Safety Label

Explains the meaning of various safety labels attached to the centrifuge.

Safety Precautions

Lists important safety guidelines to prevent malfunctions during operation.

Lifting and Carrying

Instructions on how to safely lift and move the centrifuge.

Transport, Storage, Use Conditions

Specifies environmental conditions for transport, storage, and use.

Product Description

Intended Use

Explains the primary laboratory function of separating components via centrifugal force.

Product Overview

Identifies and labels the main parts of the centrifuge.

Accessories

Lists items included with the centrifuge.

Technical Specifications

Provides detailed technical data and specifications for the centrifuge models.

Unpacking

Installation

Power On;OFF and Lid Release

Details on how to power the unit on/off and operate the lid release mechanism.

Install and Remove a Rotor

Step-by-step guide for installing and removing centrifuge rotors.

Swing-Out Rotor

Fixed Angle Rotor

Sample Tube Loading

Drain Hole

Setting the AT SET SPEED Mode

Setting the MIN; HOUR Value

Setting Temperature

Fast Cool

Program Saving

Program Recalling

Start

Stop

Setting the Sound Pitch of End Alarm

Setting the Repeat Count of End Alarm

Maintenance

Unit

Cleaning and care instructions for the exterior of the centrifuge.

Chamber

How to clean and maintain the internal chamber of the centrifuge.

Motor Shaft

Guidance on cleaning and maintaining the motor shaft to prevent imbalance.

Rotor

Procedures for cleaning, drying, and storing rotors to ensure longevity and safety.

Movement of Instrument

Trouble shooting

Check List

A list of common symptoms and their corresponding checks for troubleshooting.

Error Code

Lists error codes, their descriptions, and troubleshooting steps.

Equipment Disposal

Rotors and Accessories

Fixed Angle Rotor, GRF-G-250-6

Specifications for the GRF-G-250-6 fixed angle rotor.

Fixed Angle Rotor, GRF-G-85-6

Specifications for the GRF-G-85-6 fixed angle rotor.

Fixed Angle Rotor, GRF-G-50-8

Specifications for the GRF-G-50-8 fixed angle rotor.

Fixed Angle Rotor, GRF-G-c50-8

Specifications for the GRF-G-c50-8 fixed angle rotor.

Fixed Angle Rotor, GRF-G-c15-12

Specifications for the GRF-G-c15-12 fixed angle rotor.

Fixed Angle Rotor, GRF-G-m2.0-30

Specifications for the GRF-G-m2.0-30 fixed angle rotor.

Angle Rotor, GRA-G-15-24

Specifications for the GRA-G-15-24 angle rotor.

Swing Rotor, GRS-G-r750-4

Specifications for the GRS-G-r750-4 swing rotor.

Microplate Holder Bucket GLP-mw-r750

Specifications for the GLP-mw-r750 microplate holder bucket.

Swing Rotor, GRS-G-750-4

Specifications for the GRS-G-750-4 swing rotor.

Microplate Holder Bucket GLP-mw-r250

Specifications for the GLP-mw-r250 microplate holder bucket.

Swing Rotor, GRS-G-r250-4

Specifications for the GRS-G-r250-4 swing rotor.

Swing Rotor, GRS-G-250-4

Specifications for the GRS-G-250-4 swing rotor.

Swing Rotor, GRS-G-100-6

Specifications for the GRS-G-100-6 swing rotor.

50 mL Conical Bucket GLB-dc50-100

Specifications for the GLB-dc50-100 50 mL conical bucket.

15 mL Dual Round Bucket with a Cap GLB-bd15-100

Specifications for the GLB-bd15-100 15 mL dual round bucket.

15 mL Dual Conical Bucket with a Cap GLBB-bdc15-100

Specifications for the GLBB-bdc15-100 15 mL dual conical bucket.

Vacutainer 10 mL Bucket GLB-15-8-100

Specifications for the GLB-15-8-100 Vacutainer 10 mL bucket.

CE Declaration of Conformity

GYROZEN 1248R Specifications

General IconGeneral
BrandGYROZEN
Model1248R
CategoryLaboratory Equipment
LanguageEnglish

Related product manuals